What Is a Surface Roughness Measuring Gauge?

Surface roughness measuring gauges are measuring instruments used to evaluate the state of microscopic irregularities on the surface of a workpiece as a numerical value.
In the past, surface roughness was evaluated subjectively by inspectors visually or by touching the surface with their fingers or fingernails. A surface roughness measuring gauge makes it possible to control the desired condition of a workpiece surface using quantitative values.
Uses of Surface Roughness Measuring Gauges
Surface roughness measuring gauges are mainly used to analyze minute surface irregularities, for example, to check the finish of metal products. Surface roughness is especially important for metal products that come in contact with other parts, and is a very important factor in the field of tribology, which specializes in friction and wear.
Surface roughness is often used to evaluate the sliding surfaces of mechanical parts and the rolling surfaces of rotating shafts and bearings. It is also used in a wide range of other fields, such as medical care, research and development, and production sites.
Principle of Surface Roughness Measuring Gauges
Surface roughness measuring gauges are classified into the following two types. Since there are significant differences in the shapes and materials that each method is good at measuring, appropriate operation is required according to the purpose.
1. Contact Type
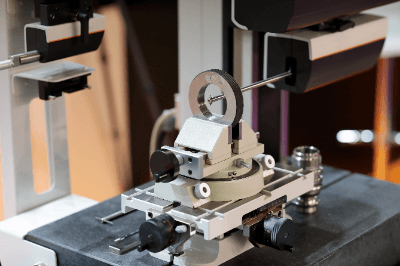
The contact type is measured by directly touching the object to be measured with a stylus. Although this method provides measurement results of the surface profile itself, it is not possible to measure a shape smaller than the diameter of the stylus or a part that cannot be physically touched, such as a narrow part where the stylus cannot enter.
In addition, since direct contact is involved, the stylus needs to be replaced periodically, which may damage the object to be measured. In particular, when measuring hard objects such as metals, the stylus may be damaged if it is accidentally pressed with more force than necessary. Handle with care.
2. Non-contact Type
The non-contact method uses light instead of a stylus to perform measurement. Typical examples are the confocal method, which measures by reading the reflected light of irradiated light, and the white interference method, which measures by interference fringes created by synthesizing the reflected light of the object to be measured and the mirror when white light is irradiated.
The non-contact method is characterized by its short measurement time, but it cannot measure well in areas where light cannot reach or in shapes where reflection cannot be obtained properly. It is necessary to measure from multiple directions by changing the placement of the object to be measured, or by cutting a portion of the part to allow light to reach it.
Other Information on Surface Roughness Measuring Gauges
1. Definition and Parameters of Surface Roughness
There are a great many definitions and parameters for evaluating surface roughness, but the best known is arithmetic mean roughness, which is written with the symbol Ra. It is often used because it is an image of calculating the average value of an uneven surface. In some cases, parameters other than arithmetic mean roughness may be desirable, such as in bearings, where the depth and size of the grooves that collect oil may affect the function of the part.
Other known parameters include maximum height roughness (Rz) and ten-point average roughness (Ry). Roughness parameters are defined in ISO and JIS, but they have been revised several times, so care should be taken when looking at old drawings.
2. Trouble With Touch Needles
In general, the stylus of contact-type surface roughness measuring gauge is subject to wear and requires periodic replacement. If the tip of the stylus is chipped, it cannot measure correctly, so it is important to check it periodically with a magnifying glass.
The material used for the stylus is diamond or sapphire, which are very hard materials that may damage the surface of the object to be measured. Particular care should be taken when repeatedly measuring the same spot or moving the stylus at a high speed.