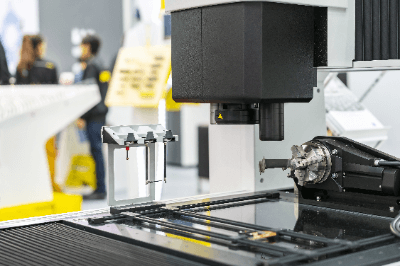
What Is a Dimensional Inspection System?

A dimensional inspection system is a highly functional visual inspection system that inspects the dimensions of mainly small electronic components such as LED substrates, CMOS sensor substrates, and ceramic substrates.
Dimensional inspection, a component of visual inspection equipment, is an inspection device that makes a pass/fail judgment as to whether a component or product is finished according to specifications. It is capable of measuring dimensions with micrometer-level precision, and by using the device for pass/fail inspections of finished products, it is possible to inspect the entire number of products.
In addition, by linking the conveyor system with image processing, an automatic dimensional inspection line can be constructed. Since image processing is equipped with a high-performance camera, it can be used to check the condition of intermediate products or for positioning during processing. They can also be used for dimensional measurement of metal parts as well as electronic parts.
Uses of Dimensional Inspection Systems
Dimensional inspection systems are often used for electronic components that require micron-level accuracy. Specifically, they are used to measure the edge width, alignment, register length, and other dimensions of coated sections in intermittent coating, stripe coating, and other processes of electrode sheets. It is also used to detect defects and uncoated areas.
Other uses of dimensional inspection systems include dimensional inspection of exterior wall boards, tiles, etc., and surface checks of lumber and after-extrusion processes. 3D dimensional inspection models can also be used to check the volume of minerals, food, etc.
Also, the equipment can measure parts that cannot be measured by human operators. For example, the inner and outer diameters of O-rings, the radius and angle of the tip of a metal part, and other difficult-to-measure areas can be measured using image processing.
Principle of Dimensional Inspection Systems
The dimensional inspection systems use a high-performance CCD or CMOS camera to perform inspections. Some models can scan laser beams and obtain height information to measure 3D XYZ axis dimensions.
On the production line, defective products identified as out of specification as a result of dimensional measurement using image processing is eliminated, and only the good products are automatically passed to the next process.
The work procedure for dimensional inspection systems begins by illuminating the object and capturing images with a camera through a lens. The image is then recognized by an image processor and measured.
1. Camera Selection
The number of pixels is selected according to the dimensional tolerances required for the inspection of the object to be measured.
2. Illumination
There are three types of illumination: direct reflection type, diffuse reflection type, and transmission type, which are selected according to the surface condition of the object to be measured.
3. Image Processing (edge detection)
Edges are the areas where color shading is often expressed in image processing. Differences in product height, material, color, and texture appear as edges. Dimensional inspection systems can measure the length and angle of areas that appear as edges, as well as the center position from the edge. Since the distance between edges is measured, the accuracy of the measurement depends on whether the edges are visible.
Other Information on Dimensional Inspection Systems
1. Appearance Inspection Equipment
Appearance inspection equipment is a device that can automatically inspect the appearance of a product. The visual inspection device is equivalent to a camera or other image sensor for visual inspection, and an image processing device or software replaces the brain. Since the numerical values listed in the judgment criteria are based on past data, it is easy to create standard values.
However, visual inspection equipment is not necessarily ready for operation immediately after installation. This is because inspection equipment requires preparation, and prior adjustment and confirmation take time. In some cases, it is difficult to set the sensor and light source positions for video and other sensors, as well as the judgment values for detecting foreign objects, and in some cases, the imaging software is unable to detect the foreign objects that it originally wanted to detect.
Such problems can be solved by repeatedly changing the hardware position settings to find the proper position. Even if the software setting detects an unexpected rejection the first time, it learns the data and updates the judgment data, including the next appropriate judgment value, so that the same rejection will not occur thereafter.
2. Image Dimension Inspection
Image dimensional inspection is a method that can instantly measure the height and depth of an object through images. In image sensor dimensional measurement, edges are detected by planning the object and measuring its position, width, and angle. In addition, mastery of the edge detection principle enables optimal detection to be set up.
Edge refers to the border between light and dark in an image, and edge detection is the detection of the border between these shades of gray using image processing. Edges are processed by the following processes.
(1) projection, (2) differentiation, (3) correction so that the maximum value of the differentiation is 100%, and (4) sub-pixel processing (interpolation calculation is performed on approximately three pixels centered on the maximum portion of the differential waveform from the waveform formed by those pixels to measure edge positions to the nearest 1/100th of a pixel).
One advantage of image processing is that it can automatically measure the dimensions of each part based on the captured data and save the numerical values as data. In addition, by performing dimensional inspection using image processing, the measured dimensions of each part can be saved as numerical values, and the data can be used for dimensional information management, shape analysis, and process improvement.