What Is a Tensile Testing Service?

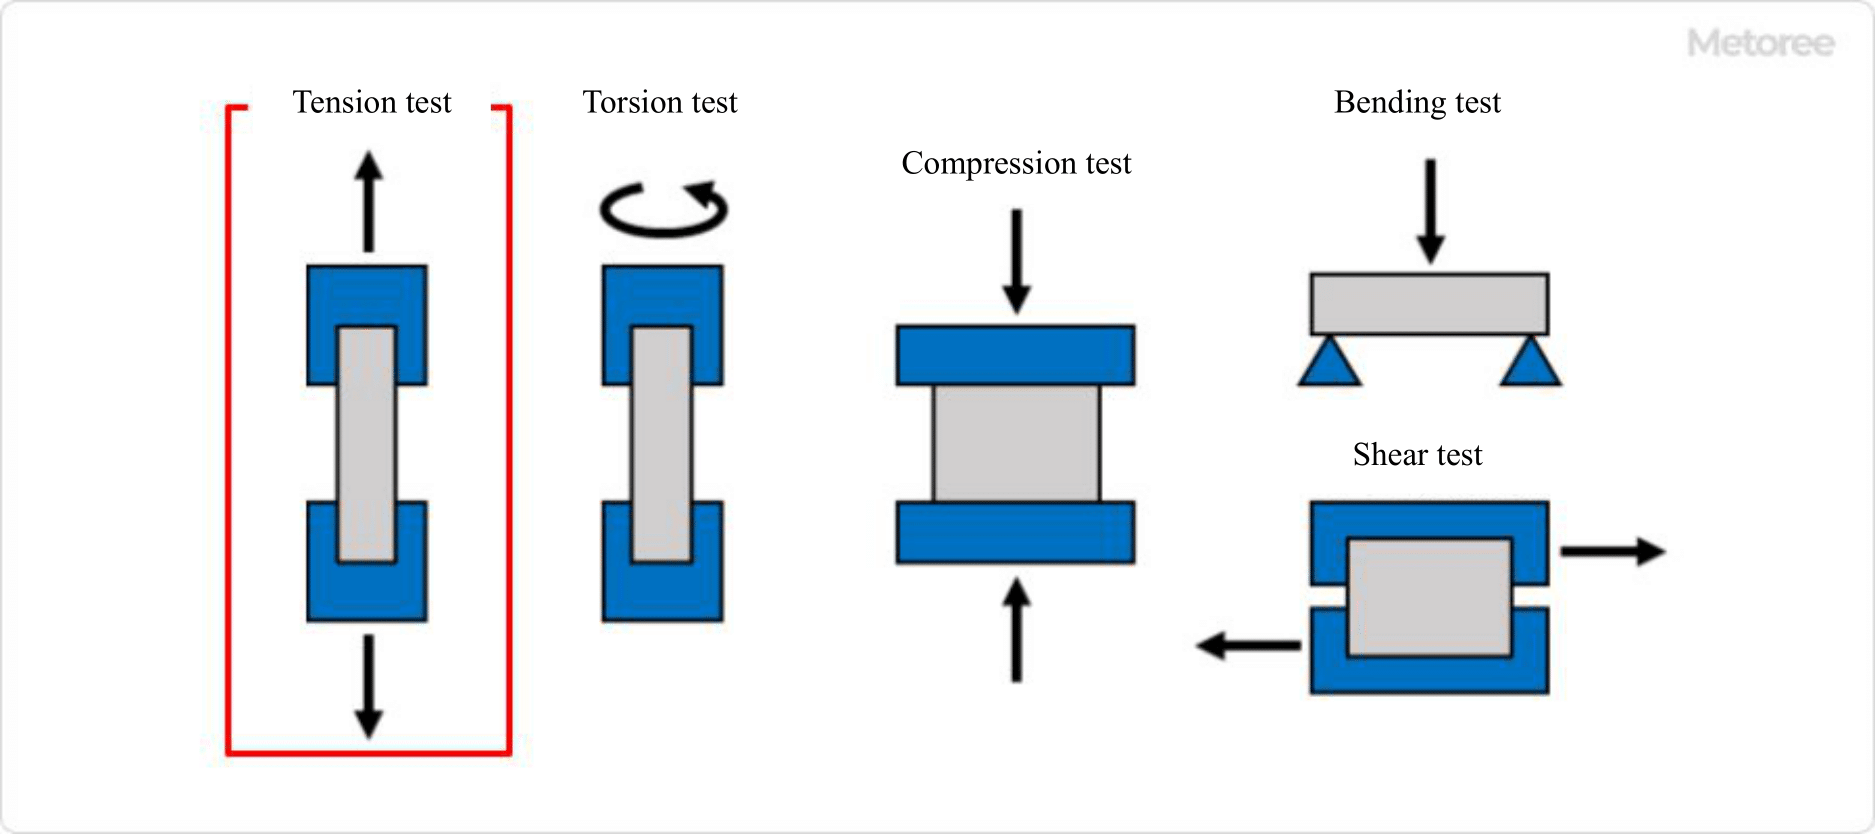
Figure 1. Types of strength tests
A tensile testing service, like bending and compression testing, is a type of strength test for materials.
This test measures the strength of a material when a tensile force is applied to it, i.e., a force that pulls both ends of a test specimen outward. A tensile testing service or universal testing machine is used to apply a tensile load. Measurements are made using load cells, strain gauges, and displacement transducers. By analyzing the relationship between strain and applied load or stress obtained from the test, the mechanical properties of the material can be evaluated.
A tensile testing service is performed in diverse fields. The data obtained from testing contributes to the development of products that can be used safely and reliably.
Uses of Tensile Testing Services
Tensile testing services are used in various fields, such as civil engineering, construction, machinery, and medicine.
The purpose of tensile testing services is for research and development and quality assurance. It is applied to various materials such as metal, rubber, plastic, and paper. Tensile testing is also used in classes at universities and other institutions, where students learn more about materials by actually stretching the material, observing how it is stretched to fracture, analyzing the data, and discussing the results.
The data obtained from tensile testing services are used for various simulations and designs. The data obtained from tensile testing is important for the development of products that can be used safely and reliably, as it supports the foundation of such products.
Principle of Tensile Testing Services

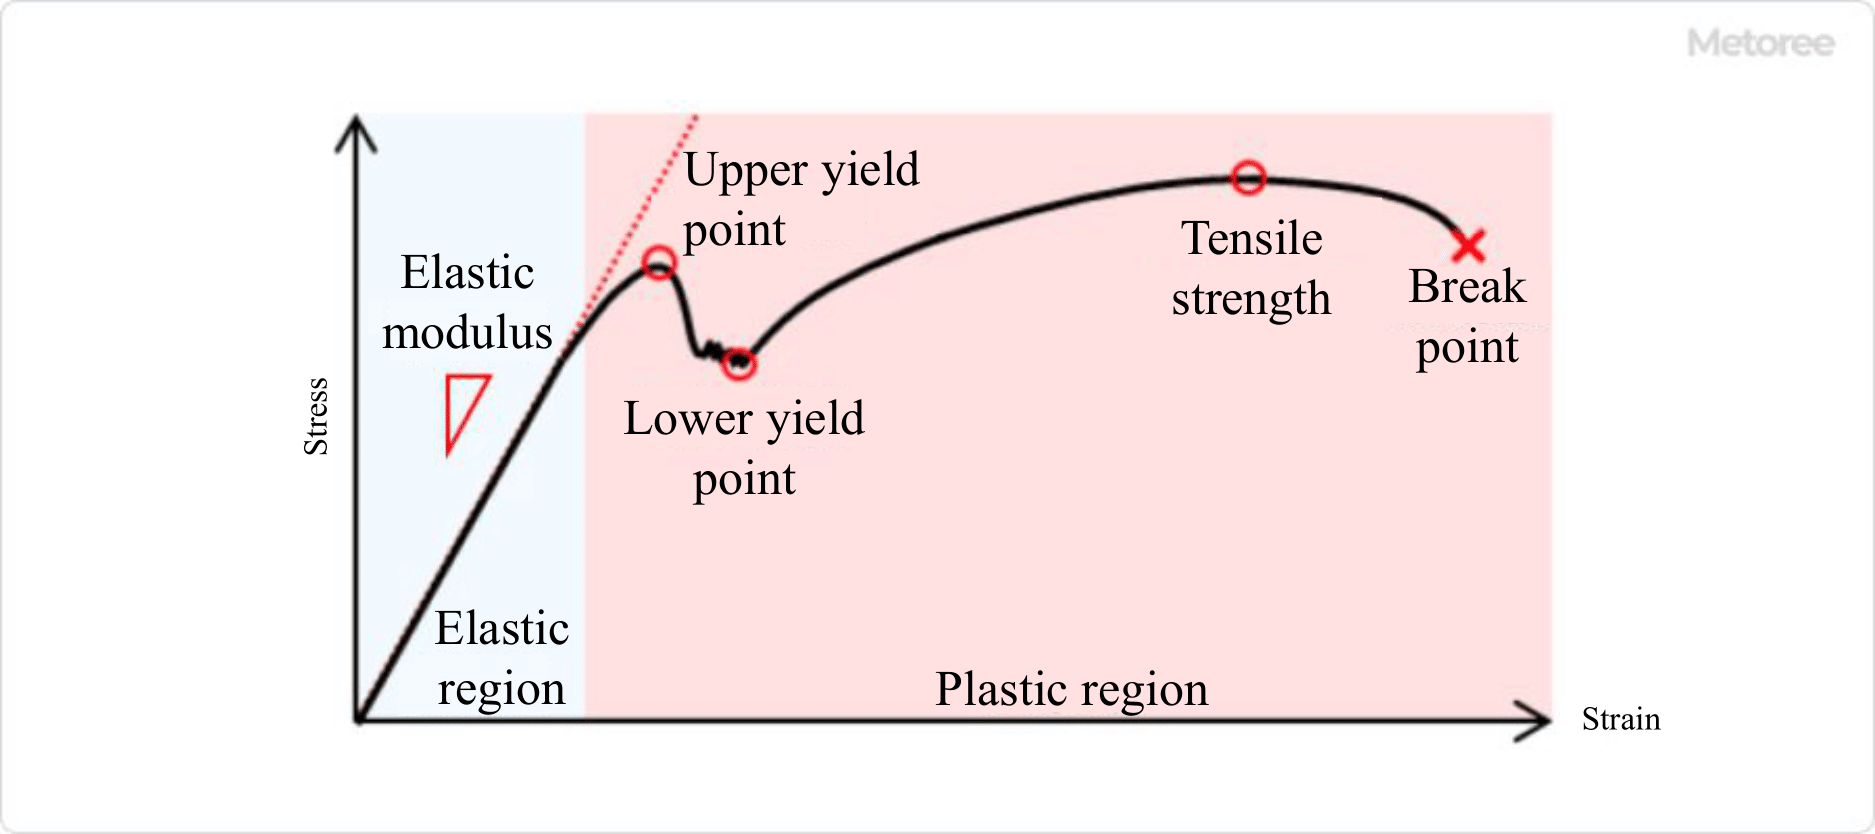
Figure 2. Stress-strain curve
When a tensile force is applied to both ends of a specimen, the material begins to stretch in the direction of the tensile force and eventually breaks.
Stress and strain applied to a material are proportional, but as tensile force is continually applied, the proportional relationship between stress and strain is broken, and the increase in stress in response to changes in strain becomes slower. When the load is further increased and a condition called yield point is passed, the stress drops once but then rises again as the load is applied. The maximum value of stress at this time is the tensile strength.
The tensile testing services are continued until the specimen breaks, which provides reliable data.
Other Information About Tensile Testing Services
1. Data Obtained From Tensile Testing Services

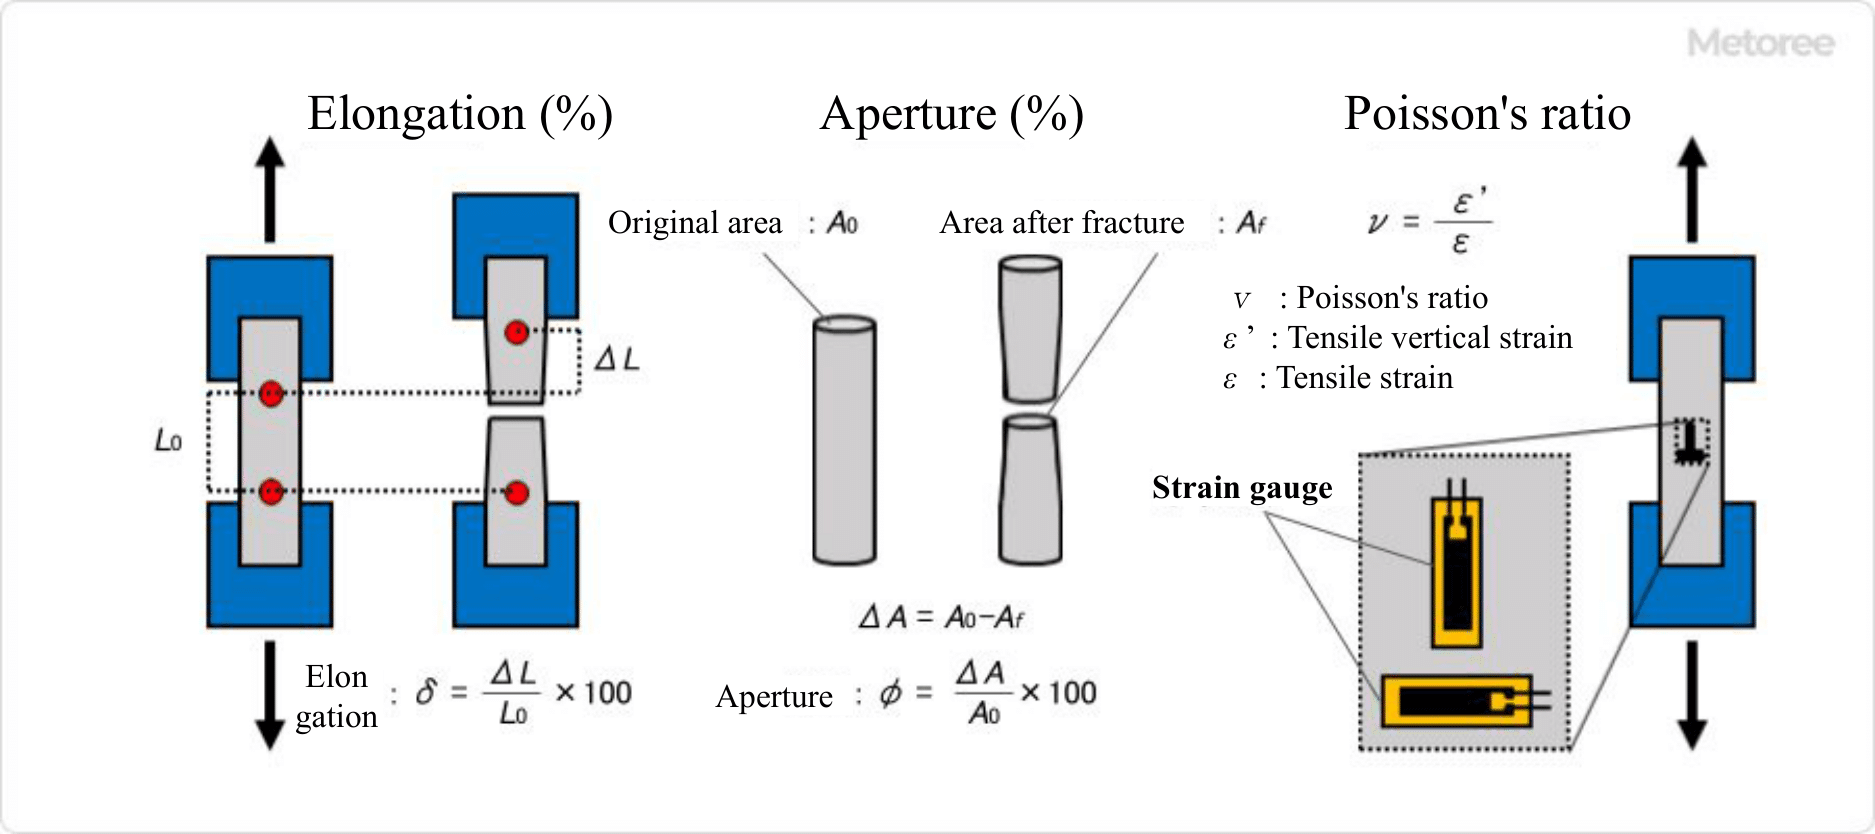
Figure 3. Example of data obtained from a tension test
The information derived from tensile testing services includes stress-strain curves, elongation, elongation-drawing, Poisson’s ratio, etc. By analyzing the stress-strain curves, information, such as elastic modulus, upper yield point, lower yield point, tensile strength, and breaking point, can be obtained.
1. Elongation (%)
Elongation is the ratio of how much a specimen elongates to rupture and is generally smaller for higher-strength specimens and larger for lower-strength specimens. Two marks are placed on the specimen and the distance between the two marks is measured before the test starts and at the time of fracture. Elongation is the change in distance expressed as a percentage of the original distance between the points.
2. Aperture (%)
Aperture is the percentage change in the cross-sectional area of a specimen. The larger this value is, the more suitable the specimen is for deep drawing. The cross-sectional area of the most distorted portion of the specimen after rupture is measured. The change in the cross-sectional area relative to the original cross-sectional area, expressed as a percentage, is the aperture.
3. Poisson’s ratio
Poisson’s ratio is the absolute value of the ratio of the strain in the direction of the applied tensile load to the strain perpendicular to the applied load. It can be obtained by attaching a biaxial strain gauge to a specimen and performing tensile testing services. The larger the Poisson’s ratio, the more the material strains in the direction perpendicular to the tensile load.
4. Modulus of Elasticity (N/mm2)
The modulus of elasticity is the slope in the elastic range, an interval where the relationship between stress and strain can be expressed as a linear equation. Here, the elastic range is the interval where the material returns to its original shape when the load is removed, even if it is deformed. The slower this slope is, the softer the material is.
5. Upper Yield Point (N/mm2)
The upper yield point is the point where the stress value is highest at the boundary between the elastic and plastic regions and is generally called the yield point. Here, the plastic zone is the section where deformation does not return even if the load is removed. The phenomenon where plastic deformation begins to occur suddenly is called yielding. A high yield point means that the material is less susceptible to plastic deformation.
6. Lower Yield Point (N/mm2)
The lower the yield point is, the lower the stress value on the yield shelf, and the better the forming ability of plastic. The lower this value is, the better the plastic-forming capability. The yield shelf is the section that appears after yielding begins abruptly at the upper yield point, where the stress level decreases and the stress does not increase even if the strain increases.
7. Tensile Strength (N/mm2)
Tensile strength is the maximum tensile stress applied during tensile testing services and is the maximum strength a material can have. The higher the tensile strength, the higher the strength overall.
8. Breaking Point
The breaking point is the point on the stress-strain curve when the specimen breaks. The stress at that point is called the breaking stress, and the strain is called the breaking strain.
2. Equipment Required for Tensile Testing Services
In tensile testing services, tensile testing machines and universal testing machines are used to apply tensile load, and load cells, strain gauges, and displacement transducers are used for measurement.
There are various types of testing machines, including motorized, hydraulic, and electromagnetic types. Universal testing machines can perform a variety of tests by replacing jigs. For tensile testing services, jigs such as screw-type flat grips, pneumatic flat grips, and fixed-point rust-type grips are used.
Strain gauges are attached to a test specimen and used to calculate strain by measuring the amount of change in current as the specimen is strained along with the object being measured. Displacement gauges used for measurement are either contact or non-contact, the former being able to measure small elongations with high precision, and the latter minimizing the effect of contact on the specimen. Both of these, moreover, are available in several types, which are used differently depending on the material and application.