カテゴリー
category_usa

Stud Remover

What Is a Stud Remover?

A stud remover is a specialized tool for loosening and removing stud bolts (all-threaded or inch-cut bolts) that have already been screwed in. The terms “stud bolt setter” and “stud puller” are also commonly used.

Stud bolts cannot be loosened by turning them with general-purpose tools because they do not have a part into which a tool can be inserted, like a hexagonal bolt. In addition, it can be tightened and secured with a double nut (two nuts screwed onto the stud bolt) and turned with a double nut wrench.

However, since this requires time and effort to set and remove the double nut, a stud remover can be used as a dedicated tool to efficiently and easily remove the stud bolt.

Uses of Stud Removers

Stud removers have few other uses, as they are basically dedicated tools for screwing in and removing stud bolts.

The stud removers are attached to a wrench in the same way as a box socket for a hex bolt or nut.

Attach the stud remover that matches the size of the stud bolt to the wrench and insert it into the stud bolt. Turn the stud remover slightly counterclockwise to secure it to the stud bolt. Then turn the wrench counterclockwise (loosening direction) to loosen and remove the stud bolt.

The stud removers can be used to remove the stud bolt without damaging the threads.

How to Select Stud Removers

The following points should be considered when selecting stud removers:

Size of the Insertion Angle

The insertion angle is the size of the square hole where the socket is inserted into the wrench handle, and there are three different sizes. It is the same as for socket wrenches and comes in three sizes: 1/2″ (12.7mm), 3/8″ (9.5mm), and 1/4″ (6.35mm). Select a remover that matches the insert angle size of the wrench handle.

Thread Size

The outer diameter of the stud bolt threads is from 5.0mm to 19.0mm, and the remover should be selected accordingly.

Types of Stud Removers

There are two main types of stud removers.

  • The socket type, in which a built-in roller eccentrically attached to the socket grips the stud bolt. This type has a specific size of bolt it can handle.
  • The eccentric roller with a serrated outer circumference grips the stud bolt by biting into the stud bolt. This type is compatible with multiple sizes and is highly versatile. However, the contact between the roller and the stud bolt is a single point, making it slightly more slippery than the socket type. This type is the same as the socket type and is used by attaching it to a wrench.
  • The through-hole type is effective when the stud bolt is long and can work by gripping the root of the stud bolt, making it easier to work with than the socket type, which turns the stud bolt at the tip.
カテゴリー
category_usa

Pipe Vise

What Is a Pipe Vise?

A pipe vise is a plumbing tool used to firmly hold and secure a pipe or tube during cutting or threading operations.

It is usually fastened to a workbench, construction vehicle, or tripod work platform.

A vise-type pipe vise is used by clamping a pipe by turning a V-groove-shaped metal fitting with jagged teeth using a screw-type handle so that the metal fitting bites into the pipe and prevents it from slipping.

A chain-type pipe vise is used by wrapping a roller chain around the pipe instead of V-groove tooth metal fittings to fix the pipe.

Uses of Pipe Vises

Pipe vises are specialized tools for fixing pipes during pipe processing, and their use is limited.

They are used for preventing and fixing material misalignment during pipe cutting and welding, and for fixing pipes when incorporating threaded fittings. When processing long pipes, the pipe vises should be used to support the portion of the pipe that is not secured by the pipe vises.

Due to its small size and portability, it is used at construction sites, in unspecified work areas in factories, and other sites where a large number of pipes are handled. Recently, with the development of electric pipe cutters and threading machines, there are more and more situations where work can be done without using pipe vises.

How to Select Pipe Vises

The following points should be considered when selecting pipe vises:

Fixing Method

A vise type generally fixes a pipe with jagged teeth, which may scratch the pipe. To minimize scratching, some vises have finer tooth profiles and can be used for plated (white) or coated copper pipes.

The chain type provides strong fixation with high torque and pressure. In addition, the flexible chain can be stored compactly, minimizing storage space when not in use.

Applicable Pipe Outer Diameter

Some pipe vises have specific pipe sizes to which they are compatible, and it is necessary to select a compatible model for secure fixation.
Generally, applicable pipe sizes are 1/8B to 6B.

Others

For pipe welding, there are welding pipe vises that fix two pipes to be welded in a straight line and concentricity with a chain, or welding pipe vises that fix a pipe to an elbow, tee, or flange and ensure reliable welding work.

カテゴリー
category_usa

Bending Machine

What Is a Bending Machine?

A bending machine is a generic term for processing machines used to bend pipes, metal plates, and angle bars.

Bending machines are often specialized machines depending on the workpiece to be processed. There are many types of bending machines available for workpieces of various sizes, ranging from small tools that bend pipes manually to large processing machines that can be programmed and automatically processed using electric, hydraulic, or other actuation methods.

This section describes small bending machines used primarily as tools.

Uses of Bending Machines

There are many different types of small bending machines, each of which is divided according to the type of workpiece to be processed and the processing method.

Manual bending machines are tools used in field environments where there is no working power source. They are used for bending thin pipes, reinforcing steel wire rods, steel plates, and thin aluminum sheets.

Motorized bending machines are used for bending and cutting operations on rebars and angle bars.

Hydraulic bending machines are used primarily for bending pipes. Some have a combined power source, such as the electro-hydraulic rebar Bending Machine cutter.

How to Select Bending Machines

Many bending machines are specialized tools for specific applications or types of workpieces, and the points to consider in selecting bending machines differ for each tool.

  1. Pipe bending machines
    Many bending machines for pipes with thin outer diameters are small and bend by pushing and closing two levers by hand-like scissors.

    Hydraulic pipe bending machines are used for bending pipes with large outside diameters, thick-walled steel pipes, and stainless steel pipes that are difficult to process with small manual Bending Machines, as well as for bending pipes with large bending radii. It is necessary to select a suitable bending die according to the pipe’s outer diameter and bending radius.

  2. Bending machines for rebars
    Bending machines for rebars are available in manual, electric, and electro-hydraulic types. They are selected according to the availability of a power source at the work location, the number of pieces processed, and work efficiency. There are portable, hand-held Bending Machines as well as stationary bending machines that are placed at a fixed work location for processing. There are also tools that can cut, such as electro-hydraulic rebar Bending Machine cutters.
  3. Thin plate bending machines
    This is a bending machine for thin steel and aluminum plates. Selection must be made after confirming the size and thickness of the plate that can be processed.
カテゴリー
category_usa

Crimping Tool

What Is a Crimping Tool?

A crimping tool is used to join wires and crimp terminals.

A crimping tool is roughly classified into manual one-hand tools, manual two-hand tools, manual hydraulic tools, and electric hydraulic tools.

The types of terminals and their dimensions vary depending on the electrical equipment, and the crimping tool must be capable of handling these diverse terminals.

The range of use (nominal terminal dimensions) is generally 14mm² or less for manual one-hand tools, 100mm² or less for manual two-hand tools, and 150mm² or less for manual hydraulic tools.

Uses of Crimping Tools

Crimping tools are mainly used to join terminals to wires for electrical equipment, indoor wiring, and electrical components.

Crimping tools are equipped with dies of various sizes, and crimping is performed at the die position that matches the nominal size of the terminal.

The cross-sectional area of ​​the wire to be crimped should be within the range that will allow the crimping of the terminals to be used. If the conjugation falls out of the range, it may cause wire breakage or other accidents. To ensure stable crimping of the joint, it is recommended that the crimp be made with the wire core approximately 1mm from the terminal.

Some manual tools, such as one-hand crimping tools, feature a structure that prevents the handle from opening until the crimping is completed. This is achieved through a forming confirmation function (ratchet function), ensuring that the user can always confirm the completion of the crimping process.

How to Select Crimping Tools

The points to consider when selecting crimping tools are as follows:

  • How to select the appropriate tool
    For example, crimping a terminal with insulation with a bare terminal tool may cause the insulation to tear, exposing the metal part of the terminal and causing a short circuit. In addition, it is important to select the crimping tools that best suit the application, as crimping tools for electrical equipment may be different from those for electrical equipment used in electric cars.
     
    For those used in the field, such as electricians’ tools, it is important that they are easy to operate. Another key point is to have a forming check function (ratchet function) so that the connecting terminal cannot be detached from the tool unless the distance between the dies is within the proper crimping connection range.

The reliability of the tool is also important in the selection process.

Important points in evaluating reliability are that the size is stamped on the terminal after crimping, making it possible to trace the process, and that the crimp forming height is controlled during manufacturing through crimp forming tests. It is also important when selecting a tool that the connection performance satisfies the value specified in the connection performance test.

カテゴリー
category_usa

Nailer

What Is a Nailer?

A nailer is a tool that allows you to drive nails into wood electrically. The advantage is that it requires less time and effort than manually driving nails into the wood. If you frequently drive nails into wood, using a nailer will dramatically improve your work efficiency.

There are various nailers, from high-pressure nailers that are connected to a compressor to rechargeable nailers that can be used in confined spaces, making them useful in a wide range of situations. In order to use it safely, it is necessary to choose a nail gun suitable for the intended use.

Uses of a Nailer

Nailers are easy to handle, even for beginners, and can quickly drive nails into the ground. They are therefore used in a wide range of applications, from construction sites and woodworking areas to DIY at home.

When used at home, they are often used to assemble or repair furniture. Small nailers in particular are the most versatile type of nailers, as many of them can be handled with one hand and have a strong driving force.

In recent years, rental and used nailers have also become available, making it possible to use nailers at lower prices.

How to Choose Nailers

Types of Nailers

There are many different types of nailers. Some of them are introduced below, so be sure to choose the right one for your use:

  • High-pressure roll nailers: High-pressure roll nailers are compact and powerful. They can drive nails under high pressure and are low rebound, making them easy to handle even for beginners.
  • Normal-pressure roll nailers: Although less powerful than high-pressure roll nailers, these nailers can drive nails with relatively high pressure and offer excellent cost performance.
  • Piecewise nailers: These nailers do not drive in a series of nails, but rather handle each nail one at a time. The nailing position can be finely adjusted, making it suitable for work in tight spaces.

How to Connect Nails

There are two types of nailers that can be attached to nailers: wire nails and plastic sheet nails.

  • Wire nails: Wire nails are less prone to jamming and offer excellent cost performance. Various nail lengths are available.
  • Plastic sheet nails: Plastic sheet nails have a stronger nail connection than wire nails and are less likely to collapse. Therefore, plastic sheet nails are suitable for carrying and handling short nails.

Types of Nails

Various types of nails are available, depending on the material into which you want to nail.

Finish nailers are used for finishing. The nails are less noticeable and they are used to provide a beautiful finish.

Brad nailers on the other hand are shaped like a staple needle and are suitable for fixing fabric-like materials, although the nails are more visible.

カテゴリー
category_usa

Jig Scroll Sawing Machinery

What Is Jig Scroll Sawing Machinery?

Jig scroll sawing machinery is a motorized version of a thread saw, which is an integrated tool with a table on which materials are placed.

The motor drives the saw up and down, and the operator moves the material on the table and presses it against the saw to cut and process it. It can process various materials such as wood, plastic, and metal, and can cut along fine curves and cut hollows, among other power tools.

There are three types of jig scroll sawing machinery: spring type, in which a motor pulls the blade downward and a spring pulls it back upward; parallel arm type, in which a motor moves the arm that supports both ends of the blade up and down; and parallel link type, which is an improved version of the parallel arm in which the arm moves back and forth and the tip moves up and down.

How to Use Jig Scroll Sawing Machinery

Select the blade of the thread saw according to the material to be processed and the processing details.

With the outlet unplugged, set up the thread saw. First, tighten the lower blade stopper screw under the table, then set the upper blade stopper lever to secure the blade.

Turn on the jig scroll sawing machinery to start the operation. The saw blade will move up and down like a sewing machine needle. Place the material on the table, apply the blade to the part to be cut, and push the material out while holding it from above with both hands.

Since the saw is moving automatically, it is important to work slowly and surely without taking your eyes off the part to be cut for your safety.

How to Choose Jig Scroll Sawing Machinery

Jig scroll sawing machinery comes in various sizes, from small tabletop machines to large stationary machines.

The criteria for selecting the size of jig scroll sawing machinery is the foothold dimension, which is the distance from the saw blade to the arm. Select jig scroll sawing machinery with sufficient margin for the material.

The performance of jig scroll sawing machinery is determined by the number of strokes, which is the number of times the saw blade moves up and down per minute, and the stroke width, which is the width of the saw blade. For both the number of strokes and stroke width, the higher the number, the faster the work speed. However, since jig scroll sawing machinery with a larger stroke width requires a larger size, the size of the jig scroll sawing machinery and the stroke width must be considered in conjunction.

For the stroke speed, wood is generally processed at high speed, while plastic and metal are processed at low speed. There are also jigsaw machines with adjustable strokes, so if you want to cover a variety of materials and processing details, you should choose a jigsaw machine with adjustable strokes.

カテゴリー
category_usa

Lathe

What Is a Lathe?

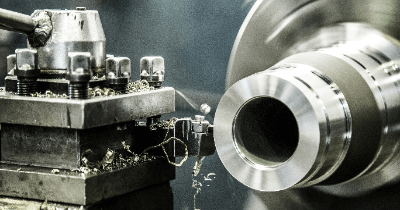
LathesA Lathe is a type of machine tool for metalworking. It is a machine that fixes the material to be processed on a rotating base called a chuck, and applies a cutting tool called a bite to the workpiece to cut it into the desired shape.

A lathe consists of a spindle stand, a bed, a tailstock, a feeder, and a reciprocating stand, etc. By changing the type of byte, various types of processing can be performed with one machine, such as external turning, internal diameter processing, end face grinding, taper grinding, thread cutting, and butt cutting.

Since the lathe processes materials while rotating them, it is often used for processing circular materials.

Uses of Lathe

Lathes are often used for processing circular or conical shapes because they process materials while rotating them.

Specifically, they are often used for round industrial products such as screws, bolts, and shafts, but they are also widely used for everyday items such as doorknobs and chair parts.

The widespread use of NC lathes, which numerically control everything from blade change to feed rate and coordinate position, has made it possible to mass-produce high-quality parts, making them indispensable in the production of mass-produced parts.

Principle of Lathes

A lathe is basically composed of five parts.

1. Spindle Head

The spindle base incorporates the motor and transmission used to rotate the material and is responsible for controlling the number of revolutions and direction of rotation. The unit of rotation speed is RPM, which indicates how many revolutions the spindle makes per minute.

2. Bed

The bed is a wide table-like area that supports the lathe’s tailstock and reciprocating table. When the tailstock is moved, it slides on the bed. Since the metal rails on the bed are in contact with the sliding surfaces of the tailstock, it is a good idea to clean the chips on the bed periodically to prevent the rails from being scratched. 

3. Reciprocating Table

The reciprocating table is used to move the cutting tool attached to the tool rest back and forth, left and right. Care must be taken when operating the reciprocating table, as too close to the rotating chuck can cause contact between the tool rest and chuck, resulting in an accident.

4. Feeder

Like the reciprocating table, this device is used to move the cutter back and forth, left and right, but it is more precise than the reciprocating table, allowing operation in increments of 0.01 mm.

5. Centering Table

The table on the bed attached to the opposite side of the spindle base is the tailstock. It is mainly used to support and secure a long workpiece from the opposite side, or to drill a hole with a drill attached.

How to use a Lathe

First, the appropriate cutting tool is selected according to the size, material, shape, and processing details of the workpiece, and the cutting speed, spindle speed, and other processing conditions are determined.

Next, the workpiece is fixed in the chuck, and the tool is fixed to the tool rest by adjusting the height of the cutting edge so that it matches the center height.

After shaving the end face of the workpiece, set the center drill on the tailstock and bring it close to the workpiece, set the drill in the center of the workpiece to set the machining standard, and then lathe the workpiece according to the drawing.

How to Select a Lathe

When selecting a lathe, the following specifications should be checked:

1. Distance Between Centers

This is the distance from the spindle to the headstock and represents the maximum length of the workpiece. In actual lathe turning, a chuck is attached to the spindle to set the workpiece. In addition, a drill, etc., is also mounted on the headstock, so only materials shorter than the center-to-center distance can be machined.

The actual machining range is about 60-70% of the center-to-center distance.

In the case of internal diameter machining, the tool set in the tool rest on the reciprocating table is used to cut the inside of the workpiece, so the reciprocating table interferes with the workpiece, further reducing the length of material that can be machined.

2. Up Swing of the Bed

The distance from the bed to the spindle multiplied by 2 represents the maximum diameter of cylindrical material that can be machined without touching the bed.

In practice, the diameter of the material that can be machined is limited by the diameter of the chuck, since the workpiece is fixed using a chuck attached to the spindle.

For the center-to-center distance and swing over the bed, select a size that allows for the size of the material to be machined. However, a lathe is not a machine that can be easily replaced once purchased and installed. When selecting a lathe, it is necessary to consider the installation space and price.

カテゴリー
category_usa

Sharpener

What Is a Sharpener?

Sharpeners are tools used to grind knives and other cutting tools to improve their sharpness.

Generally, after continuous use of a kitchen knife, the edge of the blade becomes rounded due to wear and tear, and the sharpness of the blade deteriorates. Sharpeners can be used to easily restore sharpness.

While a whetstone is used to sharpen the blade, sharpeners improve the bite of the food by scratching the cutting edge. Therefore, a sharpener cannot be used as a substitute for a whetstone when performing routine maintenance.

If you want to use a knife for a long time, it is better to use a whetstone, but sharpeners are useful when you want to quickly restore the sharpness of a knife because anyone can use them with a simple operation.

Usage of Sharpeners

Sharpeners are mainly used to sharpen kitchen knives, but some products can also sharpen scissors, sickles, and other blades. In general, many of them are compact and portable, making them convenient for outdoor use such as camping.

Various manufacturers offer products in a variety of designs and shapes, and by selecting one suitable for the environment in which it will be used, it can also be used as an interior decoration product.

Structure of Sharpeners

Sharpeners have a simple structure. Each type of sharpener has a built-in whetstone, which is used to sharpen knives and other cooking utensils by sliding them over the whetstone.

The whetstone is made of materials such as ceramic or diamond and can be used for various types of knives.

How to Select Sharpeners

Sharpeners are generally categorized into four types: roll-type, cross-type, electric-type, and sharpening rod. It is important to understand the characteristics of each and choose the one that best suits your needs.

1. Type

Roll Type
The roll type is the most popular type of sharpeners because of its wide variety. A roll-type sharpener incorporates a grinding stone, which can be sharpened by placing the blade on the grinding stone and pulling it.

Sharpeners are sold in types ranging from those with one grinding stone to those with three, each of which has a different roughness of the grinding stone, allowing for a clean finish. However, care should be taken to avoid frequent use, which can result in jagged edges and damage to the blade.

Intersecting Type
Crossed sharpeners are used by placing a knife between two V-shaped grinding stones. However, since it sharpens in the horizontal direction to the cutting edge, only the cutting edge is sharpened and burrs are left behind.

If you use this type of sharpening knife for sashimi knives, which have excellent sharpness, you should avoid using it for expensive knives because it may damage the cutting edge of the knife in addition to deteriorating the sharpness of the knife.

Electric Type
Electric sharpeners can be used electrically, so even those who are not confident in their strength can speed up the process. Generally, it has the same shape as a roll sharpener, and you can sharpen a knife by placing it on the rotating whetstone and sliding it.

Electric sharpeners are characterized by the fact that they are less likely to produce uneven sharpening, but care must be taken to avoid damaging the blade if the sharpening is done incorrectly.

Sharpening Stick
As the name suggests, a sharpening stick is a stick-shaped sharpening tool that is used to sharpen knives by rubbing them against a file-like surface. This type of sharpener requires adjustment of the amount of force and the angle at which it is applied to the knife and may be difficult to use until you get used to it. However, it is compact and convenient for use with scissors and slicers as well as kitchen knives.

2. Materials That Can Be Used

Kitchen knives and other blades are made of various materials, such as stainless steel and ceramic. Using a sharpener that is not compatible with the blade material will damage the blade, so it is important to read the information on each product carefully and select a sharpener that is compatible with the blade material.

3. Safety

Sharpeners are compact and lightweight, which can lead to serious injury if not properly secured. Electric sharpeners are relatively safe to use because they do not require the application of force, but for manual sharpeners, it is necessary to check the safety features, such as non-slip or suction cup fixation.

4. Hygiene

Kitchen knives and other cooking utensils come in direct contact with food, so hygiene measures are also important. A stainless steel type of knife has a grinding stone that is resistant to rust and can be kept clean for a long period. Products with a removable grinding stone are also available and are recommended when hygiene is important.

カテゴリー
category_usa

Disc Sander

What Is a Disc Sander?

A Disc Sander is a power tool used to sand and smooth surfaces. A typical type has a sanding disc attached to the spindle of the machine, and the disc is pressed against the material to be sanded.

There are a variety of types, including those that are installed on a workbench, those that are integrated with a workbench, and portable types that can easily be used for DIY purposes.

A similar product is a disk grinder, which is a tool that performs polishing, grinding, and cutting by rotating a grinding wheel.

Uses of Disc Sanders

Disc Sanders are often used in metalworking, woodworking, automotive, and other factory and home workshops. They are useful for finishing curved and irregular surfaces, deburring metal and wood, shaping, and removing material.

Principle of Disc Sanders

Disc Sander sanding is performed by rotating a sanding disc attached to a spindle at high speed and pressing material against it. Sanding discs are made of various materials such as aluminum oxide, silicon carbide, and diamond abrasive. Appropriate abrasive grains can be selected according to the work to be performed.

Types of Disc Sanders

There are several types of disc sander, each with its own specific application and design. The six most common types are as follows:

1. ID Disc Sander

An ID (inside deiameter) disc sander is one in which the sanding disc is mounted on the machine spindle and the material is pressed against the disc.

2. OD Disc Sander

In contrast to an ID disc sander, an OD (outside deiameter) disc sander attaches a sanding disc to the machine’s outer circumference and presses material against the disc from the outside.

3. Combination Disc Sander

Equipped with both inside and outside deiameter sanding discs, the combination disc sander can be used according to the work to be performed.

4. Portable Disk Sander

This is a smaller version of the disc sander and is often used for small-scale sanding work or work in confined spaces. 

5. Stationary Disc Sander

A larger, more powerful version of a disc sander that is often used for industrial applications and has features such as a tilting table and dust collection system.

6. Belt Disk Sander

A sander that integrates a sanding belt and a sanding disc in one unit, allowing the sander to switch between the sanding belt and the sanding disc.

How to Select a Disc Sander

When purchasing a disc sander, there are several important factors to consider.

1. Size

Disc Sanders comes in a variety of sizes, from small portable models to large industrial machines. You should consider the size of the material to be sanded and the space in which the machine will be placed.

2. Power

The power of a disc sander depends on its voltage (V). More powerful motors can handle larger materials and jobs that require powerful sanding

3. Speed

The speed of a disc sander is usually measured and set in revolutions per minute (RPM). Increasing the RPM allows for faster sanding, but also increases heat buildup and the risk of burning wood or other materials. 

4. Disc Size

The size of the sanding disc is an important factor to consider because it determines the surface area available for sanding. Larger discs can handle larger materials and thus can sand a larger area at a time.

5. Dust Collection Capability

Sanding generates a lot of dust, so a dust collection system is an important feature to consider. Some sanding machines have built-in dust ports, while others can be fitted with a dust collection system. 

6. Table Tilt

Some disc sander models allow the table to be tilted for angled sanding, which is useful for certain tasks.

Other Information on Disc Sanders

Precautions for Using Disc Sanders

When using a disc sander, it is important to keep the following points in mind:

1. Wear protective equipment
Always wear protective glasses, a dust mask, and ear protection when using a disc sander. To avoid getting caught in the machine, clothing should be free of slack, jewelry should be removed, and hair should be tied up. 

2. Secure the material
Ensure that the material is firmly secured before grinding to prevent it from slipping or flying off the machine.

3. Start the machine
Start the disc sander and wait until it is at full speed before bringing the material into contact with the sanding disc.

4. Use the appropriate abrasive
Select the appropriate abrasive for the work to be performed. Coarse abrasives will cut quickly but leave deep scratches. Fine abrasives, on the other hand, can shave slowly but leave a smooth finish.

5. Applying appropriate pressure
Avoid pressing the material too hard so that it is sanded efficiently by the sandpaper, as this slows the rotation of the disc and may reduce the efficiency of sanding.

6. Move the material evenly
Move the material smoothly and evenly over the sanding disc, using light force to keep it level.

7. Avoid overheating
Overheating the material or the sanding disc can cause burns and damage both the machine and the work piece. If the machine begins to feel hot or smell smoke or burning odor, stop work and allow the heat to cool.

8. When finished, turn off the machine
Turn off the disc sander and wait for the sanding disc to come to a complete stop before removing material or replacing sandpaper.

カテゴリー
category_usa

Orbital Sander

What Is an Orbital Sander?

An Orbital Sander is a power tool that grinds by vibrating a square pad in small increments. It is also called a finishing sander because it can grind flat surfaces to a smooth finish. The large area of the pad makes it suitable for sanding large objects.

Commercially available paper files can be used. Since it does not require strong force and does not have habitual movements, it is easy to handle even for DIY beginners.

The main attraction is that it can finish the work more neatly and quickly than hand sanding.

Uses of Orbital Sanders

An Orbital Sander is a tool used for a wide range of applications, from general DIY to professional sites. Although it is possible to sand by hand using an ordinary sandpaper, an orbital sander is suitable when the work area is large. Not only does it improve work efficiency, but it also provides a uniform finish.

Therefore, it is mainly for grinding flat surfaces of wood and metal, finish grinding, and sharpening putty on wood furniture. When wood is freshly cut, the surface may be rough, scratched, or dirty. Orbital sanders are used to sand the surface to a smooth finish, which improves the adhesion of subsequent paints and finishes.

Ann Orbital Sander smoothes the surface of wood by scraping it with a file. The finished surface soaks up the liquid and requires painting or applying a finishing material.

Principle of Orbital Sanders

An Orbital Sander is basically a sand file (sandpaper) or cloth file attached to the bottom surface, which is then rotated, reciprocated, or vibrated to grind the material. Since the power source is electric, it can greatly reduce labor compared to manual operation.

A pulley is fixed to the motor’s rotating shaft. Pulleys are so-called pulleys, which are parts that transmit power from the motor, the power source, using a belt. The pulleys are located off-center from the motor’s axis of rotation, so they rotate while oscillating slightly.

An Orbital Sander is capable of nearly 10,000 eccentric movements per minute. This allows the sandpaper to adhere to flat surfaces in a stable manner for clean sanding.

How to Select an Orbital Sander

Points to consider in selecting an orbital sander include the precision of the sanding and the size of the area to be covered.

1. Power Supply

There are two types of power sources: those that are connected to a power source with a power cord and those that are battery-powered. The power cord type is suitable for long-time use, while the battery type is suitable for easy handling. 

2. Dust Collection Capability

Orbital Sanders produces a lot of fine dust from wood and metal. Wearing goggles and a mask prevents dust from being inhaled or getting into the eyes. Recently, many models are equipped with dust collectors.

3. How to Install Sandpaper

There are two types of sandpaper: the clamp type and the velcro type. In the clamp type, the sandpaper is clamped with the clamp lever on the body. The velcro type has velcro on the pad, which can be replaced by simply attaching the sandpaper.

There is also a dual-use type that can be fitted with both. Since commercially available paper files do not have holes for dust collection, it is necessary to drill holes with a punch plate (included or sold separately). 

4. With Speed Control Function (Silent Function)

Since motor noise and vibration noise depend on the speed of the motor, the speed control function allows you to adjust the noise level. If you are using an orbital sander in a noise-sensitive environment, we recommend a model with a speed control function.

Other Information on Orbital Sanders

How to Use Orbital Sanders

Sandpaper is attached to the pad of the orbital sander. There are special sandpaper products that are compatible with the sander. When using commercially available sandpaper, the key is to cut it to the size of the base plate and stretch it so that it does not sag.

By varying the coarseness of the file, one orbital sander can perform everything from rough grinding to finish polishing. Note that the orbital sander vibrates strongly when in use. To prevent accidents, you should always hold the sander with both hands when turning it on.