カテゴリー
category_es

Fuentes de Alimentación Conmutada

¿Qué es una Fuente de Alimentación Conmutada?

Una fuente de alimentación conmutada es un dispositivo que suministra alimentación de CC mediante un método de regulación de conmutación entre fuentes de alimentación de CC.

Las fuentes de alimentación generales se pueden clasificar aproximadamente en dos tipos: el tipo lineal, que es económico pero pesado debido a su estructura de circuito simple, y el tipo de conmutación, que es compacto debido al uso de circuitos integrados.

Debido a sus respectivas características, el tipo lineal se usa para adaptadores de CA simples, mientras que el tipo de conmutación se usa para suministrar energía a los componentes electrónicos en las instalaciones.

Aplicaciones de Fuentes de Alimentación Conmutadas

Las fuentes de alimentación conmutadas se utilizan principalmente para suministrar energía a los equipos de información industrial.En los últimos años, a medida que los equipos electrónicos se han vuelto más sofisticados, los adaptadores de CA han cambiado de sistemas lineales pesados a sistemas de conmutación compactos.

Además, con la difusión de las fuentes de alimentación USB, las fuentes de alimentación conmutadas son un componente indispensable para suministrar energía a equipos electrónicos compactos. En el campo industrial, las fuentes de alimentación conmutadas se usan ampliamente como componentes que suministran energía de CC de manera estable para impulsar componentes electrónicos de control, como válvulas de solenoide y sensores en equipos automatizados.

Principio de las Fuentes de Alimentación Conmutadas

Una fuente de alimentación conmutada es un dispositivo que utiliza una fuente de alimentación de CA, como 100 VCA, como entrada, la convierte en una fuente de alimentación de CC, como de 5 a 30 VCC, y la suministra de manera estable.

La configuración del circuito de una fuente de alimentación conmutada típica es la siguiente:

  • Rectificación de Entrada y Circuito Rectificador
    La fuente de alimentación de CA de entrada se suaviza en la medida de lo posible.
  • Circuito de Conmutación
    Permite conmutar la alimentación de CA a CC.
  • Circuito Rectificador y Rectificador de Salida
    Suaviza la fuente de alimentación de CC distorsionada después de la conversión.
  • Circuitos de Control
    Controla la tensión y la potencia de salida.

Esta configuración permite obtener una fuente de alimentación DC estable con tensión constante.

Más Información sobre las Fuentes de Alimentación Conmutadas

1. Diferencia entre un Rectificador y una Fuente de Alimentación

Un rectificador es un término genérico para un elemento que tiene la propiedad de conducir la corriente en una dirección, mientras que una fuente de alimentación es un término genérico para una fuente de energía.

Se puede decir que un rectificador es un elemento que convierte una fuente de alimentación de CA en una fuente de alimentación de CC. Es un diodo o dispositivo de conmutación que permite que la corriente fluya en una dirección.

Hay dos tipos de rectificación: rectificación de media onda y rectificación de onda completa.

Rectificación de Media Onda
En los circuitos de CA, las corrientes positivas y negativas fluyen alternativamente y la “rectificación de media onda” elimina la corriente positiva o negativa. La configuración del circuito es simple y de bajo costo, pero la eficiencia es baja y no puede manejar grandes corrientes.

Rectificación de Onda Completa
La rectificación de onda completa es un método que toma corrientes positivas y negativas y las cambia a una corriente unidireccional. Este método se utiliza principalmente en fuentes de alimentación conmutadas. En comparación con la rectificación de media onda, la rectificación de onda completa es más eficiente y la pulsación se puede suprimir en menor grado.

La rectificación de onda completa incluye un método que usa dos diodos y un método de circuito puente que combina cuatro diodos. Dado que la corriente después de estas rectificaciones es inestable, la salida del rectificador se combina con un circuito como un condensador para suavizar para eliminar la pulsación y funcionar como fuente de alimentación.

2. Causas de Fallo de las Fuentes de Alimentación Conmutadas

Hay “factores externos” y “factores internos” que causan fallas en las fuentes de alimentación conmutadas.

Falla Debido a Factores Externos

  • Destrucción física
  • Una entrada repentina de alto voltaje o ruido debido a un rayo
  • Fallo de cortocircuito debido a la entrada de polvo o humedad
  • Destrucción de varias partes del circuito debido a productos químicos o gases corrosivos.

En particular, la aplicación repentina de alto voltaje debido a la caída de un rayo destruye cada elemento y otros componentes electrónicos dentro de la fuente de alimentación. Para evitar estas fallas, es efectivo instalar productos de circuitos de protección como los limitadores de sobretensiones.

Fallas por Factores Internos
Los factores internos son causados por el deterioro o la falla de los condensadores electrolíticos, los ventiladores de enfriamiento, los componentes semiconductores, etc. La vida útil de una fuente de alimentación varía mucho según el entorno en el que se usa y el tiempo que se usa.

カテゴリー
category_usa

Extension Cord Reel

What Is an Extension Cord Reel?

Extension Cord ReelsAn extension cord reel, also referred to as a cord reel or electric drum, serves as a practical tool that allows for the extension of electrical power via an extension cord.
The extension cord reel includes an extension cord, a drum for winding the cord, and an outlet plug on the drum’s side. This device allows for the extension of electrical power from a wall outlet by plugging the reel’s cable into the wall and extending the cord as needed.

Uses of Extension Cord Reels

Extension cord reels are indispensable on construction sites.

These sites often use electric drills, saws, and welders for cutting, drilling, and welding metal and wood. Although battery-powered tools are convenient, their use is limited by battery life. Tools powered from an electrical outlet are preferred for all-day use.

However, the limited length of a tool’s cord restricts its use, making extension cord reels essential for added flexibility.

Principle of Extension Cord Reels

While various specifications of extension cord reels exist, typically only a few are used at each job site due to storage and mobility constraints. One reel is often sufficient for most needs.

Specifications include cord length, generally ranging from 10 to 50 meters. Longer cords offer more convenience but are heavier and can pose a fire hazard if used while wound up due to heat accumulation in the drum. Conversely, shorter cords are lighter and safer to use but limit the range of operation.

カテゴリー
category_usa

Thin Rubber Glove

What Is a Thin Rubber Glove?

Thin Rubber Gloves

Thin rubber gloves are gloves suitable for detailed work using fingertips.

They are classified into natural rubber gloves and synthetic rubber disposable or reusable, and should be used separately depending on the intended use.

Uses of Thin Rubber Gloves

Thin rubber gloves are widely used in cleaning, water work, gardening, construction sites, food processing, and medical settings. They are often used to protect hands from dirt, roughness, and injury, as well as for thermal protection.

Because of their excellent flexibility and fit, they are suitable for detailed work that requires the use of fingertips. Because they are durable and can be used for long hours, they are useful in medical fields during surgeries, examinations, and medical checkups.

The three main purposes for using thin rubber gloves in the medical field are as follows

  • To protect medical personnel from the risk of infection and contamination via blood, body fluids, needles, scalpels, etc.
  • Prevent patients from being exposed to contaminants through the hands and fingers of healthcare workers
  • Reduce the risk of contamination of medical facilities and supplies

Hygiene must also be considered, especially when used for surgery. Thin rubber gloves are always sterilized.

Principle of Thin Rubber Gloves

Sulfur is used in thin rubber gloves to increase the rubber’s durability, elasticity, and heat resistance. Without the addition of sulfur, the rubber could deteriorate quickly and tear apart.

However, the process of adding sulfur to rubber, known as vulcanization, takes time. Therefore, vulcanization accelerators are used to increase production efficiency. Anti-aging agents are also useful to prevent deterioration.

Typical compounds of vulcanization accelerators are thiramide compounds, dithiocarbamate compounds, and mercapto compounds. Typical compounds of anti-aging agents are N-isopropyl-N-phenyl-p-phenylenediamine.

Types of Thin Rubber Gloves

Thin rubber gloves are classified into natural rubber gloves and synthetic rubber gloves.

1. Natural Rubber Gloves

Natural rubber is produced from the sap (latex) of the Para rubber tree. Asia accounts for 90% of the area where the Para rubber tree is cultivated. Because of its superior breaking strength, durability, and low heat generation, large tires for trucks, buses, and airplanes are made from 100% natural rubber.

The rubber component in latex is said to be 30-40%. The basic skeleton is polyisoprene, a cis-bonded isoprene C5H8. Cis-bonding increases breaking strength and durability. Since it is difficult to produce 100% cis-bonded polyisoprene in synthetic rubber, its breaking strength and durability are inferior to those of natural rubber.

The disadvantages of natural rubber gloves are that they cannot be used against oils and chemicals, and the sap, latex, can cause allergic reactions. Synthetic rubber gloves, on the other hand, are made from petroleum and can be used against oil and chemicals. They also do not cause latex allergies.

2. Synthetic Rubber Gloves

Synthetic rubber, also called nitrile rubber, is made from petroleum and is used against oils and chemicals. It does not contain latex and does not cause latex allergy. However, they can cause allergic contact dermatitis, a delayed allergic reaction.

In addition, the cost of synthetic rubber gloves is somewhat higher, whereas natural rubber gloves are less expensive.

Other Information on Thin Rubber Gloves

1. Latex Allergy

Latex allergy is an allergic reaction specific to natural rubber. As an immediate allergic reaction, symptoms appear within two hours after skin or mucous membrane contact with the gloves or inhalation of the powder on the gloves. The main symptoms are urticaria at the site of contact and on the whole body, respiratory symptoms such as coughing and wheezing, and anaphylactic shock.

The causative agent is a protein component in the sap (latex) of the Para rubber tree. It is said to be contained in natural rubber at about 1.5%.

Fruits and vegetables have also been found to contain components similar to the above proteins. Particular attention should be paid to chestnuts, bananas, avocados, and kiwifruit, which can trigger latex-fruit syndrome. Before using natural rubber gloves, it is important to check in advance whether you have experienced any discomfort or tingling sensation in your mouth when eating fruits and vegetables.

People who are prone to allergic reactions are said to be more likely to develop latex allergy because their skin barrier function is already weak. Care should be taken depending on one’s individual health.

2. Allergic Contact Dermatitis

Allergic contact dermatitis is a delayed allergic reaction. It develops hours to days after contact. Symptoms include itchy eczema, erythema, edema, serous papules, dryness, cracking, and rough hands.

The causative agents are said to be vulcanization accelerators and anti-aging agents. Therefore, both natural and synthetic rubbers can cause the disease. Treatment includes topical steroids, antihistamines, and oral steroids.

Prevention of the onset of the disease includes wearing cotton gloves under rubber gloves, avoiding use for long periods of time, using vulcanization accelerator-free rubber gloves, and patch testing before use.

カテゴリー
category_usa

Metal Joint

What Is a Metal Joint?

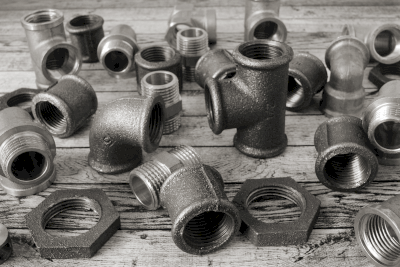
Metal JointsA metal joint refers to various metal components used for joining materials, with different types designed for specific applications.
The term “metal joint” is commonly used to describe connectors used in assembling items like shelves from polyvinyl chloride (PVC) pipes. These joints are also employed to reinforce wood assemblies, enhancing their structural integrity.

Both are used to connect two or more materials with a metal joint to hold them firmly in place.

Uses of Metal Joints

Metal joints are used when you want to join pipes such as PVC to make a frame, but cannot be used for running water through the pipes. Special pipe fittings must be used for flowing liquids and gases.

Principle of Metal Joints

Metal joints for pipes such as polyvinyl chloride (PVC) feature sheaths to connect the pipes, with the number of sheaths varying depending on the joint. This design facilitates easy assembly and disassembly.

If you need to connect two pipes, a two-sheath joint is used, while three-dimensional assemblies require joints with more sheaths. Sheaths are available in various angles, including right-angled, 180°, and 45°. Some joints also have sleeves for rotational adjustment of the pipe’s direction, so select a metal joint that suits your specific purpose.

Metal joints for wood are made in the form of metal plates, which are attached to the wood joint and tightened with screws after the wood is incorporated, increasing the strength of the joint.

カテゴリー
category_usa

Saber Saw Blade

What Is a Saber Saw Blade?

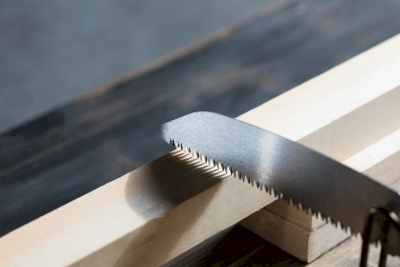
Saber Saw BladesA saber saw, also known as a reciprocating saw, is an electric tool equipped with a saber saw blade.
Being electric, saber saws are ideal for prolonged cutting tasks as they reduce hand fatigue. Saber saw blades, made of various materials like steel and carbon, can cut through hard materials including iron and wood.

Orbital saber saw blades add an elliptical motion to the standard reciprocating movement, enhancing cutting power.

Uses of Saber Saw Blades

Saber saw blades are replacement blades for saber saws. Therefore, select the blade that best suits the required use of your saber saw.

While cutting soft materials such as wood or polyvinyl chloride piping does not require special consideration, hard materials like stainless steel pipe demand specific blades. Using a wood blade for stainless steel will quickly render the blade ineffective.

The saber saw blades are long and narrow, enabling access to tight spaces, and being electrically operated, they simplify the cutting process.

Principle of Saber Saw Blades

In addition to the material, other important factors in saber saw blades include the number and size of blades, blade thickness, and length.

The number of blades in a saber saw blade is also related to the size of each blade. The smaller the number of blades, the larger the size of each blade. Using a saber saw blade with a large blade increases the speed of cutting. However, the disadvantage is that the large blade makes the cut surface rough. On the other hand, if the blade has a small blade, the cutting speed will be slow, but the cut surface will be clean.

Thick blades are more suitable for cutting hard materials since they are stronger than thin ones. On the other hand, thicker blades produce a messy cutting surface and more cutting debris. If the blade is thin, the cut surface will be clean, but the blade will bend and break easily.

Longer blades can cut larger objects while shorter blades are easier to use when considering workability. Therefore, it is important to select the blade that best suits the application.

Saber Saw Blades

The cutting capacity of saber saw blades is determined by the material, thickness, and thickness of the object to be cut. Generally, it may be written as “maximum cutting dimension”. Most manufacturers use the φ notation (diameter dimension) as the cuttable size, and the numerical value expresses the cuttable size for cylindrical materials such as pipes. It is desirable to select the model based on this numerical value.

In addition, additional functions of the saber saw blade to compensate for its cutting ability include, a low vibration mechanism that can be expected to reduce body fatigue by suppressing vibration, a dustproof and drip-proof specification that is resistant to rainwater and dust, and cutting by jerking action.

The dust-proof and drip-proof design is resistant to dust and rainwater and can be used outdoors in the rain or at dusty work sites without concern.

The low-vibration mechanism reduces vibration by counterbalancing. It has a function called the orbital mechanism that increases the cutting speed by increasing the blade’s bite into the material by adding a crouching motion to the blade movement. While the cutting speed is faster, it also has the disadvantage of making the cutting surface rough and prone to burrs.

There are various factors related to the cutting ability of saber saw blades:

  • Material to be cut
    The ability varies depending on the material, such as steel, spiral duct, stainless steel, wood, cast iron, ALC, etc.
  • Number of peaks (number of blades)
    The higher the number of saber saw blade blades, the closer the cut surface is to burr-free, but the lower the cutting speed. Conversely, the fewer the number of blades, the faster the cutting speed, but burrs will occur on the cut surface.
  • Blade length
    Each manufacturer offers blade lengths from 150 mm to 300 mm. While a longer blade length provides a wider cutting surface, it also causes more vibration to the machine body, so it is necessary to hold the machine body firmly in place. If ease of handling is a consideration, shorter blades are easier to work with.
  • Blade thickness
    A thin blade produces less cutting debris and a clean finish, but if the material is hard and thick, a thicker blade is necessary.

How to Use Saber Saw Blades

  1. Speed ​​adjustment: Turn the dial with the trigger pulled to adjust the speed.
  2. Fixing the saber saw blade to the material: Place the saber saw blade on the target area to be cut.
  3. Cutting: Pull the trigger to start cutting. Hold the blade firmly in your hand so that it does not move from the cutting point.
    (If the blade is at an angle, it may break, which is dangerous.)
カテゴリー
category_usa

Alligator Clip

What Is an Alligator Clip?

Alligator Clips

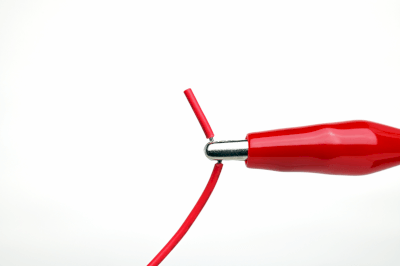
Alligator clips, also known as minnow clips, are devices designed for temporarily connecting electrical wires and components. They feature spring-loaded, serrated jaws that resemble an alligator’s mouth, which can securely grip onto terminals or wires. The clips are often insulated with materials like polyvinyl chloride to prevent electrical shorts and provide user safety.

Uses of Alligator Clips

Alligator clips are indispensable tools in various applications, including electrical engineering, automotive diagnostics, and educational science experiments. They facilitate quick and temporary connections for testing, measuring, or power supply purposes. In the automotive sector, they are used for connecting and testing electrical components and circuits. In educational settings, alligator clips are commonly utilized in physics and electronics labs to assemble temporary circuits for experimentation.

Principle of Alligator Clips

The functionality of alligator clips is based on their ability to create temporary electrical connections. By clamping the clip onto a wire or terminal, an electrical pathway is established, allowing for current flow. The insulating coating on most alligator clips ensures that they can be used in close proximity without the risk of short-circuiting. Additionally, some alligator clips are equipped with features such as a hole at the tail end for secure wire attachment, enhancing their versatility in various configurations.

Other Information on Alligator Clips

Types of Wires with Alligator Clips

Wires equipped with alligator clips can come with various terminal types to suit different applications, such as double-sided alligator clips for testing, USB terminals for power supply from USB devices, BNC terminals for connection to measurement instruments like oscilloscopes, and cigar sockets for automotive electrical testing. Additionally, specialized cables for medical devices like low-frequency therapy equipment often feature alligator clips for secure attachment to treatment needles.

Color-Coding for Use

Alligator clips and their attached wires are often color-coded to denote their intended use, such as red for positive connections and black for negative. This standardization helps prevent wiring errors and simplifies electrical testing and diagnostics.

DIY Alligator Clip Wires

Creating custom wires with alligator clips involves stripping the insulation from the wire ends, threading them through the clip’s tail hole, soldering for a secure connection, and reapplying the clip’s insulating cover. This process allows for the fabrication of tailor-made wires suited to specific needs or projects.

カテゴリー
category_usa

Offset Grinding Wheel

What Is an Offset Grinding Wheel?

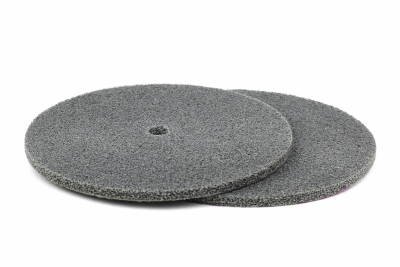
Offset Grinding WheelsAn offset grinding wheel is a disk-shaped grindstone, primarily used with disk grinders. These wheels are rotated at high speeds on machines to grind the surfaces of metals and other materials.

Various types of offset grinding wheels are available, depending on the hardness and type of abrasive grains used. The appropriate wheel must be selected based on the metal or target material’s properties.

Uses of Offset Grinding Wheels

Offset grinding wheels are used to polish metal surfaces, such as stainless steel and aluminum. The disk-shaped design allows for polishing both the surface and the edge of the wheel, making them adaptable to various products. They can evenly shave surfaces for a smooth finish or be angled for deeper cuts.

Principle of Offset Grinding Wheels

Offset grinding wheels, a type of grinding wheel, are made by combining multiple abrasive grains. They consist of abrasive grains, bonding material, and pores between them. The abrasive grains are bonded together by the material, with pores formed in the gaps. These pores help dissipate heat generated during polishing and provide space for shaving removal. One advantage of grinding wheels is their longevity; they can self-repair their sharpness as the abrasive grains on the surface are worn away, maintaining their grinding performance even with long-term use.

Differences Between Offset Grinding Wheels and Flexible Grinding Wheels

Offset grinding wheels have a convex shape and can cut more aggressively, potentially thinning or deforming the material. They are better suited for cutting rather than polishing and may leave deep scratches. In contrast, flexible grinding wheels are thinner and more adaptable to workpieces. They are suitable for grinding not only flat surfaces but also thin materials and curves, providing a wider, softer grinding area and a smoother finish.

How to Install and Use Offset Grinding Wheels

To use an offset grinding wheel on a disc grinder, install the wheel with the convex center facing the fixed flange. Tilt the grinder at an angle of about 15°-30° for usage. A larger angle provides a stronger polish but increases the risk of scratching and danger to the user. Since a new grinding wheel may bite into the material, initially grind by pulling the body and shaving the outer circumference to remove corners. Once rounded, either pushing or pulling can be used.

Safety Precautions in Using Offset Grinding Wheels

Safety is paramount when using offset grinding wheels. Ensure the wheel matches the grinder’s specifications, use it at or below the maximum operating speed, always attach the grinder’s cover, check the wheel’s condition, wear protective gear, secure the work area, and firmly fix the workpiece.

カテゴリー
category_usa

Natural Rubber Glove

What Is a Natural Rubber Glove?

Natural Rubber GlovesNatural rubber gloves are made from natural rubber, produced from the sap of rubber trees. These gloves are known for their high mechanical strength, resistance to tearing and scratching, and excellent elasticity.
Natural rubber gloves come in various thicknesses, suitable for different types of work. It’s important to note that natural rubber contains latex, which may cause allergic reactions in some individuals. Additionally, these gloves have low resistance to oils and organic solvents, making them unsuitable for work involving such substances.

Uses of Natural Rubber Gloves

Natural rubber gloves are easy to fit and suitable for detailed work. They are commonly used as general household gloves and for cleaning tasks. Additionally, they are often used in the manufacturing industry for parts inspection, quality testing, and sorting work due to their low risk of contamination. These gloves are also beneficial in construction, civil engineering, fisheries, agriculture, gardening, forestry, and livestock fields, especially for outdoor work, as they are less affected by external temperatures. Their flexibility in low temperatures makes them useful for work in cold climates and freezers.

Principle of Natural Rubber Gloves

The primary material in natural rubber gloves is isopropylene rubber. They are highly resistant to water, alcohol, basic aqueous solutions, and ABS detergents. However, they have low resistance to oils such as gasoline, kerosene, heavy oil, and diesel oil, and are not resistant to aromatic compounds like benzene and toluene, ether compounds like tetrahydrofuran, and chlorine compounds. This makes them generally unsuitable for work involving organic solvents.

Other Information on Natural Rubber Gloves

1. Manufacturing Process of Natural Rubber Gloves

Natural rubber is processed into three main forms: latex (liquid rubber), RSS (Ribbed Smoked Sheets), and TSR (Technically Specified Rubber). Latex is used for natural rubber gloves. Ammonia is added to prevent coagulation, and the latex is then filtered, centrifuged to remove impurities, and concentrated to produce latex concentrate. This concentrated latex is mixed with various agents and shaped using hand-shaped molds to form rubber gloves.

2. Allergy Symptoms of Natural Rubber Gloves

Natural rubber gloves contain various ingredients besides isopropylene rubber. Some individuals may develop latex allergies, sometimes severe. Therefore, if discomfort occurs while using rubber gloves, it’s recommended to stop using them immediately. Medical gloves, especially surgical and examination gloves, are increasingly being made from synthetic rubber to avoid the risk of latex allergies.

3. Quality of Natural Rubber Gloves

As natural rubber gloves are derived from natural materials, they may contain impurities like proteins, resins, and sugars, and must be checked before use. Additionally, variations in physical properties can occur due to the economic and climate conditions of the rubber-producing countries, affecting prices and availability.

カテゴリー
category_usa

Surveyor’s Wheel

What Is a Surveyor’s Wheel?

Measuring Wheels

Surveyor’s wheels, also known as surveyor’s wheels, measure distances by rolling along a surface. This tool is equipped with a wheel that records the length traveled, displaying it on a built-in counter. Surveyor’s wheels are highly valued in construction, land surveying, and various outdoor applications for their ability to quickly and accurately gauge long distances.

Uses of Surveyor’s Wheels

Surveyor’s wheels are widely used across different industries for tasks that require distance measurements. They are particularly useful in construction for assessing site dimensions, in real estate for determining property sizes, and in electrical engineering for estimating wire lengths. Additionally, surveyor’s wheels play a critical role in landscaping, road maintenance, and sports field design, where precise distance measurements are essential.

Principle of Surveyor’s Wheels

The principle of operation for surveyor’s wheels centers on the rotation of the wheel. As the wheel turns, it calculates the distance traveled based on the circumference of the wheel. This distance is then displayed to the user via an analog or digital counter. Surveyor’s wheels are designed for accuracy and ease of use, with features such as ergonomic handles and robust construction to ensure reliable measurements across various terrains.

How to Select Surveyor’s Wheels

When choosing a surveyor’s wheel, consider the maximum distance it can measure, the type of display (analog or digital), the accuracy and potential measurement error, and the minimum unit of measurement. Selecting a wheel that matches your specific needs will ensure effective and efficient measurement tasks. Additionally, consider the durability and material of the wheel to ensure it can withstand the conditions of your measuring environment.

カテゴリー
category_usa

Allen Wrench

What Is an Allen Wrench?

Allen Wrenches

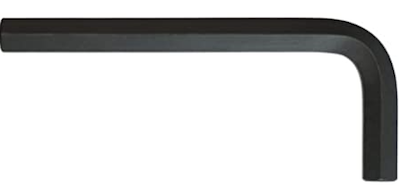
An Allen Wrench is a tool used for tightening or loosening screws with hexagonal sockets, similar to a hexagon socket wrench.

These wrenches are L-shaped with a regular hexagonal tip and have different lengths for the short and long arms.

The standards for Allen Wrenches include:

  • JIS B4648 Hexagonal Bar Wrench
  • ISO 2936 Assembly Tools for Screws and Nuts – Hexagon Socket Screw Keys
  • ASME B18.3 Socket Cap, Shoulder, and Set Screws, Hex and Spline Keys

Uses for Allen Wrenches

Allen Wrenches are typically used to fasten bolts and screws with hexagonal sockets. These specifically include:

  • Hexagon socket bolts (e.g., hexagon socket button bolts, hexagon socket countersunk bolts)
  • Set screws
  • Hexagon socket plugs

Different types of screw heads, such as Phillips and flat, are used for various applications. Hexagonal sockets are mainly used for fastening where a higher torque is required.

Principle of Allen Wrench

The principle of an Allen Wrench is straightforward: Insert the wrench’s hexagonal tip into the hexagonal socket of a bolt or screw, and turn it to tighten or loosen. The L-shaped design, with differing arm lengths, offers versatile usage depending on the application. For areas with limited space or requiring less torque, use the longer arm for leverage. Conversely, for tighter spaces or when more torque is needed, use the shorter arm.

Types of Allen Wrenches

Allen Wrenches are classified based on size, tip shape, materials, and other features.

1. Classification by Size

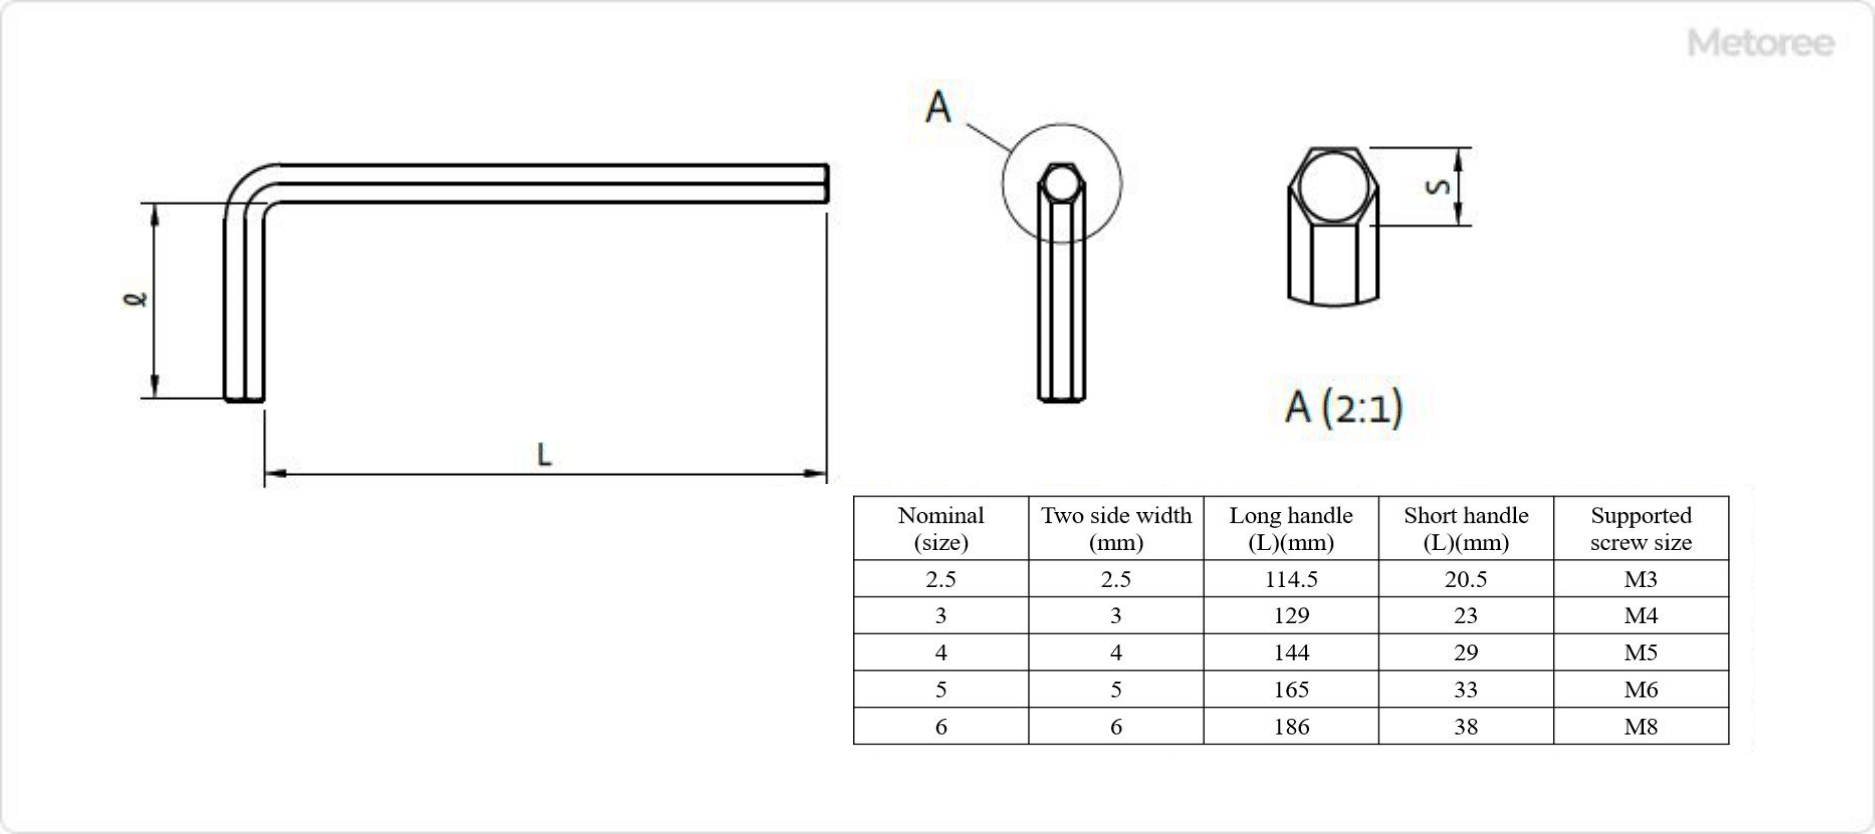
Figure 1. Example of hexagonal bar wrench sizes

Figure 1. Example of hexagonal bar wrench sizes

Allen Wrench sizes follow the JIS B4648 for millimeter sizes and ASME B18.3 for inch sizes. However, the length of wrenches sold may vary from the standard.

For JIS B4648 millimeter sizes, the bilateral width dimensions range from 0.7 to 46 mm. The length of the arms correlates with the width dimension. See Figure 1 for examples.

ASME standard wrenches come in inch sizes, with hexagonal dimensions ranging from 1/16 to 3 inches.

2. Classification by Tip Shape

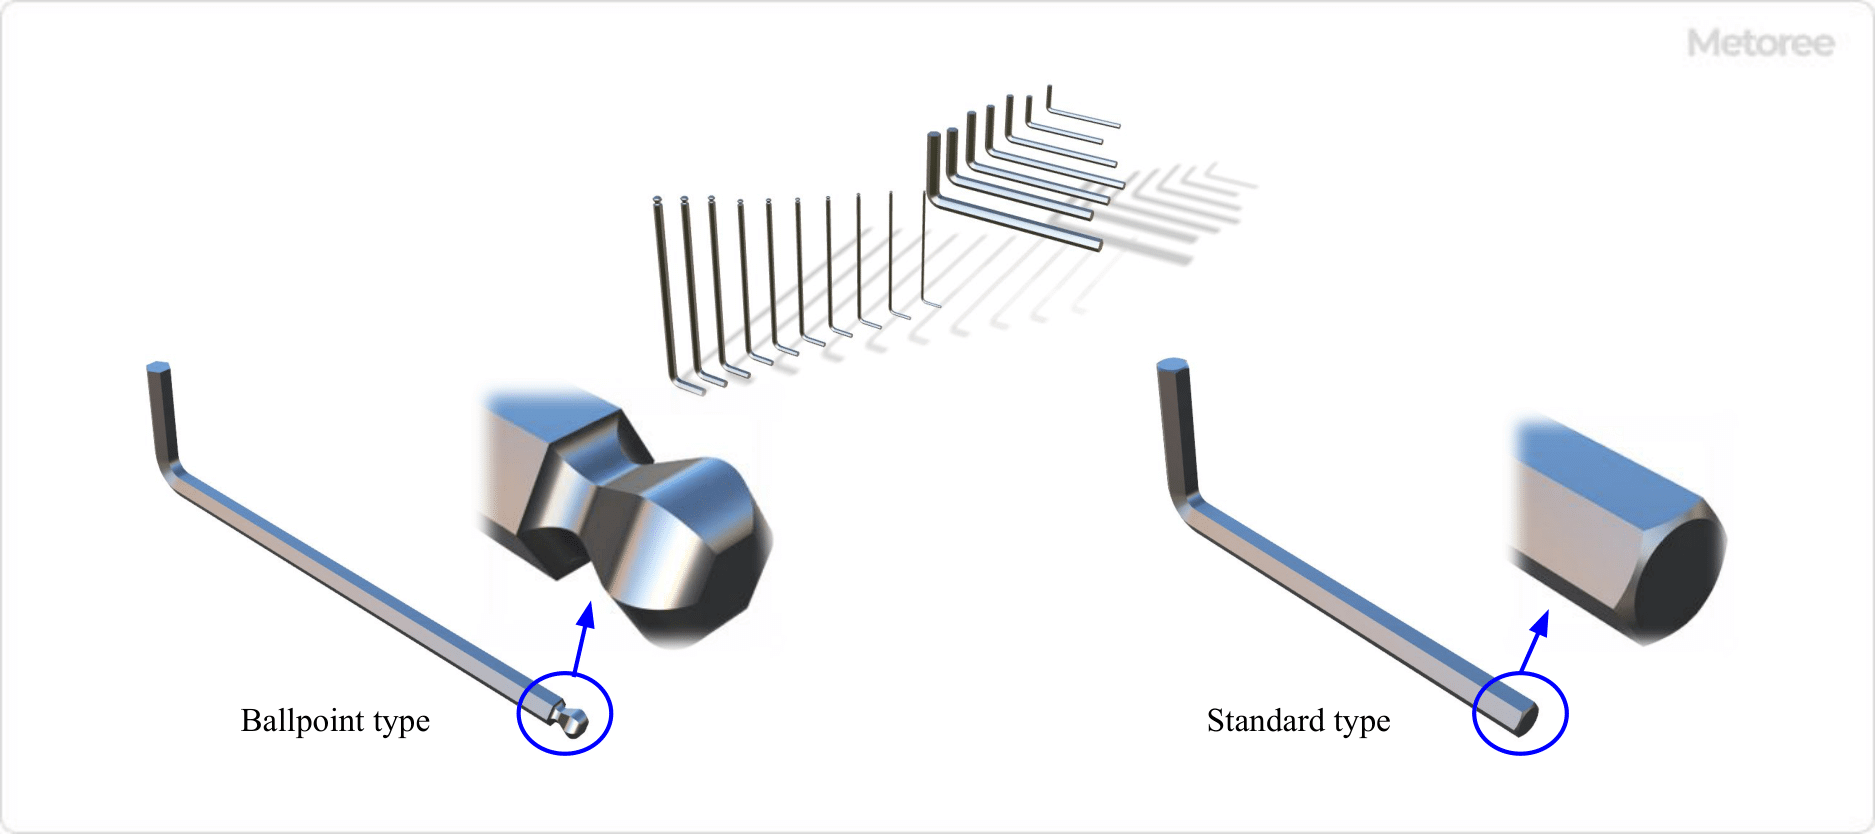
Figure 2. Tip shape of hexagonal bar wrench

Figure 2. Tip shape of hexagonal bar wrench

Allen Wrench tips come in two shapes: a standard hexagonal and a ball-point with chamfered corners. The ball-point allows for angled insertion, useful in hard-to-reach areas, whereas the standard tip is used for direct, perpendicular insertion. However, the ball-point type may not be suitable for high-torque tightening.

3. Classification by Material and Surface Treatment

Common materials for Allen Wrenches include chrome molybdenum steel, chrome vanadium steel, and stainless steel. Surface treatments like black dyeing, nickel plating, and chrome plating are common, except for stainless steel wrenches.

4. Others

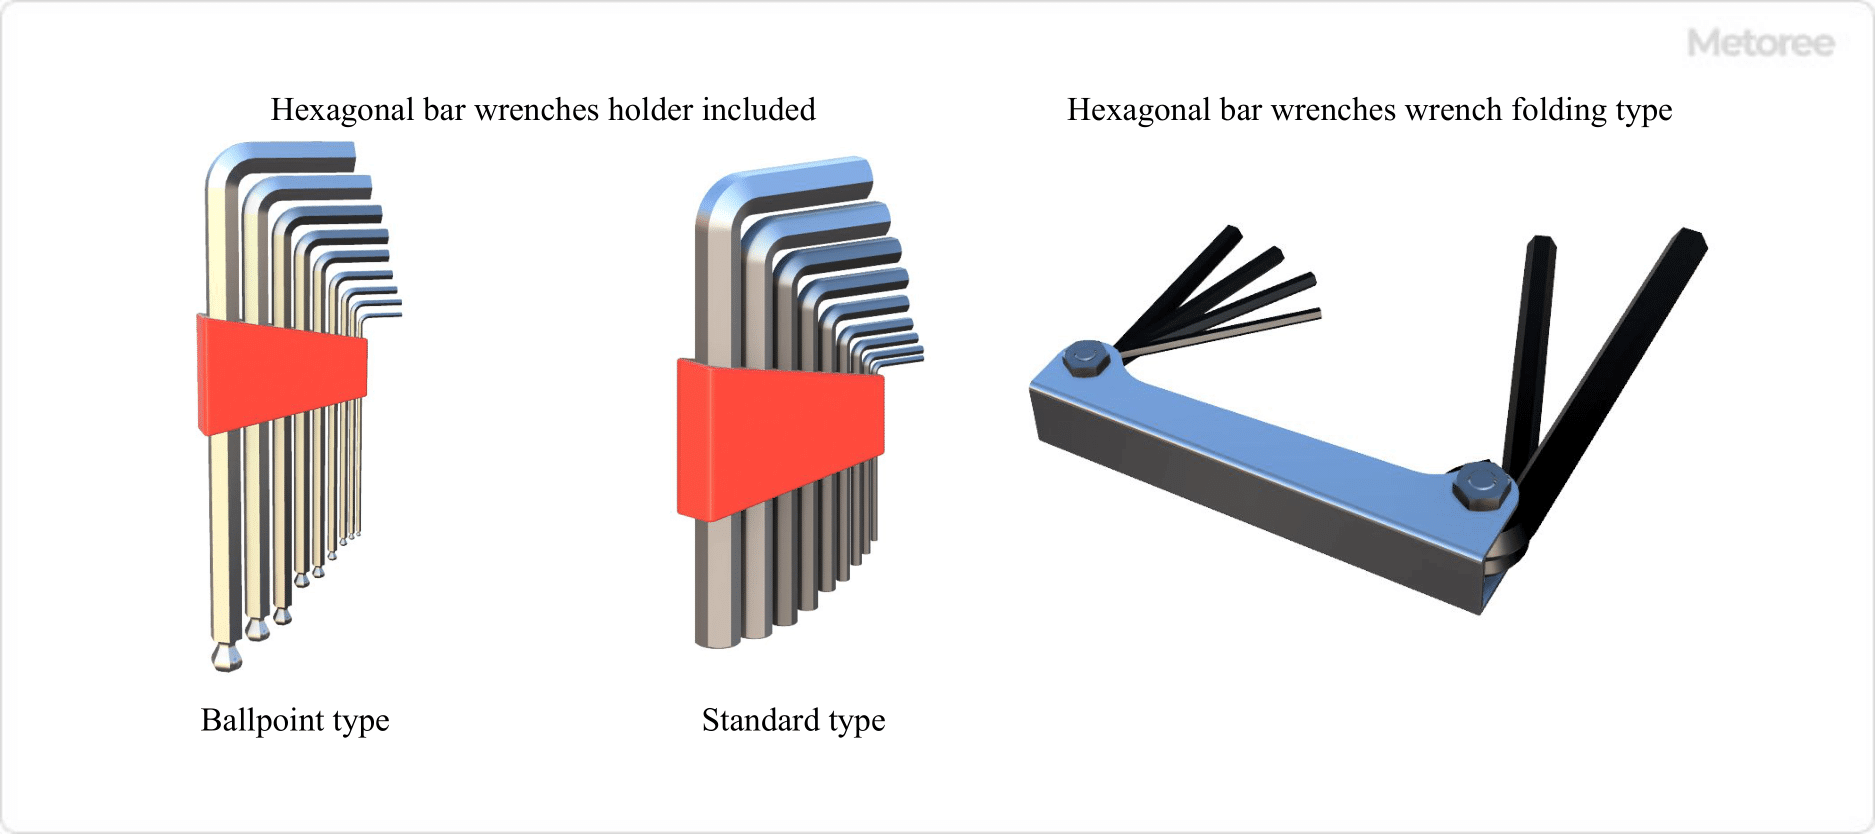
Figure 3. Hexagonal bar wrenches with holder and folding type

Figure 3. Hexagonal bar wrenches with holder and folding type

Allen Wrenches also come in sets with holders or as folding types, where multiple sizes are contained in one tool. This design is convenient for storage and selection of the required size.