カテゴリー
category_usa

Tool Bag

What Is a Tool Bag?

Tool Bags

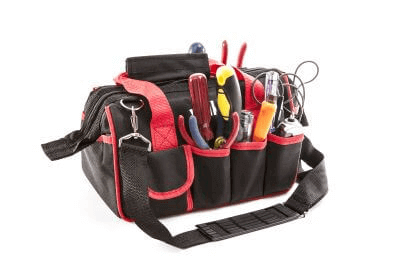
A tool bag is a special bag for storing small tools such as power tools, screwdrivers, and other small items.

By storing tools that do not fit into a tool belt, they can be quickly retrieved when needed and also reduce the weight of the tools on the belt.

Tool boxes can be used for storing tools, but since they are heavy and difficult to carry, tool bags are useful in the field where there is frequent travel. In addition, a tool bag made of soft material will not damage construction materials or materials on the job site.

Uses for Tool Bags

Tool bags are not only used for transporting tools and other materials to the job site, but may also be used for storing tools directly in the bag after use.

Tool bags are also used for storing pre-determined tools in order to save time and effort in loading and unloading necessary tools each time they are transported, or to prevent forgetting necessary tools.

Types of Tool Bags

There are two types of tool bags: those with dividers and zippers for easy organization, and genuine tool bags that fit tools neatly. Genuine tool bags are used for storing and transporting expensive or fragile items such as power tools and precision instruments.

Tool bags come in a wide variety of sizes, from small pouch-type bags that wrap around the waist to hold relatively small and frequently used tools such as screwdrivers and wrenches and can be worn on the job site, to large tool bags with wheels. In general, they are often used to carry tools close to where they will be working on a construction site.

A tool box is a container similar to a tool bag, but since tool boxes are boxes and therefore difficult to carry, tool bags made of flexible fabric are more suitable for carrying tools over long distances.

How to Select a Tool Bag

Tool bags come in a variety of sizes and functionalities, so choose the one that best suits your work environment, taking into consideration how often you need to carry the bag and how often you need to open and close it. Also, check for safety features such as load capacity and whether there is a mechanism (e.g., zipper) to prevent tools from popping out of the bag. The following is a summary of points to consider when selecting a tool bag.

1. Size

Small, compact tool bags are easy to carry spare tools in. Larger tool bags can easily hold tools with long handles.

2. Material

Cloth bags are sturdy and durable, making them convenient for storing tools that are frequently taken in and out of the bag. Those made of polyester can be water-repellent, making them suitable for outdoor use in rainy weather or at sites where they may get wet. Those made of leather can safely store tools with sharp edges such as knives and pincers, and tools with pointed tips.

3. With or Without Cover

If the bag has a cover, it can protect tools from dust and dirt. It also prevents dirt from sticking to the inside of the tool bag, making it easy to clean. Without a cover, tools can be easily removed from the bag, but it is not suitable for use at sites where dust is likely to be generated.

4. Pockets

The more pockets you have, and the more sizes, the more tools and accessories you can store. Also, having a designated place to store tools will prevent them from being lost.

5. Type of Handle

There are various types of handles, such as tote type, shoulder type, backpack type, and carry type. If the bag has handles, check whether they are movable or not. If it has handles, it is easier to carry. On the other hand, when working, it is easier to take out tools when there are no handles.

Other Information on Tool Bags

How to Use the Tool Bag

Before using the tool bag, check for cuts, fraying, or deformation. When storing tools, pay attention to the following.

  • For tools with blades, be sure to close the blades and store them in such a way that the blades do not face the opening.
  • For power tools, disconnect the battery or lock the battery to prevent malfunctions before storing the tools.
  • Do not store more than the load capacity of the tool bag, and make sure that no tools are popping out of the bag or overflowing.
  • Avoid placing the tools near fire or electric tools that generate high heat.
カテゴリー
category_usa

Parts Box

What Is a Parts Box?

A parts box is a case for storing bolts and nuts.

In addition to bolts, they are also used to store small parts such as crimp terminals and air fittings.

There are assembly types that can be stacked or lined up, as well as portable types that have partitions inside a case with a lid. There are also parts boxes used as shelves with numerous drawers. Most are made of plastic, but some have steel cases.

How to Use a Parts Box

Although parts boxes are intended primarily for storing items, they can be used in a wide variety of ways.

  • Installed and Used as Shelves
    Shelf-like or assembled parts boxes are often used as parts shelves. In the case of the assembly type, the shelves can be expanded by adding more tiers, as they can be freely customized to some extent.
  • Portable Use
    Case-type parts boxes with lids are suitable for portable use. Some parts boxes are equipped with handles.

How to Choose a Parts Box

There are two types of parts boxes: plastic and steel.

Features of Plastic Type

1. Lightweight
Compared to the steel type, the plastic type is lighter and therefore easier to carry.
2. Easy to See
Since many plastic types have transparent cases, you can check what is in the box without opening the lid. This reduces the number of times you have to check the contents, which leads to shorter working hours.
3. Fragile
Because they are plastic, they are vulnerable to impact and break easily. It can also become brittle quickly depending on the environment.
4. Only Lightweight Items Can Be Stored
When heavy items are stored, the bottom will fall out, so only light items can be stored.

Features of Steel Type

1. Sturdy
Because it is made of metal, it is sturdy. It can withstand some impact.
2. Heavy Items Can Be Stored
Even if you put in some heavy items, the bottom will not fall out. However, if it is too heavy, it will be difficult to carry.
3. You Can’t See What’s Inside
When the lid is closed, the contents cannot be seen, so it is necessary to open the lid to check the contents.

カテゴリー
category_usa

Hydraulic Puller

What Is a Hydraulic Puller?

A hydraulic puller is a tool used to remove gears and bearings using hydraulic force.

Gear pullers and bearing pullers pull out gears or bearings with the force of a screw, while hydraulic pullers use stronger hydraulic pressure.

Hydraulic pullers use stronger hydraulic pressure, which is especially necessary when removing bearings that have been hard-fitted together. They can also be used as a last resort to remove rusted or seized gears and pulleys that cannot be removed with a threaded puller.

How to Use a Hydraulic Puller

Hydraulic pullers, like gear pullers and bearing pullers, are used by hooking the jaws onto the object and pulling it out. However, a hydraulic cylinder is used for the part that touches the shaft.

The rod of the hydraulic cylinder is placed against the shaft while the hydraulic puller hooks its jaws onto the object. Then, oil is fed to the hydraulic cylinder with a manual hydraulic pump. The handle of the hydraulic pump applies many times more force to the hydraulic oil than is applied by hand due to the principle of leverage, resulting in strong pressure that propels the hydraulic cylinder forward. Each time the hydraulic cylinder moves forward, the object is pulled out.

How to Choose a Hydraulic Puller

There are several types of hydraulic pullers. The main difference lies in the mounting method of the hydraulic cylinder. Here are the advantages and disadvantages of each:

  • Direct Mounting Type
    The hydraulic cylinder is directly attached to the extrusion. The hand pump for pressurization is often directly connected to the cylinder. Since the hand pump is directly attached to the main body, the hand pump used cannot be too large, and the pushing force is somewhat smaller.
  • Feed Screw Bottom Type
    A hydraulic cylinder is attached to the bottom of the feed screw for pushing. When the tip of the hydraulic cylinder is applied to the shaft, it can be set quickly by bringing it close to the screw. Many types of hand pumps are connected with a hose. Since the hand pump can be installed separately, its size can be increased. Therefore, the hydraulic pressure delivered is also larger, and gears and bearings can be pulled out with very strong force.
カテゴリー
category_usa

Bearing Puller

What Is a Bearing Puller?

A bearing puller is a tool used to remove bearings assembled in facilities and equipment. By using the force of the screw to pull out the bearing, even bearings that are difficult to pull out by hand can be easily removed.

A similar tool is the gear puller, distinguished by its notably different jaw shape. Given that Gears are typically used individually, gear pullers feature thicker hooks and longer jaws. However, because two or more bearings are often stacked together, the jaws of a bearing puller are thinner and shorter so that they can fit into the gap between them.

There are also types of bearing pullers that hook onto the inner ring as well as the outer ring of the bearing.

How to Use a Bearing Puller

To use a bearing puller, hook the jaws onto the outer circumference of the target bearing and tighten the bolts to hold the jaws in place so that they do not come off. Then, tighten the center bolt until it hits the shaft on which the bearing is assembled. While supporting the center bolt and pawl so that they do not come off, apply a wrench or the like to the hexagonal part and tighten it hard, and the bearing will be pulled out by the pawl.

For the bearing puller for the inside diameter, as the center bolt is screwed in, the jaws spread out and catch on the inside diameter. Once the pawl is firmly hooked, pull it out in the manner of a knock pin extractor. In addition to that type, there is also a type that can be pulled out by screwing in the same way as for the outer ring.

How to Select a Bearing Puller

To use a bearing puller, it is first necessary to select one for the outer ring or the inner ring. For bearings attached to a shaft, select a type that hangs its jaws on the outer ring. For bearings attached to another case like a bearing box, select a type that hangs on the inner ring.

The size of the outer ring will vary from body to body. One type of bearing puller is sufficient for a certain size bearing. However, if the bearing is too large or too small, a different-size bearing puller must be used. Poor jaw fit can lead to bearing damage and jaw wear.

Selecting the size for the inner ring allows the jaws to be interchangeable so that multiple sizes of jaws can be provided for one set of main units. If the correct size for the bearing is not chosen, the pawl may disengage when pulled. Ensure the pawl is securely hooked onto the bearing before extraction.

カテゴリー
category_usa

Wedge

What Is a Wedge?

A wedge is a triangular or V-shaped tool made of metal or wood. A wedge is inserted into a gap between objects to widen the gap or fix the position of the object.

Wedges made of resin are also available, with a familiar example being a door stopper, which is also a type of wedge. Basically, the thinner end is inserted and the thicker end is struck with a hammer or pushed in by hand. Wood or resin-made ones are elastic, providing them with high holding power without causing damage to the other party.

Uses of Wedge

A wedge serves various purposes, primarily used to apply force that cannot be achieved by hand, either to break or securely position objects with substantial force.

  • Breaking Objects
    Wedges can be used to break many kinds of objects. Stone, wood, and metal can also be broken with wedges.
  • Fixing objects
    Wedge has great holding power when it is driven into a gap. It is also used in wood construction, and if it fits perfectly, it can make a strong pillar or other structure. Kusabi is also used for door stoppers and car wheel stoppers, making it a familiar material.

How to Select Wedge

Wedge can be selected according to its shape and material.

  • Wedge Shape
    The most important factor in selecting Wedge is the size of the V-shaped angle. If you are looking for holding power, a small angle is sufficient. However, if you want to break something, you need to choose a large angle because you need to be able to pull it apart. Wedges play an important role in wooden structures such as temples because they do not use nails. It is necessary to measure the size according to the pillar to be used and sharpen it to fit perfectly.
  • Wedge Material
    When selecting a wedge based on material, opt for wood or resin if you prioritize holding power. These materials are highly resilient and won’t scratch the object. Many wedges made of resin with folds are sold to increase holding power. However, metal wedges are used in production equipment to support parts that are subject to heavy loads. When used to break objects, metal wedges are used for their destructive power.
カテゴリー
category_usa

Chisel

What Is a Chisel?

Chisels are used to cut off rusted parts of bolts and to strip spot welds. When cutting or bending steel plates, the names are used as classifications. When they are attached and used with electric or hydraulic breakers, they are often called chisels.

The main uses of chisels are for chipping, deburring, and surface stripping of welds.

Uses of Chisels

Chisels are used for the following operations.

  • Deburring of Arc Welding
    During arc welding (a welding method using electrical discharge), metal particles (molten metal) called spatters scatter and adhere to the weld during operation. Since these spatters degrade the surface quality, they are removed with a chisel before painting.
  • Concrete Removal Work
    Chisels are used to chisel and drill holes in concrete at demolition, new construction, and renovation sites. It is often used for work that requires precision and for cutting stone for block assembly and tile assembly.
  • Spot Weld Stripping
    Spot welding (a method of applying electricity to a steel plate and using its power resistance for pressure welding) is used for automobile chassis and other applications because it has few welding areas and is suitable for mass production. In automotive sheet metal painting, it is necessary to strip the surface areas of these spot welds. Chisels for sheet metal are designed to be inserted into narrow gaps in the chassis structure to allow work to be performed.

How to Choose a Chisel

1. Types:

Chisels can be broadly classified into the following five types.

(1) Flat Chisel
This is the most common type of chisel, and looks like a larger flathead screwdriver. It is mainly used for concrete removal work, but can also be used for various purposes.

Since the force applied to the striking head is efficiently transmitted to a small area, it can also be used for accurate grooving and shaving. On the other hand, it is not suitable for cutting and crushing bricks and blocks.

(2) Brick Chisel
Because the blade is large and the force of the blow head can be transmitted evenly, it is suitable for use in breaking hard and wide blocks such as fire bricks. Since the JIS standard defines the width of Japanese bricks as 60 mm, it is recommended to select a blade with a slightly larger width than that.

(3) Cutting Chisel
Suitable for cutting blocks, splitting bricks, and peeling P-tiles, etc. It is also used for peeling off white lines marked on paved roads.

(4) Slot Chisel
Slot chisels are used for sheet metal work, deburring, and bolt cutting. Since the handle is plate-shaped, unlike a hammer, the cutting edge does not rotate when struck with a hammer, and accurate grooves can be engraved. The width and thickness do not change much from the handle to the cutting edge.

(5) Pointed Chisel
This is a stake-shaped type of chisel. Since the force is concentrated on a single point, processing can be done even with light hammering force. It is especially suited for drilling holes and grooves in concrete. It can also be used for crushing, but not for cutting.

2. Size: Select the Size That Best Suits Your Application.

In general, the shorter the overall length, the easier it is to handle and carry. However, when cutting blocks, there is a possibility of hitting your hand with too much force. Select a length that is easy to use depending on the intended use.
As for the width, we recommend a wider blade width of 80 to 100 mm, since the cut surface is more beautiful when cutting bricks and blocks in a single cut.

カテゴリー
category_usa

Engraving Service

What Is an Engraving Service?

An engraving stamp, also referred to as a carved seal, engraved stamp, or marking, is a tool used for engraving letters or numbers on metal plates or leather. An engraving is sometimes used to refer to “engraved letters,” but here it is described as “a tool used for engraving.”

The tip of the thin rod-shaped part has a convex mold of letters or numbers, and the tool is stamped by pressing the molded part of the tip against a metal plate or leather and tapping it. An engraving service requires one letter to be engraved. Therefore, it is necessary to have enough tools for each letter or number to be engraved.

Although the use of engraving services has been decreasing recently due to the development of laser processing machines, they are still used for small-quantity nameplate production.

Uses of an Engraving Service

Engraving services are used for the following applications:

1) Engraving on nameplates and nameplates of mechanical products, such as serial numbers, individual product control numbers, production dates, dimensions, and specifications.

2) To imprint the manufacturer’s name or brand name on leather products.

Item 1 is very important for product quality control as it provides information on the manufacturing history (traceability) of individual products.

When using a hammer or other tool for manual stamping, mount the engraving services on a holder with the required number of characters lined up to shorten the work time, align the engraved characters, and stamp them with even force. This results in a clean finish.

How to Select an Engraving Service

The following points should be considered when selecting an engraving service:

1. Normal and Reverse Characters

There are two types of engraving services: “Normal” and “Reverse.” “Normal” engravings, like seals, can be recognized as characters in the same direction as they are engraved, while “Reverse” engravings are characters that are backward (reverse or mirror characters) in the engraving direction and not legible as is.

Normal characters are mainly used for nameplates.

Reverse characters are mainly used for molds, etc., and are readable as positive characters in the state of the product produced by stamping on the mold.

2. Tip Shape

Engraving services are available in various tip shapes, depending on the application.

a. Engraving services (standard) have a sharp point at the tip of the letterforms, which provides excellent imprinting of the engraving and is suitable for metal engraving.

b. Solid engraving services have a flat tip on the letterforms.

c. Low-stress engraving services have a rounded tip on the letterforms, which allows low-stress stamping and does not place a load on the other surface.

d. Braille low-stress engraving services are a combination of Braille and low-stress.

3. Character Size (Character Height)

Several character sizes (character heights) are available, and the required character size is selected. Examples of sizes include character height dimensions from 1.5 mm to 16 mm.

カテゴリー
category_usa

Lever

What Is a Lever?

A lever is a tool that uses the principle of leverage, consisting of a fulcrum, a force point, and an action point. A single fulcrum and a bar are all that is needed to use it as a lever.

There are many tools in the world that use the lever principle. A typical example is a nail puller. A crowbar used for lifting and shifting heavy objects is also a type of lever.

Scissors and pliers also use the lever principle and can be considered as types of levers.

Uses of a Lever

Levers are used to amplify and utilize the force applied. For example, it would be very difficult to remove a nail from a piece of wood with only the force of a finger. However, with a nail puller, the nail can be pulled out in an instant by the lever principle.

They are also used to carry heavy objects. Wooden sticks were used as levers when the pyramids were built in ancient Egypt. Other times, they are used for cutting, such as with scissors or nippers.

How to Select a Lever

There are many ways to use levers. Here we introduce the shapes and names of leverage tools according to their uses, so you can refer to them when selecting a tool.

  • Pulling
    This is the simplest lever and is often rod-shaped. It has a fulcrum in the middle and force and action points on both sides.
    ・Nail puller
    ・Crowbar
  • Lifting and Carrying
    As with the puller, there are many simple shapes. There are force points and action points on both sides with a fulcrum in between.
    ・Crowbar
    ・Drum lifter
    Carrier
  • Gripping
    Two arms are used to grip and hold an object. The two arms intersect at the fulcrum, with the handle as the force point and the gripping part as the action point. There are also types like tweezers that have a fulcrum at one end, a point of action at the other end, and a force point in between.
    ・Pliers
    ・Tweezers
    ・Tongs
  • Cutting
    The principle is the same as the gripping tool, but the point of action is the blade. Two arms intersect with the fulcrum as the intersection point, with the handle as the force point and the cutting portion as the point of action. Also a type with a fulcrum at one end, an action point at the other end, and a force point in between, like a thread cutter.
    Nippers
    ・Scissors
    ・Thread cutter
カテゴリー
category_usa

Hammer Handle

What Is a Hammer Handle?

A hammer handle is the part of a hammer held in the hand and distributed separately from the head.

The appropriate hammer handle must be selected to match the hammerhead. Using an inappropriate hammer handle will not only result in inadequate hammering but may also cause accidents due to broken hammers. On the other hand, proper hammer handle replacement can lead to continued use of a familiar tool.

How to Use a Hammer Handle

Hammer handles must be properly attached to the hammerhead with a wedge or the like before use. It is important to check the hammer handle before use to prevent accidents.

The hammer handle should be held in a position that balances the weight of the hammerhead. If a heavy hammerhead is attached, it is essential to select a hammer handle made of a material that will not slip due to sweat, etc., or to cover it with non-slip tape to prevent accidents.

The length of the hammer handle should be short for work in a confined space and long for work that requires striking force, to improve work efficiency.

How to Select a Hammer Handle

Hammer handles should be selected with the following points in mind, depending on the intended use of the hammer.

1. Purpose of Use

For hammers with metal heads, select a hammer handle that can withstand the weight of the hammer.

2. Overall Length

The overall length of hammer handles ranges from about 26 mm for commonly used one-handed hammers to nearly 1400 mm for long hammers such as those used for quarries.

3. Head Diameter

The diameter of the hammer handle’s head ranges from 8 mm for small one-handed hammers to 30 mm for large hammers. A wedge to secure the hammer to the head is also required.

4. Material

The material of the hammer handle should be selected per the head and the intended use. Some wooden hammer handles are made of strong wood.

カテゴリー
category_usa

Incandescent Lamp

What Is an Incandescent Lamp?

Incandescent Lamps

An incandescent lamp is a lighting device that emits light by heating a filament inside a glass enclosure to temperatures between 2,000 and 3,000°C. A variant, the halogen lamp, uses a halogen gas-filled glass tube to prolong its lifespan.

Despite their higher energy consumption and shorter lifespan compared to fluorescent lamps and LEDs, incandescent lamps remain in use for their dimmability and unique color production, particularly in retail and commercial settings.

Uses of Incandescent Lamps

Historically favored for their low installation cost and superior color quality, incandescent lamps have found niche applications that capitalize on these attributes. They offer a continuous spectral distribution, unlike the peaky distribution of fluorescent lamps and LEDs, making them ideal for settings where natural color rendition is critical, such as restaurants and living rooms.

Structure of Incandescent Lamps

Comprising a mouthpiece, tungsten filament, and glass tube filled with an inert gas like argon or nitrogen, incandescent lamps are designed to efficiently convert electricity into light.

1. Support Wire

Introduces electricity into the bulb, typically made of nickel wire.

2. Sealing Wire

Leads electricity into the bulb through the base, using copper-coated nickel steel wire, with halogen lamps often utilizing thin molybdenum foil.

3. Fuse Wire

Acts as a safety feature to prevent overcurrent, made from constantan wire.

4. Filament

The primary light-emitting component of the lamp.

5. Anchor

Supports the filament using molybdenum wire.

6. Bulb

Encloses the filament, made from either soft soda glass, hard borosilicate glass, or quartz glass for halogen lamps.

Principle of Incandescent Lamps

Light is generated when an electric current heats the filament inside the bulb, emitting light across a continuous spectrum with a peak in the infrared. Argon or nitrogen gas within the bulb prevents the filament from deteriorating quickly.

Halogen lamps enhance luminous efficiency through higher operating temperatures, using quartz glass and halogen gas to prolong filament life via a regenerative cycle.

Types of Incandescent Lamps

Various designs cater to different lighting needs, from decorative to functional.

1. Silica Bulb

Offers a simple design with a frosted finish for diffused light.

2. Clear Bulb

Provides high brightness with a transparent enclosure for sparkling light effects.

3. Ball Bulb

Delivers a soft, ambient light with its spherical shape.

4. Mini Light Bulb

Small, with a shorter lifespan, suitable for frequent replacement.

5. Small Round Bulb

Compact and durable, with a lifespan of up to 5,000 hours.

6. Reflex Bulb

Features an internal reflector for directed lighting, ideal for spotlighting.

7. Krypton Bulb

Lasts twice as long as standard bulbs, with about 10% reduced power consumption.

8. Mini Krypton Bulb

Small but bright, used for accent lighting in bathrooms and vanity areas.

9. Chandelier Bulb

Designed to mimic the appearance of flames, enhancing the aesthetic of chandeliers and pendant lights.