カテゴリー
category_usa

Sheet Metal Scissors

Understanding Sheet Metal Scissors
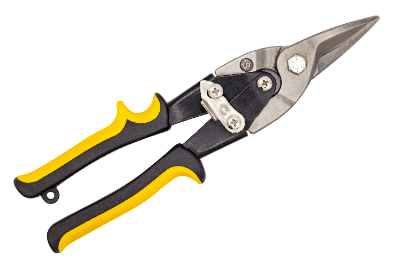
Sheet Metal Scissors

Sheet metal scissors, essential tools in sheet metal processing, facilitate cutting through the action of two crossing blades. They excel at slicing through steel plates, tinplate, and more.

Distinct from standard shears, sheet metal scissors are available in a broad array of sizes and types. Their design features a long grip relative to the blade, which may be back-skived, warped, or threaded to enhance sharpness, enabling significant shearing force. However, their unique design nuances classify them as tools primarily for craftsmen.

Applications of Sheet Metal Scissors

Sheet metal scissors find utility across various sectors due to their versatility. They play a pivotal role in construction and metal fabrication, cutting through steel and aluminum plates, along with wire.

They are commonly used for:

  • Auto body part trimming.
  • Roofing material and flashing cutting.
  • Home DIY metalworking projects.
  • Plumbing installations involving metal plate working and sheet metal cutting.
  • Jewelry creation.
  • Metal furniture and ornament crafting and restoration.

How Sheet Metal Scissors Work

Operating on the leverage principle, similar to regular scissors, sheet metal scissors use the rotation center as the fulcrum, applying force to the handle to shear metal. This force encompasses the linear shear to cut the material, the bending load due to material bending, and the frame friction of the scissors.

Choosing the Right Sheet Metal Scissors

With a multitude of blade shapes and materials offered by various manufacturers, selecting the ideal sheet metal scissors depends on the specific application.

Blade Shape

Blade shapes are primarily categorized into three types, each suited for different cutting needs:

  • Straight Blade: Ideal for smooth, even cuts in straight lines.
  • Willow Blade: Offers flexibility for cutting straight or curved lines, featuring a pointed tip for ease of cutting and smooth finishes.
  • Gouging Blade: Best for creating holes in tin plates and executing sharp curves, perfect for detailed and precise work.

Other variants include corrugated plate cutting scissors and Western scissors with a double-strength structure, enhancing ease of use and achieving finer finishes.

Blade Material

The material is crucial for the scissors’ durability and cutting performance:

  • Yasugi Steel: Known for its hardness and composition variety, this steel is a popular choice in many Japanese blades.
  • Molybdenum Steel: An upgrade over standard stainless steel, offering prolonged sharpness and excellent rust resistance.
  • HSS (High Speed Steel): Known for its hardness and ability to efficiently cut through thick and hard materials while maintaining sharpness over time.
  • SLD Steel: Distinguished by its high hardness and toughness, it offers a balanced performance with enhanced rust resistance.
  • ZDP Steel: Utilizing powder metallurgy technology, it stands out in hardness, corrosion resistance, wear resistance, and toughness, though its hardness may complicate blade setting and sharpening.
カテゴリー
category_usa

Chalk Line

What Is a Chalk Line?

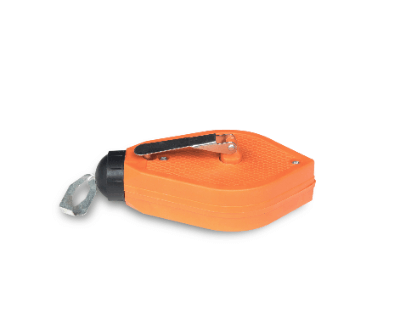
Chalk LinesA chalk line is a carpenter’s tool used to draw a straight line on the surface of a piece of wood or other material.
Uses of Chalk Line

Chalk lines are essential for drawing straight lines in construction, equipment installation, electrical work, and shipyard tasks. They’re used for various purposes, including:

    • Marking building dimensions and room partitions
    • Locating piping
    • Positioning beams and columns during construction
    • Placing lighting fixtures and inserts
    • Cutting with saws and other cutting tools
    • Work in shipyards

Principle of Chalk Line

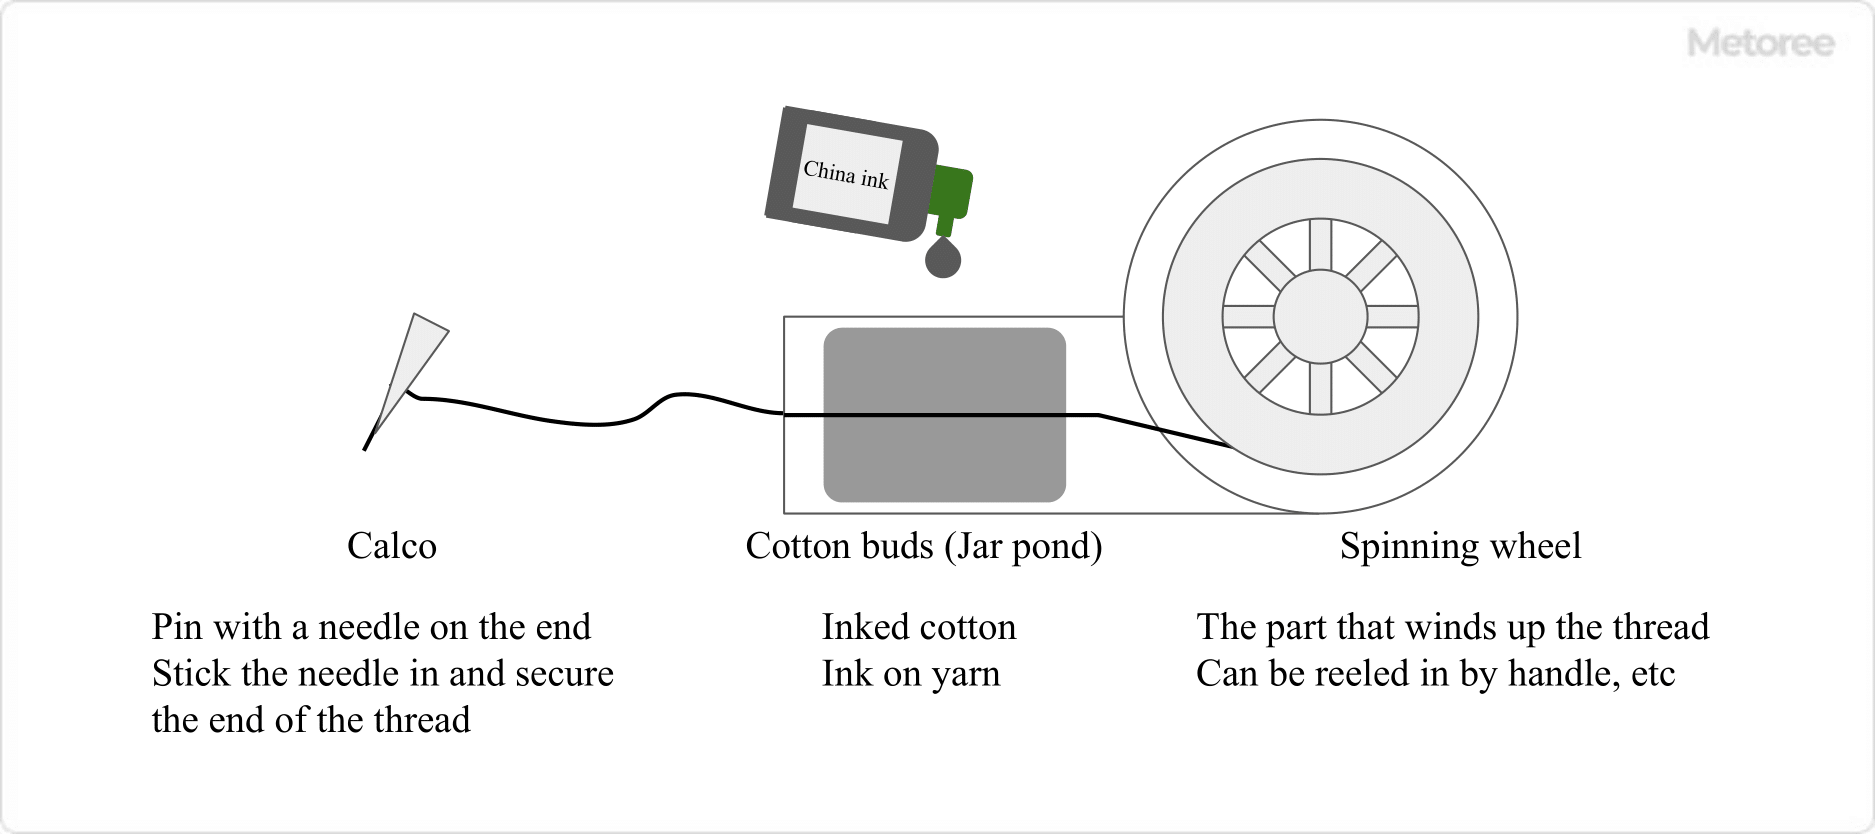
Chalk-Lines_墨つぼ-1

The chalk line consists of a jar containing inked cotton inside, a string wheel on which the string is wound, and a pin component called a crank that holds the string in place at the end of the string. Generally speaking, resin is used for the exterior of ink pots, nylon for thread, and cellulose for cotton.

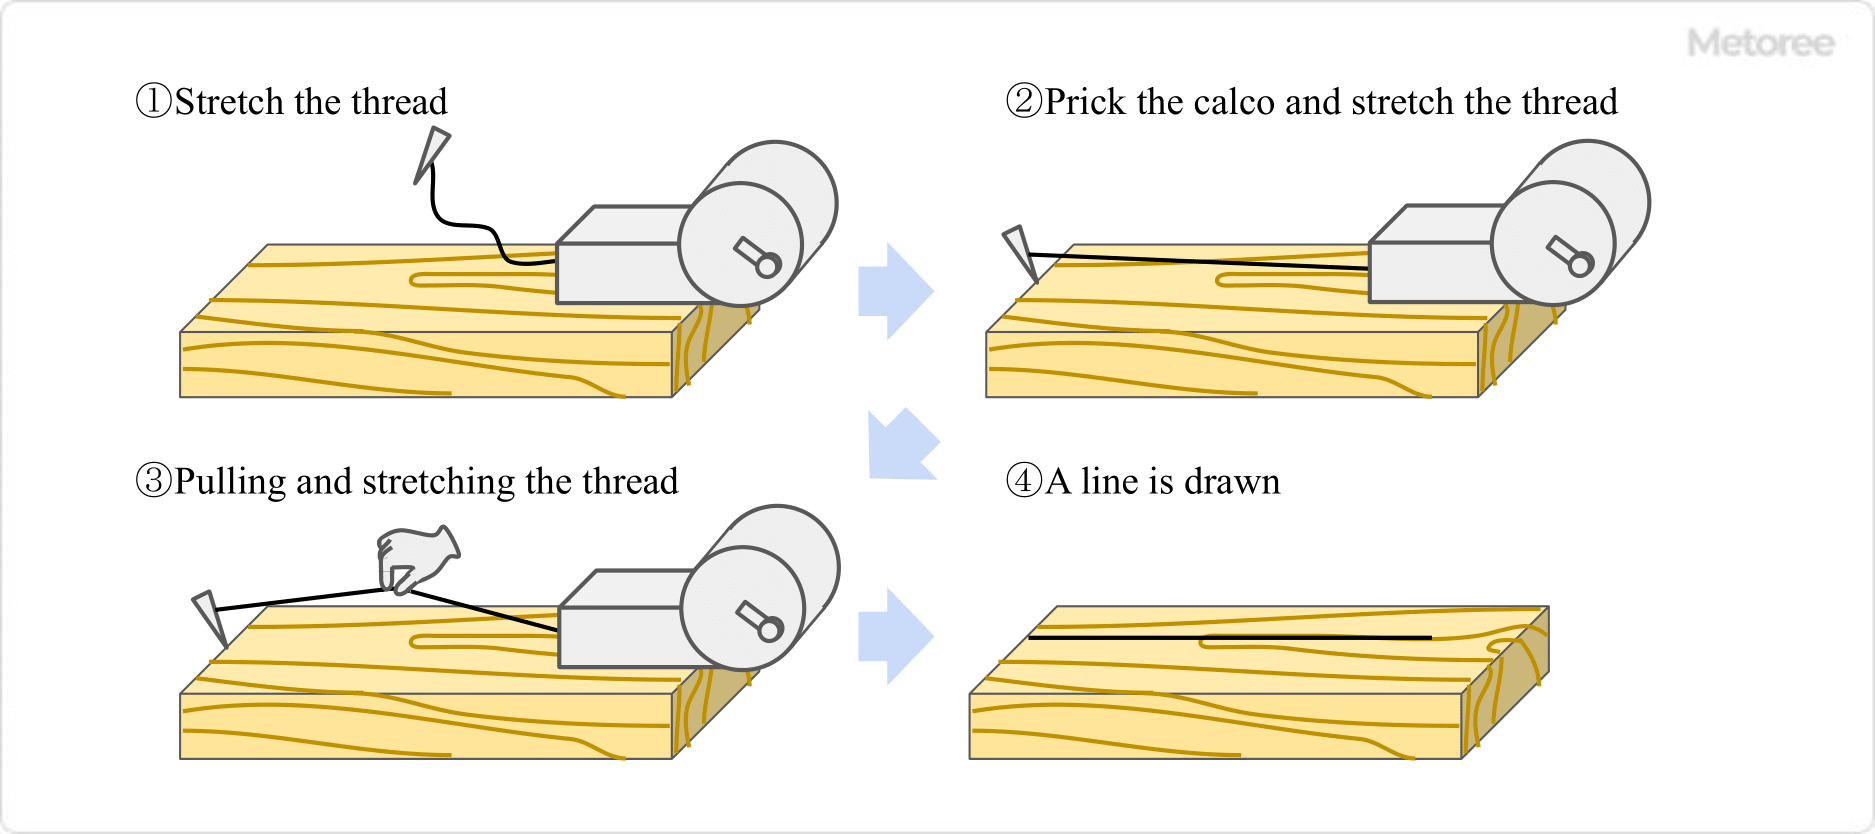
Chalk-Lines_墨つぼ-2.

After inserting the chalk line into the lumber or other material on which you wish to draw a line and fixing it in place, slowly pull out the thread. The string passes through the inked cotton, coating it with ink to mark lines on materials like lumber.

How to Select a Chalk Line

Chalk lines are tools used to mark straight lines with ink.

1. Thread Restrainer on the Body Side

Some chalk lines have a thread restrainer attached to the body so that you do not have to restrain the inked thread with your fingers and keep your hands clean. There are two types of thread restrainers: the diagonal cut type and the crane-neck type. The diagonal-cut type makes it easy to see the tip of the chalk line and also allows the thread to be held steady.

The crane-neck type has a rod-like part that extends from the chalk line to hold the thread, making it ideal for use in tight spaces such as corners and other places where it is difficult to hold the thread. Contrary to the diagonal cut type, the part that holds the thread is narrow, making it a little unstable to fix the thread.

2. Thread Take-up Method

There are two types of chalk line thread take-up methods: manual and automatic. Automatic winding is more efficient because the thread can be wound up in an instant, but it may be pulled too hard when rewinding and may cause the chalk to stick.

It is safer to choose a rewinder with an automatic deceleration function or a function that prevents chalk from flying toward the needle. Manual rewinding is not as fast as automatic rewinding. However, if you use a type with more gears to increase the rewinding speed, rewinding is not that difficult.

3. Thread

The thickness of the thread is also important in choosing a chalk line. A thicker thread can be used for patterns because it produces clear lines. However, its drawback is that it consumes ink quickly. Thinner threads are used for areas where you do not want to leave traces of ink. However, the thinner the thread, the more likely it is to break during use. Therefore, you should choose a chalk line with a strong thread.

4. Chalk Line

If the chalk line is not used frequently, the ink may harden. If you use it infrequently, you should choose an ink jar with a sealed lid to prevent the ink from drying out.

5. Inks

Chalk-Lines_墨つぼ-3.

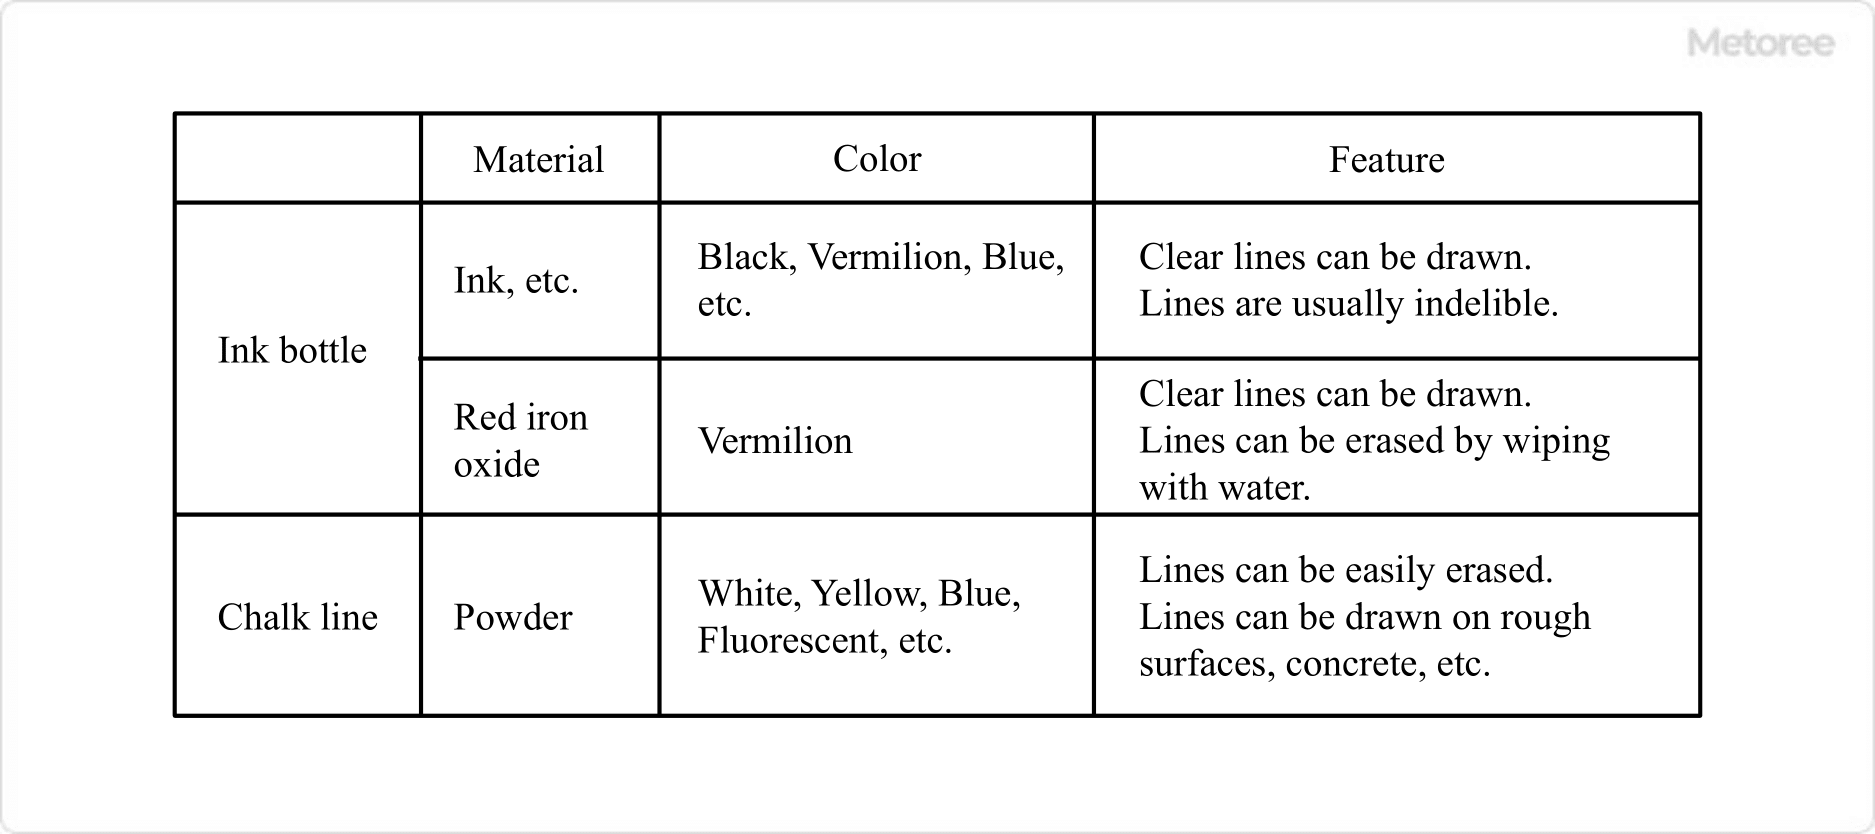
Black India ink is usually used for chalk lines. When color coding is desired, ink in colors other than black, such as white, vermilion, and blue, is used. the lines drawn are often indelible.

When ink is used on a log or a finished piece of lumber, vermilion ink is sometimes used to avoid leaving any paint residue. The vermilion ink used in this case is made from bengara and can be wiped off clean.

Since the chalk line is made of powder, it can be easily erased. It is often used for finishing materials where you do not want to leave traces of ink. It is also suitable for rough surfaces, concrete, and metal, as it is difficult for ink to adhere to these surfaces.

It is important to choose the right type of ink for the purpose.

カテゴリー
category_usa

Leveling String

What Is Leveling String?

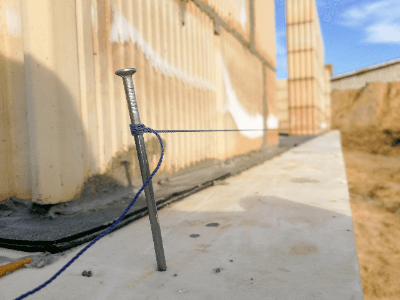
Leveling StringsLeveling String is a tool used in construction to mark horizontal lines. It’s typically hooked onto a nail and can be secured into a block or concrete. This string is essential for visualizing straight lines between two points in the air and comes in various colors like yellow and pink for visibility. It is available in different materials and thicknesses.
Uses of Leveling String

Leveling string is crucial for ensuring horizontality in construction tasks such as piling bricks, building formwork, and civil engineering. It’s used to check horizontal lines and parallelism, ensuring it is stretched without sagging or touching other objects. The string is also valuable in DIY projects for establishing level and parallel lines.

Principle of Leveling String

Leveling strings are made from either synthetic fibers like polyester, polyethylene, nylon, and polypropylene, or natural fibers like cotton and silk. Synthetic fibers offer high water resistance, with polyester and polypropylene being particularly strong and hard to stretch. Natural fiber strings, while not water-resistant, can be used for various other applications.

Leveling strings are designed for repeated attachment and removal. The technique of tying and securing the string plays a crucial role in its effectiveness. Thinner strings are lighter and less prone to sagging but can be less visible and more prone to breaking.

Origin of Leveling String

Leveling string has been historically used in construction, particularly for foundation work and checking the placement of reinforcement bars in reinforced concrete. This process ensures the durability and strength of a structure’s foundation.

Conversion From Leveling String to Laser

Laser leveling, a modern alternative to traditional leveling strings, uses a laser beam for level measurements. This method eliminates measurement errors associated with string sagging, speeds up the measurement process, and allows for one-person operation, enhancing work efficiency. Despite these advantages, the affordability and flexibility of leveling strings mean they continue to be used alongside laser leveling tools in various construction scenarios.

カテゴリー
category_usa

Motor Wrench

What Is a Motor Wrench?

Motor Wrenches

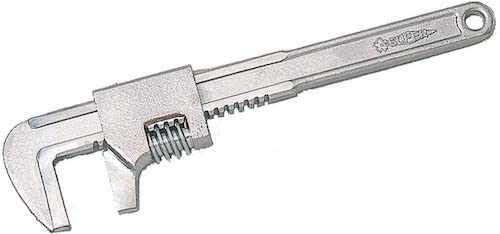
Motor wrenches are industrial tools designed for tightening nuts and fittings on sanitary fixtures with minimal effort. Unlike monkey wrenches, which have a perpendicular clamping part to the handle, motor wrenches have a parallel grip, allowing for a wider opening to accommodate larger nuts commonly found in plumbing.

And unlike pipe wrenches, which are intended for tightening cylindrical pipes and have jagged jaws that could damage nuts, motor wrenches provide a secure fit without damaging the nut’s surface, making them ideal for use with plumbing fixtures.

Uses of Motor Wrenches

Motor wrenches are versatile tools used in maintenance tasks for water pipes in sinks, toilets, and bathrooms, where they handle a wide range of nut sizes. Their design is particularly suited for fittings that require low tightening torque, making them compatible with nuts made of softer materials like resin.

Principle of Motor Wrenches

The defining feature of motor wrenches is the worm gear mechanism that allows for adjustable jaw opening widths, accommodating various nut sizes. Typically made from softer metals like aluminum to prevent damage to plated, brass, or resin nuts, these wrenches can adjust the opening width in a direction parallel to the handle. However, larger openings require more force for tightening or removal, hence the option to use a vertical motor wrench in tight spaces.

Other Information on Motor Wrenches

Precautions for Using Motor Wrenches

While motor wrenches are straightforward to use, certain precautions are necessary to avoid accidents or damage to nuts.

Ensure a Secure Grip
Before applying force, ensure the wrench securely grips the nut without rattling to prevent slippage that could lead to accidents or injuries. Additionally, avoid applying force if the grip is insufficient, as this could damage the nut.

Turn in the Correct Direction
Always turn the wrench from the upper jaw towards the lower jaw. When loosening nuts, be mindful not to apply excessive force in the wrong direction, as this could damage the wrench or the nut. For stuck nuts requiring more force, a vertical motor wrench is recommended over extending the handle, which could lead to breakage.

カテゴリー
category_usa

Disk Drive

What Is a Disk Drive?

Disk DrivesA disk drive is a data storage device consisting of a disk for storing information and a head for reading and writing this information. Disk drives are classified into magnetic disk drives (like floppy and hard disks) and optical disk drives (such as CDs). Internal disk drives are built into the computer, while external disk drives connect via interfaces like USB.
Uses of Disk Drives

Disk drives are crucial in computer systems for storing data and programs. Magnetic disk drives, offering high-speed access, are commonly used as boot disks for operating systems. SSDs (solid-state drives) are increasingly favored for their faster access speeds. Optical disk drives, with slower access speeds, are used for data storage, backup, and distribution of multimedia content.

Principles of Disk Drives

Magnetic disk drives use magnetism for writing and reading, whereas optical disk drives use lasers. Magnetic drives write information by magnetizing a magnetic layer and reading it by detecting magnetic field changes. Optical drives use a spindle motor to rotate the media and a laser beam to read information from the reflected light. CDs and DVDs utilize a red laser, while Blu-ray discs use a blue-violet laser with a shorter wavelength, allowing for higher storage capacity.

Other Information on Disk Drives

1. Disk Drive Failures

Failures in disk drives, often due to their mechanical parts or high precision, can sometimes be resolved by cleaning the pickup lens. Disc media defects like scratches or stains can also cause read issues. Internal physical failures require specialist repair due to the complexity of the drive’s structure.

2. Unusual Noise From Disk Drive

Noise from a disk drive may be due to improper installation or disk insertion. Securing the drive properly inside the PC and correctly inserting the disk can often mitigate noise issues. Eccentric disk media or attached labels can also cause temporary noise.

3. Differences Among Optical Disk Drives

Optical disk drives like Blu-ray use blue-violet lasers with shorter wavelengths, enabling them to store more data than DVDs. These drives vary in terms of writeable and read-only capabilities.

カテゴリー
category_usa

End-Cutting Pliers

What Are End Cutting Pliers?

End Cutting Pliers

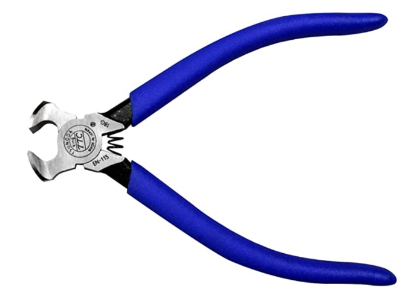
End cutting pliers are tools designed with a blade tip bent at a right angle, resembling a nail clipper, for cutting hard materials such as nails. These pliers feature robust blades ideal for cutting wires and cables in electrical and construction work.

Their versatility extends to plane processing and various other applications, making them indispensable in multiple fields.

Uses of End Cutting Pliers

These pliers excel at trimming protrusions on flat surfaces, like exposed nail heads in wood, and are handy for adjusting or removing metal fasteners in clothing. They’re also effective for extracting staples from materials fastened to wood, showcasing their broad utility across different scenarios.

Principle of End Cutting Pliers

End cutting pliers are specialized for snipping protruding materials. While they may not be the most frequently used tool, their ability to cut through hard metals makes them a valuable emergency resource. Their cutting strength is enhanced by special alloys, non-oxidation, and high-frequency hardening processes, enabling them to cut through both soft and hard materials. However, the material size they can handle is determined by the pliers’ size.

How to Choose End Cutting Pliers

Choosing the right end cutting pliers involves considering their size, blade shape, and additional features tailored to your specific needs.

Size

Select pliers based on the task at hand. Common lengths range from 120 to 160 mm, with smaller sizes suited for precision work and larger ones for tougher tasks like cutting hard wire. Balance the need for size with the convenience of use.

Blade Shape

Blade types include flat for clean cuts, round for pinpoint accuracy and cutting hard materials, and strong blades for heavy-duty work.

With or Without Spring

Pliers with springs offer easier handling and reduced fatigue during extended use, though they may require more storage space.

Grip Type

The grip significantly affects comfort and safety. Choose a grip that fits well in your hand to ensure efficient and safe operation.

カテゴリー
category_usa

Manual Chain Hoist

What Are Manual Chain Hoists?

Manual Chain Hoists

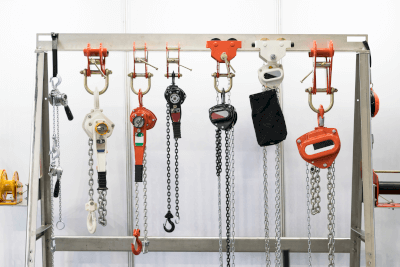
Manual chain hoists are mechanical devices designed for lifting heavy loads, widely utilized across various industrial environments. Their compact and lightweight nature makes them ideal for operations in confined or restricted areas. Requiring no electrical or hydraulic power, these hoists offer flexibility by functioning entirely through manual operation, making them suitable for locations without access to power. Known for their rugged, durable, and reliable construction, manual chain hoists ensure safe and efficient lifting, provided the specified maximum load is not exceeded to avoid potential damage.

Applications of Manual Chain Hoists

Manual chain hoists play a crucial role in lifting and moving objects across diverse settings, including:

Construction Sites

They are pivotal in transporting materials and equipment, facilitating the elevation of steel, concrete blocks, and other construction components to desired heights, alongside handling construction machinery parts.

Manufacturing Plants

In the manufacturing sector, manual chain hoists are instrumental in managing raw materials, products, loading, unloading, and equipment maintenance, proving invaluable in areas with limited space or access.

Stage Management

These hoists are essential for adjusting stage sets, lighting, and sound equipment, aiding in the swift movement and positioning of props and scenery, operated by skilled stage technicians and crews.

Maritime Operations

Within maritime contexts, manual chain hoists are key for ship construction, repair, and maintenance tasks, managing heavy parts, assembling hulls, and supporting docking and shipyard activities.

How Manual Chain Hoists Work

Comprising a chain, gears, and a braking system, manual chain hoists facilitate object lifting through force transmission via a steel link chain. Gears within the hoist amplify lifting force, allowing for efficient load elevation, while integrated braking devices ensure the load remains securely suspended even when manual force is discontinued.

Choosing a Manual Chain Hoist

Considerations for selecting the appropriate manual chain hoist include the following.

Lifting Height

Determine the required lifting height for your tasks and select a hoist with a corresponding lift capacity. Opting for a hoist with a lift length that meets, but does not excessively exceed, your needs can optimize costs.

Rated Capacity

Choose a hoist with a load rating that accommodates the weight and size of your intended loads, ensuring not to surpass this capacity for safety reasons.

Weight of the Hoist

The hoist’s own weight is also a key factor; lighter models are easier to transport and handle, particularly beneficial for tasks requiring frequent movement. Generally, a higher load rating corresponds to a heavier hoist.

カテゴリー
category_usa

Swell Tape

What Is Swell Tape?

Swell tape is tape made of non-woven fabric that absorbs water. It is sometimes described as water absorbent tape or watering tape.

It is often used for watering flowerpots. In addition, water condensation on window sills and other surfaces can be absorbed by swell tape, which will evaporate over time and dry it out. This can prevent stains, dirt, mold, etc., caused by condensation from wetting floors and walls. If there are areas around the kitchen that are prone to condensation, Swell Tape can help protect the walls as well as the window sills. Recently, products with colorful patterns are also available.

Uses of Swell Tape

Swell tape is used to absorb excess water. Recently, it has been used for bottom-feeding pots. Plants can be watered by filling a PET bottle or similar with water, inserting the Swell Tape, and then inserting the other end of the tape into the flowerpot.

It is also used to absorb condensation from window glass. When condensation is absorbed with swell tape, dirt and damage to window frames, walls, and floors can be reduced. It can also be attached to air conditioner vents to prevent condensation.

Principle of Swell Tape

Swell Tape has a simple mechanism. It is made of a highly absorbent and wicking non-woven fabric made of polyester. Felt may also be used. Some products have a seal on the back and some do not.

Swell tape is inserted into a bottom-feeding flowerpot to supply water to the flowerpot. This is convenient when you are away from home for a while or when you cannot water the flowerpot. Note that swell tape may absorb too much water, resulting in root rot and mold due to the growth of bad bacteria caused by excessive moisture.

When using swell tape for anti-condensation applications, be sure to apply one row to the lowest part of the windowpane. Swell tape will absorb moisture, preventing moisture from seeping out and accumulating on the floor and walls, and preventing mold, dirt, and stains on the wood. Swell tape should be replaced after about one year, as the adhesive will deteriorate. If too much moisture is absorbed by the Swell Tape, the tape itself can become moldy or cause foul odors. If this becomes a concern, the tape can be replaced or the amount can be adjusted.

Where to Apply Condensation-Absorbing Tape

Water-absorbing tape absorbs water, but its effectiveness will be halved if it is not applied in the right place.

The main place to put the tape is on window panes in an ordinary home. In winter, the tape is used to prevent mold and mildew from forming on the glass surface due to moisture condensation.

In this case, the place to apply the water-absorbing tape is at the bottom of the window glass. The tape will absorb the moisture that flows out below due to condensation. This will inhibit mold from forming on the edges of the window.

The amount of water absorbed by the absorbent tape is 30 grams per meter, so it has a large capacity and can absorb enough moisture from condensation even on windows on the north side, which are prone to condensation, or on glass in the direction of the window, which is easily shaded.

However, no matter how large the capacity of the tape, there are limits to how much it can absorb. For example, if the window glass is in a sunny location during the day, there is not much of a problem, but in other locations, the limit to the amount of absorption will quickly come and go.

If the absorbent tape is left in place past its limit, mold may form on the tape itself or it may emit a bad odor, so it is best to replace the absorbent tape if you feel that it is not drying easily.

How to Remove Swell Tape

In the above section, we explained that absorbent tape that has exceeded its limit must be removed or it will be harmful. However, even if you replace the tape, you may be wondering how to remove the tape cleanly.

If the tape leaves a mark, mold may grow from it, so you may want to remove it cleanly.

Here is how to remove the water-absorbent (swell) tape, leaving no marks.

1. Use a Sticker Remover Spray

This method involves spraying the tape with a sticker remover spray, which can be found at stores such as 100-yen stores. Since it is readily available, it is easy to remove and very convenient.

However, depending on the condition of the water-absorbent tape, there may be traces of the tape even after spraying and removing the sticker.

2. Use Kitchen Detergent and Hot Water

If you use items in your house, you can remove the tape by using kitchen detergent and hot water.

Dissolve the detergent in hot water and moisten the absorbent tape with hot water on a sponge. Leave it for a while (10 to 20 minutes), and the tape can be removed cleanly.

However, even in this case, some tape marks may remain, so it is best to scrape off the residue with a plastic spatula.

カテゴリー
category_usa

Weed Eater

What Is a Weed Eater?

Weed Eaters

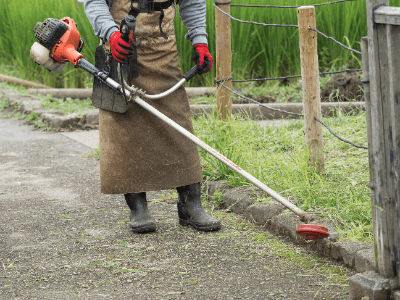
A weed eater is a machine used to cut grass and branches.

They are powered by an engine or battery. Weed eaters can be used for a wide range of tasks, from yard maintenance to clearing underbrush in forestry. Most of them are equipped with a shoulder belt and work by moving the blade at the tip while holding the handle.

There is also a hand-pushed type with wheels and a handle, but this section describes those that are used for weed eater work by holding the handle. There is a national certification for the handling of weed eater, which is called “weed eater operator.”

This certification is not required for individuals who use small weed eater, but is necessary when mowing for business purposes.

Usage of Weed Eaters

Weed eaters are used for a wide range of applications, such as cutting weeds in the home, weeds in the fields, cutting underbrush in the forests, and cutting bamboo grass. Depending on the application, engine displacement, power, and blade type vary. In recent years, small and inexpensive models have become available, making it possible for ordinary households to own one.

While they are easy to use, they also carry the risk of injury and accident, so care must be taken when using them. Safety knowledge and equipment are essential to prevent injuries from contact with the blade itself and accidents caused by flying rocks (e.g., damage to car glass due to injuries or flying rocks).

Weed eater specifications have been improved to make it safer to work with, and many weed eaters now stop rotating when the handle is released.

Principle of Weed Eaters

Weed eaters are available in different shapes and sizes, depending on the power source and the shape of the handle. However, regardless of the type of power or the shape of the handle, power is used to rotate the blade. The blade rotated by power is generally used to cut a given object.

Faster and larger blades can cut more grass and other materials at once. At the same time, the weight of the machine increases because it requires more power, and a reasonable amount of physical strength is also required. There is a clutch between the power source and the rotating blade, which shuts off the power to the blade when the work is overloaded or at low speeds.

The blade can be changed according to what is to be harvested and the surrounding conditions. By changing the blades, the weed eater can be adapted to different situations.

Types of Weed Eaters

Classification by Power

Weed eaters are mainly powered by engine, cord and rechargeable batteries.

Engine Type
The engine type is powerful and suitable for serious work, but it is difficult to maintain and handle. Also, the engine is noisy, so care must be taken to avoid noise in urban areas.

Lightweight and easy-to-handle 2-stroke engines are the most common type, but 4-stroke engines are also used for environmental friendliness and noise reduction.

Cord Type
Corded engines are less noisy and can be used in residential areas without hesitation. There is no need to worry about running out of fuel or battery charge.

However, since a power source is required for the work area, it can only be used within the reach of the power cord, and care must be taken not to cut the cord while working.

Rechargeable type
Like the corded type, the rechargeable type is quiet and can be used in residential areas. If the battery capacity is small, it is light and easy to handle, making it suitable for garden maintenance.

The disadvantage, however, is that the continuous working time is short. A larger battery capacity can work for a longer period, but the weight increases and the initial cost is high.

2. Classification by Handle Shape

There are three main types of handles: two-handled, loop handle (2-grip handle), and backpack.

Two-Handed Handle
The U-shaped handle is held with both hands. It is easy to move the handle from side to side, making it suitable for work on flat surfaces. It has a simple structure and is widely used.

Loop Handle (2-Grip Handle)
A weed eater with a loop handle is suitable for use on sloping terrain. Since the weed eater is lifted up, the angle of the blade can be adjusted precisely and small movements are possible. It is also good for working in tight spaces because of its small turning radius.

Back-Carrying Type
This type of machine can be operated by carrying the main body on your back and holding the handle in your hand. The advantage of the backpack type is that it is suitable for work on sloping terrain. Since the heavy power unit is carried on the back, it is less tiring and suitable for long hours of work. The main types are mainly available in large displacement models.

カテゴリー
category_usa

Penetrating Driver

What Is a Penetrating Driver?

Penetrating Drivers

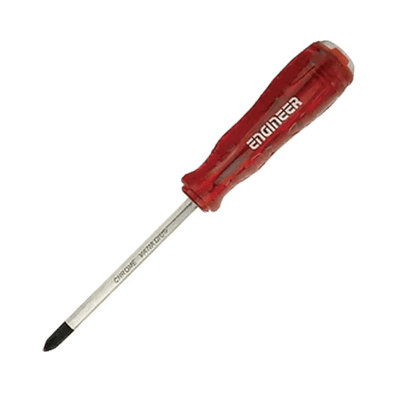
Penetrating drivers are hand screwdrivers with a metal shaft that contacts the screw and penetrates through the grip.

It is made so that the metal part behind it that comes out of the grip (called a washer or buttstock) can be struck with a hammer. The difference between a penetrating driver and a screwdriver is that a screwdriver has a non-penetrating structure, such that the metal shaft that turns the screw is stuck halfway through the grip.

When a regular screwdriver is used and struck with a hammer, not only is the force applied to the screw reduced, but the screwdriver is also damaged.

Uses of Penetrating Drivers

The primary use of penetrating drivers is to tighten or loosen screws.

It is also sometimes used to strike the back of the grip with a hammer to impact and loosen screws that have become tight or corroded and difficult to remove. It is also used to reshape crushed screw heads and for temporary hatcheries.

The best hammers to use when impacting screws with penetrating drivers are plastic or resin hammers. If a metal hammer or similar tool is used, the impact will be greater than necessary and may adversely affect parts other than the screw. If a screw cannot be loosened by any means, it is also effective to use a lubricant, etc. at the same time.

Principle of Penetrating Drivers

When you strike the metal part behind the penetrating driver that comes out of the grip, the impact is transmitted from the tip of the driver to the screw, causing the sticking part to move and a slight gap to be created, which loosens the screw.

Compared to regular screwdrivers, many penetrating drivers have a thicker, firmer grip made of resin. The reason for this is that Penetrating Drivers are designed to be struck with a hammer and to provide a firm grip. When using penetrating drivers, it is recommended to grip the penetrating driver firmly and to use gloves to soften the impact on the hand and prevent injury. Penetrating drivers are not suitable for work related to electricity, as they conduct electricity directly.

Types of Penetrating Drivers

Penetrating drivers, like regular screwdrivers, are available in a lineup of types for a variety of applications. Typical types are as follows:

1. Round Shaft Type

The cross section of the metal shaft is round. The rounded cross section of the metal shaft allows smooth turning even when the screwdriver is turned with the hand. This is the same type of screwdriver commonly seen in general. 

2. Square Shaft Type

This type has a metal shaft with a square cross section. A wrench or spanner can be applied to it to turn it with a large force. 

3. Bolster Type

This type has a hexagonal shape at the joint of the metal shaft and the grip. A wrench, glasses, etc. can be applied to the hexagonal part and turned with great force.

4. Magnet Type

A magnet is built into the tip of the metal shaft or magnetized so that screws and other metal objects stick to it. The magnetized type is useful when working in confined spaces where both hands cannot reach. There are various types, including round-axle and square-axle types with a magnet at the tip.

Other Information on Penetrating Drivers

Cautions for Use

Most manufacturers do not recommend the use of penetrating drivers and hammers to impact screws, but since many users use penetrating drivers to impact screws, they are made to withstand impact. However, care should be taken when using a flat-blade penetrating driver in place of a tup, as it can damage the tip of the screwdriver.

A shock driver (impact driver) is suitable for loosening hardened screws. Shock drivers are effective for loosening screws because the tip is made to rotate slightly as soon as it is struck with a hammer and the impact is transmitted.