カテゴリー
category_usa

Thickener

What Is a Thickener?

Thickeners

A thickener is a device used to concentrate liquids by evaporating water, commonly seen in the concentration of fruit juice. This process enhances the liquid’s flavor and quality by removing water under reduced pressure, which lowers the boiling point and allows evaporation at lower temperatures.

Thickeners have applications beyond the food industry, including chemical solution concentration, chemical manufacturing, paper and pulp production, waste liquid treatment, and reducing transportation costs.

Uses of Thickeners

In the food industry, thickeners concentrate liquids like sugar solutions, soup stocks, and fruit juices. This technology, combined with vacuum packaging and freezing, helps prevent moisture, oxygen, and temperature from degrading food, extending preservation. Thickeners also support industrial processes by concentrating recovered cleaning process liquids and other applications.

Principle of Thickeners

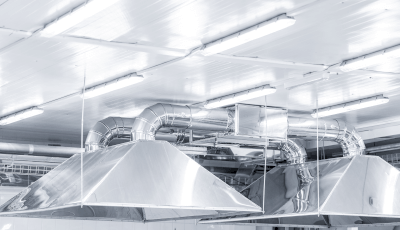
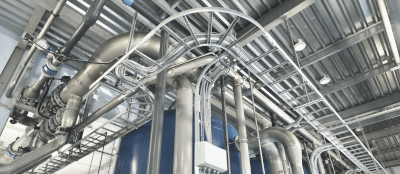
Thickeners utilize vacuum concentration, where reducing pressure lowers the boiling point of water in a solution, facilitating evaporation and concentration at reduced temperatures. The process involves placing the target liquid in a thickener, reducing pressure via a vacuum pump, and then evaporating water, often with agitation to prevent sudden boiling. Evaporated water vapor is collected, condensed, and discharged, while toxic substances removed during the process are handled separately.

Features of Thickeners

1. Preservation of Food Flavors

By concentrating at low temperatures under a high vacuum, thickeners retain the original food flavors, prevent oxidation, and avoid heat-induced deterioration.

2. Environmentally Friendly

Thickeners operate without significantly raising the temperature of the target liquid or the surrounding environment, minimizing odor and treating discharged water, making the process environmentally friendly.

3. Handling High-Viscosity Liquids

The system can process high-viscosity foods, chemicals, and pharmaceuticals, offering a broad range of applications.

4. Heating While Stirring

Thickeners concentrate the solution while agitating in the vacuum tank, which prevents sudden boiling and browning, with the capability for automatic liquid supply and compact design.

Types of Thickeners

Thickeners vary based on the evaporation tank method:

1. Natural Circulation Type

Separates the heating and evaporation chambers for natural circulation, advantageous in running costs and often used for sugar solutions and syrups.

2. Forced Circulation Type

Employs a pump to circulate liquid in the evaporation tank, suitable for high-viscosity solutions or when heat transfer is challenging, commonly used in chemical plant crystallization processes.

3. Thin-Film Flow Type

Concentrates liquids on a thin-film heat-transfer surface, ideal for heat-sensitive materials like food and pharmaceuticals, used for milk, fruit juices, enzymes, and pulp waste concentration.

カテゴリー
category_usa

Exhaust System

What Is an Exhaust System?

Exhaust Systems

An exhaust system is a device that prevents dust, organic solvents, and other substances harmful to the human body generated in the work environment from diffusing into the room by forcibly sucking and exhausting them.

There are three types of exhaust systems: general ventilation systems that ventilate the entire work environment, and push-pull ventilation systems that are installed between two sources of hazardous substances, one for blowing and the other for suction. There are also local exhaust systems that directly suction from a location near the source of the substance.

Especially in work environments where organic solvents are handled, it is mandatory to install an exhaust system and to submit a notification for installation from the viewpoint of ensuring employee safety.

Uses of Exhaust Systems

Exhaust systems are widely used at sites where work involving the handling of organic solvents and dust mainly occurs.

General exhaust systems are easy to use because of their superiority in terms of workability and installation cost. They are not suitable for handling high-risk organic solvents and other materials because of their low ventilation effectiveness and the difficulty of handling exhaust air.

On the other hand, local exhaust systems and push-pull ventilation require large equipment, but they can selectively collect and treat exhaust air, preventing high-risk substances from diffusing into the environment.

Principle of an Exhaust System

The main overall ventilation system used in exhaust systems is ventilation fans. Multiple ventilation fans are installed in a work environment to circulate air and dilute hazardous substances to maintain a safe working environment.

Local exhaust systems and push-pull ventilation systems, on the other hand, are designed to create a more active airflow and collect hazardous substances.

Local exhaust systems either cover the source of the hazardous substance with a hood for suction or install a hood directly next to the source for suction at high exhaust airflow rates to prevent the substance from spreading into the environment. The most effective type is an enclosed hood. However, open hoods are also used depending on the work environment and substances to be handled.

Push-pull ventilation systems are designed to prevent exposure to high concentrations of hazardous substances by creating a uniform flow of air in a particular work environment and can exhaust a wider area than local exhaust systems.

It is important that the performance of local exhaust systems and push-pull ventilators be maintained, so guidelines for voluntary inspections have been established for the handling of organic solvents.

カテゴリー
category_usa

Drain Trap

What Is a Drain Trap?

Drain Traps

A drain trap is a component used to prevent odors and vermin from entering the house through drains and sewers.

There are several types of drain trap, including S-shaped, P-shaped, and U-shaped traps. These traps physically prevent undesirable gases and insects from entering the pipes by plugging them with water, known as a water seal.

Due to the nature of their structure, they are designed to be easily removed for cleaning, as they tend to accumulate debris.

Uses of Drain Traps

Drain traps are required to be installed in all water areas where wastewater is generated. Whether for commercial or residential use, and are available in a variety of shapes and sizes depending on the application.

If the wastewater contains oil, hair, sediment, or other substances that are harmful to the environment or cause clogging of drain pipes, an inhibitor is installed with the trap to separate them from the wastewater.

The use of multiple drain traps in pathway are prohibited because it impedes drainage by eliminating the space for air to escape between traps.

Principle of Drain Traps

Drain traps operate on the principle that water is a liquid at room temperature and does not allow gas molecules to pass through. They act as an entry stop for gases and pests, while the water seal itself is constantly cleaned by the drainage, preventing itself from becoming a source of gases and other substances.

The amount of water stored in the trap must be 50 mm to 100 mm deep. A smaller amount of water may not function as a trap or may lose its function due to disturbance, while a larger amount may not trap sufficiently.

The most commonly used S-shaped drain traps are made of stainless steel, brass, or resin between the drain opening and the drainpipe to prevent gases in the drain pipe from flowing directly into the drain opening and are removed for maintenance.

When the amount of water in the trap becomes too low, it loses its function. This is called a broken seal. Causes include evaporation of water due to long-term disuse, storage of water above the drain, or siphon principle suction when a large amount of water flows into the drainpipe.

カテゴリー
category_usa

Catch Basin

What Is a Catch Basin?

Catch Basins

A catch basin is a trap installed in a drainpipe for sewage or rainwater generated from a home or business. A catch basin is primarily installed where drains merge or where pipes bend.

There are several types of catch basin, the most common of which are rainwater catch basins for rainwater, sewage catch basins for domestic wastewater, and public catch basins installed at connections to public sewers.

While rainwater catch basins and sewage catch basins are required to be installed and managed by residents as domestic drainage facilities, public catch basins are installed and managed by public agencies.

Uses of Catch Basins

Catch basins are installed to prevent solids from clogging the pipes and obstructing the flow of sewage and rainwater discharged from the home.

When solids clog the pipes, major repairs may be required in some locations, but it is possible to settle the solids by installing a catch basin in the middle of the pipes.

In addition, the catch basins are designed for easy cleaning, and regular cleaning will prevent clogging and foul odors.

Features of Catch Basins

Catch basins are designed according to standards to ensure a smooth connection to the public sewerage system and to prevent loss of functionality.

In the past, concrete was the main material used, considering earthquake resistance, etc. Today, however, vinyl chloride, which is stronger than concrete and more resistant to deterioration over time, is often used, especially in smaller sizes.

Rainwater catch basins are required to have a mud reservoir with a certain depth to prevent the inflow of mud, while sewage catch basins are required to have an invert to prevent the retention of sewage and to limit the angle of connection with the piping. As for lids, rainwater catch basins can be gridded, but sewage catch basins are required to have sealed lids. In either case, the installation of a double trap is prohibited to prevent gas and other gases from being trapped in the piping.

When cleaning, the lid is removed to remove any floating or settled sewage on the surface, and if necessary, the piping is also cleaned.

カテゴリー
category_usa

Steel Pipe

What Is Steel Pipe?

Steel Pipe

Steel pipes, mainly used for transporting fluids, connect equipment through a system known as piping. These pipes are essential in various industries, including thermal and nuclear power plants, petrochemical plants, and in daily life for gas, water, and steam supply.

Uses of Steel Pipe

Steel pipes serve various purposes:

1. Water Piping

Galvanized steel pipes are commonly used for water piping, featuring excellent rust and corrosion prevention due to their hot-dip galvanization.

  • Protective Coating Action: A zinc oxide film forms on the surface, providing a barrier against air and water.
  • Sacrificial Corrosion Protection: Zinc preferentially corrodes to protect exposed iron, offering electrochemical protection.

2. Piping for High-Temperature, High-Pressure Fluids

Specific steel pipes handle high-temperature and high-pressure fluids, including steam and gases. 

3. Piping for Fire Extinguishing Equipment and Industrial Water

Carbon steel pipes are used for lower temperature and pressure fluid transport, with galvanized versions for rust prevention.

Principles of Steel Pipe

1. Dimensions

The schedule number, determined by the fluid’s pressure and the pipe material’s allowable stress, guides the pipe’s wall thickness.

Schedule number (Sch) = (P/S) x 10
P: Design pressure (kg/cm2)
S: Allowable stress (kg/mm2)

2. Manufacturing Method

Steel pipes can be seamless or welded, each manufactured through distinct processes.

Types of Steel Pipe

Steel pipes vary by fluid type and material:

1. Classification by Fluid Type

Differentiated into water pipes and high-temperature/high-pressure pipes based on the fluid’s characteristics.

2. Classification by Material

Materials include carbon steel for general use, alloy steel for strength at high temperatures and pressures, and stainless steel for corrosion resistance.

3. Classification by Application

Specialized steel pipes exist for boilers, heat exchangers, and heating furnaces.

Other Information on Steel Pipe

Standards

Steel pipe standards include JIS, ISO, ASTM, and DIN, each serving different regulatory and quality benchmarks.

カテゴリー
category_usa

Riveter

What Is a Riveter?

A riveter is a tool used to fasten (join) metal plates using a type of fastener called a rivet.

Riveters are employed to fasten metal plates when bolts, nuts, or screws cannot be used, when reaching around the backside of the plate is impractical, or when welding is not feasible.

Since rivets can be used to fasten metal plates together semi-permanently with high strength, they are also used to fasten the exterior panels of airplanes.

However, once rivets are fastened, they cannot be easily removed. Therefore, this method is not suitable for fastening items that will be removed at a later date or periodically.

How to Use Riveters

This section describes how to use the hand riveter to attach rivets to the workpiece.

To prepare for the rivet, drill a pre-drilled hole in the workpiece. At this time, be sure to drill a hole that matches the standard size of the rivet to be fastened. Insert the rivet into the drilled hole. Attach a riveter to a nose piece that matches the size of the rivet to be used. Insert the shaft portion of the rivet into the riveter, and then place the nose piece tightly against the flange of the rivet.

Close the riveter handle and tighten the rivet, and the riveter will cut the shaft portion of the rivet. After confirming that the riveter has been cut, remove the riveter from the rivet. Open the handle of the riveter to eject the shaft portion of the cut rivet.

How to Choose a Riveter

When selecting a riveter, be sure to check the rivet size (rivet diameter) and the material that can be used.

There are three main types of riveters: hand riveters, electric riveters, and air riveters. The features of each are summarized below.

Hand riveters are easy for beginners to handle because they can crimp rivets simply by grasping the handle, and many of them are reasonably priced. They are easy to carry and do not require a power source, batteries, or air supply, so they can be used anywhere.

Electric riveters can easily caulk rivets by simply turning on the switch, making them ideal when you have a large number of rivets to caulk, or when work efficiency is important. Battery-powered riveters do not require a power supply.

Air riveters are lighter than electric riveters, and are suitable when large numbers of rivets are to be caulked. Also, the power of air allows for more powerful and quicker crimping. However, it is necessary to prepare air for using the air riveter and secure a work location where an air hose can be routed.

カテゴリー
category_usa

Hand Wire Cutter

What Is a Hand Wire Cutter?

Wire Cutters

A hand wire cutter is a tool for cutting linear materials such as wire rope, cable, and electric wire, which are bundles of thin wires.

Cutting with a hand wire cutter prevents the cut surface of the material from becoming frayed or falling apart. It produces a cleaner cross-section than when cutting with nippers, pliers, or other tools. Strong wires, such as stranded wires, which are made by weaving two or more metal wires together, can also be cut while maintaining their strength.

However, they are not suitable for cutting hard materials such as thick wire or piano wire, as the blades may chip or lose their sharpness.

How to Use Hand Wire Cutter

For the scissors type, similar to nippers or pliers, place the wire to be cut between the blades, grasp the handle by hand, and close the blades to cut.

In the case of the hydraulic manual type, the wire to be cut is set and secured in the blade, and then it is cut by the force of hydraulic pressure when the handle is raised or lowered.

In the case of the hydraulic electric type, there is no need to move the handle up and down. When the trigger of the hand wire cutter is pulled, hydraulic pressure is automatically applied, and the blade moves to cut the wire.

In the case of the electric type, the wire to be cut is clamped between the blades and the hand wire cutter is turned on. Then, pull the trigger of the main unit and the blades move automatically to cut the wire.

How to Select a Hand Wire Cutter

When selecting hand wire cutters, be sure to check the maximum cutting capacity, which indicates the maximum diameter of wire that can be cut at one time, and the materials that can be cut. Cutting capacity is generally indicated as “20 mm diameter” or “Φ20 mm”. Some are also described together with the material that can be cut, such as “IV Φ20 mm.” In this case, it indicates that IV wires (vinyl-insulated wires) up to 20 mm in diameter can be cut.

There are four main types of hand wire cutters: pliers, ratchet, hydraulic, and electric. The type is selected according to the thickness and hardness of the wire to be cut. The features of each type are summarized below.

  • Plier Type
    Similar in shape to pliers or nippers, these cutters are easy for beginners to handle and can cut wires of hardness and thickness that cannot be cut with nippers. Because they are light and easy to carry, they are also suitable for precision work.
  • Ratchet Type
    By moving the blade only in the cutting direction through the “ratchet mechanism,” which transmits rotation only in one direction and not in the opposite direction, even thicker wires can be cut with less force.
  • Hydraulic Type
    By transmitting power to the blade through pressurized oil, wires can be cut more quickly with less force. Therefore, it can be used in high places or in places with poor footholds. It also reduces the burden of long hours of work and frequent cutting work.
  • Motor-Driven
    By operating the blade with a motor, the wire can be easily cut at high speed without applying force. Its extremely high cutting capacity makes it suitable for replacing elevator wire ropes and cutting wires in areas where sparks are prohibited. There are two types of electric models: the outlet type, which is used by connecting it to an electrical outlet, and the rechargeable type. In the case of the outlet type, the working range is limited by the location of the power source and the length of the cord. In contrast, with rechargeable types, you need to consider that the working time is limited.

Hand wire cutters come in a variety of blade shapes and safety features as well as types, so choose appropriately according to your application and purpose. The following is a summary of the main safety features and blade shapes.

  • Shape of Blade
    Double-edged blades have more cutting force than single-edged blades, so less force is required to cut. However, it is not suitable for cutting thicker wires. The single-edged blade requires more force than the double-edged blade, but it can fix and cut thicker wires that are difficult to cut with the double-edged blade.
  • Safety Performance
    It is safe if the hand wire cutter has an open/close lock or stopper feature to prevent the blade from opening or moving when the cutter is not in use or when work is interrupted. Also, when cutting cables and wires, it is safer to choose a wire cutter with an insulated handle to prevent electric shock in the event that the wire cutter is energized.
カテゴリー
category_usa

Extension Bar

What Is an Extension Bar?

Extension Bars

An extension bar is an attachment that fits between a handle and a socket, such as a socket wrench or ratchet handle. Extension bars are available in various lengths, from short to long.

Extension bars are used to reach bolts and nuts in places that normal sockets cannot reach. If the extension bar itself cannot reach the part, it can be extended by adding an additional extension bar.

How to Use an Extension Bar

The extension bar is attached between the socket and the handle. The method of attaching and detaching is the same as that of the socket.

If the extension bar has an anti-lock function, release the lock and attach or detach the extension bar. If the extension bar is not equipped with an anti-locking function, pull the extension bar to remove it, and push it in firmly to install it.

Two or more extension bars can be connected together to make a longer extension bar. However, care must be taken to avoid wobbling. This can increase the escape of force, and can also lead to disaster if the extension bar comes off.

How to Select an Extension Bar

Length is the most important factor in choosing an extension bar. If it is too short, it will not reach the bolt or nut you want to attach or detach, making it pointless to install. However, if it is too long, it can also be problematic. When is too long, the extension bar will tend to flex, which will cause it to lose power. Also, if you are working in a confined space, you may hit your hand against a wall or a piece of equipment when you turn the handle. To work safely, it is necessary to choose an extension bar that is neither too long nor too short.

One type of extension bar is one with a swivel function. This is used when you want to use the extension bar at an angle. However, since the direction of rotation of the screw and the angle at which the handle is turned are misaligned, it cannot exert very strong force. Another type has knurling on the shaft part, which allows fast turning by turning the extension bar directly with the fingers when the ratchet handle is used.

カテゴリー
category_usa

Socket Holder

What Is a Socket Holder?

A socket holder is a case or holding device for storing sockets of tip tools such as wrenches and electric drill drivers. 

Socket holders allow you to store them in an organized manner in your toolbox. By arranging them in order by size, you can easily retrieve the size you need and improve your work efficiency.

Multiple sockets can be stored side-by-side by inserting the square hole on the wrench insertion side of the socket into the socket holder.

Uses for Socket Holders

Socket holders are specialized parts for holding sockets, thus limiting their use.

In fieldwork, different sizes of bolts are used, and multiple sockets are needed. It is therefore very important to be able to easily and quickly retrieve a socket of the desired size and specification. Sockets can be inserted into the Socket Holder in the order of size and type, so that the required socket can be found without having to search for it, thereby increasing work efficiency.

Socket holders can be optionally added to increase the number of sockets held, to accommodate sockets with different insertion angles, or to be used on both sides of the rail by alternately mounting the holders on the front and back of the rail.

How to Select a Socket Holder

The selection of a socket holder depends on the following points, which should be considered when selecting a socket holder for a particular application.

1. Clip Material

Plastic clips are easy to install and remove and hold the socket securely. Metal clips are durable and hold the socket firmly by applying the spring effect of the metal plate.

2. Size

Socket holders are available in three sizes: 1/4 (6.35 mm), 3/8 (9.5 mm), and 1/4 (12.7 mm). Select a socket holder with a holder that matches the socket insertion angle.

3. Number of Holders

Select a socket holder with the number of holders appropriate for the quantity of sockets required for storage. Some holders can be added, while others have multiple rows of rails to secure the holders.

4. Other

Other types of socket holders include “locking clip type holders” that allow easy removal of sockets, holders with holes in the rails that can be secured with screws and hooked onto hooks, and holders that can be attached to toolboxes or cabinets with magnets.

カテゴリー
category_usa

Ratchet Handle

What Is a Ratchet Handle?

Ratchet handles are a type of socket wrench with a ratchet mechanism.

The ratchet mechanism refers to a gear that limits the direction of rotation in which force is applied in one direction. A familiar example is the pedal portion of a bicycle. When pedaling, force is applied, but when not pedaling, the cogwheel is spinning.

In the same way, when you want to tighten a screw, force is transmitted when the handle is turned clockwise, and when the handle is turned counterclockwise in the loosening direction, it is possible to spin the wheel. This eliminates the need to change the tool as the screw rotates when tightening/loosening the screw, making work much faster.

The direction of rotation in which force is applied can be easily switched using a lever, making it easy to switch between screw tightening and screw loosening operations.

Uses for Ratchet Handles

Ratchet handles are used for tightening and loosening screws. As the screw rotates, the tool can be continuously tightened or loosened without having to reapply the socket.

Normally, the tool must be removed from the screw each time the screw is rotated, and then inserted again from a different angle to tighten or loosen the screw over and over again. Depending on the pitch of the bolt, the bolt will only advance 1.5mm (or 1.25mm) per rotation, so if the bolt is 10mm long, it will require 6 to 7 rotations to remove the bolt.

This method requires a lot of work time in proportion to the length of the bolt. However, by using ratchet handles, the bolt can be rotated at high speed without having to remove the tool each time, thus significantly shortening the work time.

The direction of rotation for applying force to the ratchet mechanism can be easily switched between tightening and loosening with the lever. When using a socket wrench in a small workspace, it is necessary to pull out the socket once it reaches the full rotation angle of the handle and reapply it. With ratchet handles, on the other hand, you can simply turn the handle in the opposite direction to tighten and loosen it again.

Principle of Ratchet Handles

Inside the ratchet mechanism are a pawl and a gearwheel, which engage with each other to stop rotation. The pawl is pressed against the gear using spring force.

The relationship between the pawl and the gears is set up so that the pawl acts only in a certain direction, and rotation of the gears in the opposite direction pushes the pawl up and causes the gears to rotate. The “clicking” sound when the ratchet mechanism is turned in a direction where no force is applied is due to the pawl being pushed up and falling between the following gears.

By operating the lever to switch the direction of rotation, another pawl with a different pawl engagement direction engages the gear again, allowing for reverse rotation.

How to Select Ratchet Handles

1. Size

Size has different meanings in terms of the size of the socket insert and the size of the ratchet handles themselves. In general, there are three widely used socket sizes: 1/4 (6.35mm), 3/8 (9.5mm), and 1/2 (12.7mm).

The 3/8 (9.5mm) is neither too large nor too small and is easy to use, so this size is recommended at first.

The size of the ratchet handles themselves will increase in proportion to the size of the socket insert. Larger ratchet handles are stronger and can therefore apply higher torque. Some socket sizes are as small as a nail clipper, allowing them to be used in tight spaces without difficulty.

2. Locking Mechanism

If there is a lock mechanism, the socket cannot be removed without unlocking it, which makes it safe to work with. However, it is necessary to hold down the lock release button while removing and installing the socket, which increases the time and effort required if the socket needs to be removed and installed frequently.

Attempting to forcibly remove the socket without releasing the lock will result in damage to the ratchet handles, so the sockets must always be unlocked before being removed. Even if there is no lock mechanism, a simple anti-loosing mechanism called a ball plunger is provided, so a lock mechanism is not always necessary.