カテゴリー
category_usa

Sorter

What Is a Sorter?

Sorters are used to separate objects based on various specifications. More accurate and cost-effective than manual sorting, they are used in various fields. This article focuses on sorters used in agriculture.

Uses of Sorters

In agriculture, sorters are primarily used for sorting vegetables and fruits according to specific standards, making production processes more efficient.

Features of Sorters

Advantages

Sorters significantly enhance agricultural productivity. By automating sorting tasks, they free up producers to focus on other aspects of harvesting and cultivation. Machine-based sorting also ensures higher precision compared to manual methods.

Disadvantages

However, sorters entail higher initial investments due to the cost of machinery, control devices, and software. They also require regular maintenance to maintain accuracy. One challenge is their potential inability to accurately sort based on blemishes or insect damage on produce.

Types of Sorters

Sorters are categorized into three types: weight-based, size-based, and optical.

1. Weight-based

These sorters sort crops based on weight, ideal for packaging crops directly into boxes or bags. Some models enhance accuracy with image processing cameras.

2. Size-based

Size-based sorters classify produce based on size. Their simple structure makes them easy to maintain, and they are designed to prevent damage to delicate produce. However, they may not adapt well to different crop varieties.

3. Optical Sensors

These sorters use cameras or light transmission for detailed inspections, including size, shape, sugar content, and maturity. This allows for high-precision sorting and can even sort based on color.

Choosing a Sorter

When selecting a sorter, consider the crop type and scale. Some sorters are only suitable for specific produce, and their compatibility varies based on the crop’s vulnerability to damage. The sorter’s size and functionality should match the scale of the agricultural operation, ensuring cost-effectiveness, especially for larger volumes.

カテゴリー
category_usa

Water Softener

What Are Water Softeners?

Water softeners are devices designed to remove metal ions like calcium and magnesium from water, typically through an ion exchange process. This treatment results in soft water, which has fewer minerals and is considered gentler on the skin and better for consumption.

Uses of Water Softener

Water softeners are primarily used to transform hard tap water into soft water. Soft water, having fewer minerals and impurities, is preferred for drinking, cooking, cleansing, and bathing. Additionally, it’s beneficial for laundry, as it requires less detergent and water for rinsing, preventing detergent buildup in fabrics and enhancing cleaning efficiency.

Features of Water Softener

Advantages

  • Ease of converting tap water to soft water.
  • Reduction of mineral buildup in appliances and pipes.
  • Improved taste and quality of water for drinking and cooking.
  • Enhanced efficiency in cleaning and laundry tasks.
  • Gentler on skin and hair during bathing.

Disadvantages

  • Maintenance and replacement needs, as effectiveness decreases over time.
  • Potential increase in sodium content in water.
  • Initial installation and ongoing costs for filters or other consumables.

Types of Water Softener

  • Ion Exchange Water Softener: This type uses resin beads to exchange metal ions in water with sodium or potassium ions.
  • Reverse Osmosis Membrane Water Softener: Employs a semi-permeable membrane to remove impurities and metal ions from water.
  • Reverse Osmosis Membrane-Ion Exchange Water Softener: Combines reverse osmosis and ion exchange for high-purity water production.

How to Choose a Water Softener

Selecting a water softener depends on your water quality goals, budget, and installation space. Consider the filtration technology, ongoing costs for consumables and maintenance, and the size relative to your usage and installation area. It’s also important to consider the specific water quality needs of your household and any potential increases in sodium levels due to certain softening processes.

カテゴリー
category_usa

Rotavator

What Is a Rotavator?

Rotavator

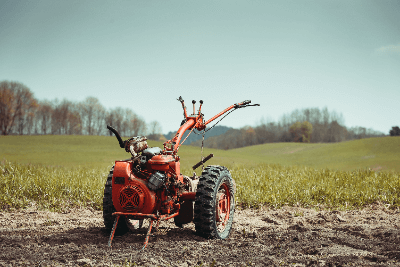
A rotavator, also known as a rotary tiller or cultivator, is a piece of agricultural machinery designed for soil cultivation. Its primary functions include loosening hard soil, evenly distributing fertilizers, and eliminating weeds and unwanted plants.

Rotavators are essential in preparing soil for planting by breaking up hardened ground and integrating compost and fertilizers into the soil. This process enhances soil fertility, leading to increased crop yields and healthier plants.

Uses of Rotavators

Rotavators are instrumental in improving soil conditions. They loosen compacted soil, facilitating aeration and friability, and are effective in evenly spreading nutrients throughout the soil. For best results, they should be used on dry soil, enhancing the efficiency of soil loosening and weed removal.

Features of Rotavators

Rotavators can be electric, gas, or gasoline-powered and rotate tines to aerate and cultivate the soil. They are most commonly powered by gasoline engines.

Advantages

  • Loosen and aerate hardened soil.
  • Control weed growth.
  • Mix compost and fertilizers efficiently.
  • Enhance crop productivity.
  • Reduce labor requirements.
  • Enable cultivation in narrow or inaccessible areas.
  • Portability for easy transportation.

Disadvantages

  • Engine noise and exhaust emissions.
  • Regular maintenance requirements.
  • Limited efficiency in large fields compared to tractors.
  • Less depth of cultivation than tractors.
  • Safety concerns without proper checks.
  • Risk of accidents during transportation.

Types of Rotavators

Rotavators vary based on power source and rotary position.

  • Axle Rotary: Small and easy to operate with good maneuverability, but prone to vibrations.
  • Rear Rotary: Strong cultivating power, ideal for straight-line movement, but require careful operation.
  • Front Rotary: Excellent maneuverability for corner cultivation, safer but less powerful.

How to Choose a Rotavator

When selecting a rotavator, consider horsepower, fuel type, and rotary position based on your field size and cultivation needs. Horsepower ranges from less than 3 for small gardens to over 6 for larger fields. Fuel type choices include gasoline, electric, and gas canister. The rotary position should align with the intended use and safety requirements.

カテゴリー
category_usa

Ditcher

What Is a Ditcher?

A ditcher is a large machine used for digging and creating trenches in the ground.

It is employed to remove surface excess water and create dry soil and fields. Ditchers are utilized for excavating trenches for drainage purposes or burying drainage pipes. There are two main types of ditchers for relatively shallow trenching: the plow type known as a “ditcher” and the rotary type.

For deeper trenching, a trencher is used. A trencher is a type of ditcher with a relatively narrow width that digs deep trenches. It can be classified into two types: conveyor-type and rotary-type, and it finds applications not only in agriculture but also in the construction sector.

Uses of Ditcher

Ditchers are used to remove surface excess water and create dry soil and fields. They are capable of digging in hard ground or soft rock.

By using a ditcher around autumn to create trenches, winter cold can penetrate deep into the ground, reducing overwintering pests and weeds, and resulting in effective pest control.

Having trenches facilitates faster melting of snowmelt water. Using the ditcher again before spring operations allows for more effective drainage.

Features of Ditcher

Ditchers are machines used for digging trenches in paddy fields, fields, and construction sites for laying pipes or cables. Here, we will primarily introduce the advantages and disadvantages when used in agriculture.

Advantages

By using a ditcher to dig trenches in the field borders and within plots, excess water on the surface and lateral percolation water in the soil can be collected and drained, drying the fields. This enables timely agricultural operations.

Moreover, avoiding waterlogging promotes healthy crop growth. Digging trenches directs water to lower positions, moving moisture away from crops.

Additionally, using a ditcher increases the surface area of soil exposed to air, allowing more oxygen to reach the soil’s interior. The upturned soil, rich in air, can also draw nitrogen from the air into the soil. As a result, the soil becomes more nutrient-rich, which is another advantage.

Disadvantages

Digging large stones is challenging and can be a cause of ditcher malfunctions, requiring careful attention. Even small stones have the potential to damage the ditcher.

In areas like mountainous regions or dried-up riverbeds, small stones are abundant in the soil. These stones, unlike small stones found in normal soil, are compacted and interlocked with each other, making it difficult for a ditcher to dislodge them. Attempting to pass through such areas forcefully can lead to strong impacts and be a cause of ditcher damage.

Types of Ditcher

Ditchers can be broadly classified into conveyor-type and rotary-type.

1. Conveyor-type

Equipped with a thick chain in the front, which rotates to dig the soil. Depths can range from 15 cm to as deep as 45 cm. Hand-push models are common for conveyor-type ditchers, with a trench width of about 10 cm. The excavated soil is pushed to one side.

2. Rotary-type

Attached to the rear of a tractor, the rotary-type ditcher operates while rotating. This allows the soil to be dug finely and thrown further. Adapted tractor horsepower ranges from 20 to 60 horsepower, accommodating both smaller and larger models.

How to Choose a Ditcher

The conveyor-type ditcher, being hand-push and maneuverable, is suitable for narrow spaces. It is often used in small fields and construction sites to cut trenches, making it particularly prevalent in construction.

The rotary-type ditcher, being tractor-mounted, is less maneuverable than the conveyor-type. However, it has higher horsepower and faster working speeds than the conveyor type, making it suitable for use in larger fields. Rotary-type ditchers are commonly used by farmers. Selecting an efficient ditcher based on specific usage conditions is crucial.

カテゴリー
category_usa

Egg Tester

What Is an Egg Tester?

An egg tester is a device specifically used for examining eggs.

During the egg examination, a bright light source is directed from below the egg to observe the details inside by making the eggshell transparent. Understanding the growth and development of the embryo within the egg allows for better utilization in subsequent production processes.

Uses of Egg Tester

Egg testers are employed to observe the interior of eggs. The examination helps identify and remove eggs where fertilization has failed.

An egg examination can be performed approximately 5 days after incubation and then periodically every few days. To conduct egg examinations correctly, it is essential to perform them in a dark place.

During egg examination, the eggs are rotated to observe the growth of blood vessels and embryo development. Fertilized eggs show the expansion of blood vessels from the embryo, while dead eggs exhibit a dark mass with unclear details.

Egg testers enable the observation of various aspects, including fertilization rates and embryo development. Specifically, they allow the identification of infertile eggs and those that died early. Removing infertile and dead eggs prevents gas accumulation, avoiding the risk of exploding eggs. Additionally, it helps prevent contamination of the incubator by bacteria.

Features of Egg Tester

Advantages

The primary advantage of egg testers is the ability to identify eggs that have not been fertilized or where growth has failed due to incubation conditions. Removing failed eggs during incubation helps protect eggs that can hatch normally.

Furthermore, whether in an incubator or during foster incubation, egg testers can prevent unnecessary incubation by concentrating on viable eggs. The removal of failed eggs ensures that the remaining normal eggs receive proper incubation.

Conducting egg examinations in multiple stages before hatching allows for an early assessment of the number of fertilized eggs. This aids in understanding the reproductive capabilities of parent birds.

Disadvantages

A drawback of egg testers is that, as eggs are often removed for examination during incubation, it can lead to a decrease in the overall temperature inside the incubator. Temperature is a critical factor in hatching eggs, so precautions must be taken not to cool the eggs.

When performing egg examinations, it is crucial to do so in a room at room temperature and to be mindful of the hand’s temperature during the examination. Quick egg examinations are also necessary to prevent adverse effects on hatching.

Types of Egg Tester

1. Handheld Egg Tester

A small egg tester that fits in the palm, allowing eggs to be held for inspection. As the eggs are examined by hand, care must be taken to avoid temperature fluctuations during the inspection.

2. Tabletop Egg Tester

A large egg tester can be placed on a table, enabling the simultaneous inspection of many eggs. Due to its size, it is often used for commercial purposes where a large number of egg inspections are required.

3. LED Egg Tester

An egg tester that utilizes LED lights during the examination. Thanks to LED technology, it emits bright light while being energy-efficient. LED-based egg testers have a long lifespan, resulting in less frequent bulb replacements. Many battery-operated egg testers with easy portability and management also use LEDs.

Presently, LED lights are predominantly used in egg testers for their benefits, such as not emitting high-heat light that could damage embryos during examinations.

4. Automatic Rotating Egg Tester

An egg tester equipped with LED lights for egg examination and an automatic feature to rotate eggs. By rotating eggs at a consistent angle, the health status of the eggs can be verified.

5. Automatic Egg Tester

An automatic egg tester illuminates the target eggs with light while capturing images with a camera for image recognition. By illuminating the eggs from various directions and capturing and analyzing images, precision is increased. Although inspections are conducted through images, clear criteria for automatic selection are defined to ensure accuracy.

カテゴリー
category_usa

Pruning Shear

What Is a Pruning Shear?

Pruning Shear

A pruning shear is a gardening tool designed for cutting plant branches.

As there are various types of trees, it is necessary to use pruning shears that suit the characteristics of each branch. Consequently, there is a wide variety of pruning shear types available, each tailored to specific features.

Uses of Pruning Shear

Pruning shears are employed when trimming branches of trees. Given the presence of various types of branches, such as those at greater heights or thicker branches, it is essential to use pruning shears based on the specific branches that need cutting.

Since the intended use of pruning shears may vary depending on the product, it is crucial to consult the instruction manual or packaging before use.

Features of Pruning Shear

Advantages

One of the advantages of pruning shears is their capability to cut branches in various locations. Some products can cut branches at different heights with the same tool.

Moreover, pruning shears tailored to the characteristics of the branches are available. Choosing a product based on features such as thick or thin branches allows for more efficient work.

Disadvantages

The main disadvantage of pruning shears is their limited functionality in cutting branches. Despite the availability of products that cater to various branches, each pair of pruning shears may have limitations on the types of branches it can cut.

Additionally, the cost can be considered a drawback. While high-quality pruning shears offer excellent performance, they can come with a higher price tag.

Types of Pruning Shear

There are various types of pruning shears.

1. Pruning Shear

Pruning shears are specifically designed for cutting thick branches. They have a spring between the handles, making them easy to open. Commonly used in home gardens, they are more effective for cutting thicker branches than regular pruning shears used for shrubs.

2. Pole Pruner

Pole pruners are designed for cutting branches in high places. They have telescopic features, allowing the handle to extend based on the required height. The design ensures that the pruner is easy to handle even at a distance.

3. Hedge Shear

Hedge shears are used for cutting low branches and leaves of short trees. While they can efficiently cut a wide area at once, they are only suitable for thin branches.

Since cutting thicker branches requires more force, it is recommended to use dedicated pruning shears. They typically have longer handles, allowing for cutting branches at slightly higher locations.

How to Choose Pruning Shears

It is advisable to choose pruning shears based on their intended use and ease of handling.

1. Intended Use

Select a product based on the branches you intend to cut. Given the variety in features, such as branches at greater heights or thicker branches, choosing the right product is crucial.

2. Ease of Handling

Pruning shears come in various shapes and sizes, influenced not only by their intended use but also by factors like hand size. It is recommended to try different pruning shears to find the one that is most comfortable for you.

How to Use Pruning Shears

Since there are many types of pruning shears with different uses, this explanation focuses on pole pruners designed for cutting branches in high places.

1. Preparing for Use

When using a pole pruner, wear long sleeves, long pants, and gloves. When cutting branches in high places, debris may fall, so it is desirable to wear clothing that covers the skin.

To protect the eyes and head, wearing a hat and safety goggles is also recommended.

2. Telescopic Feature

Many pole pruners come with telescopic features to reach high places. Adjust the handle accordingly to reach the desired location.

3. Cutting Branches

Once the handle is extended to the desired height, proceed to cut the branch. Many pole pruners come with a stopper, so check if it is released before cutting.

4. Cleaning Up Branches

After cutting the branches, collect the fallen debris. Leaving them unattended may result in branches being blown away by the wind, so prompt cleanup is essential.

カテゴリー
category_usa

Fertilizer Spreader

What Is a Fertilizer Spreader?

Fertilizer Spreader

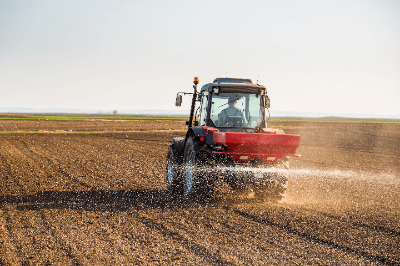
A fertilizer spreader is a machine utilized to distribute fertilizers or compost.

Various shapes of fertilizers, including powder, granules, and liquids, can be accommodated. In the past, fertilizers and compost were manually spread, but with the introduction of fertilizer spreaders, the process has become highly efficient.

Moreover, the advent of fertilizer spreaders has enabled precise fertilization tailored to the growth of crops, allowing the application of the right amount at the right time. Consequently, it is considered one of the machines that significantly contributed to the advancement of agricultural technology.

Uses of Fertilizer Spreader

Fertilizer spreaders are chosen and used during the pre-planting and post-harvest periods in the fields. The usage period does not differ from other agricultural equipment. While they can also be used during planting, it requires ensuring that there is enough space for the tractor to maneuver or sacrificing some of the crops in the path of the tractor.

Primarily used to efficiently fertilize fields, larger spreaders increase efficiency. The use of a tractor reduces physical strain even with large amounts of fertilizer. Tractors with cabins also allow for avoiding dirt, making them indispensable equipment in modern agriculture.

Features of Fertilizer Spreader

Advantages

The advantages of fertilizer spreaders lie in their ability to efficiently distribute fertilizers and compost. The use of fertilizer spreaders reduces the burden on farmers. Additionally, one of the strengths is the ability to fertilize crops according to their growth.

Disadvantages

One disadvantage of fertilizer spreaders is that they need to maintain a uniform flow of fertilizer to be effective. To fertilize fields with moist compost or dry chemical fertilizers, it is essential to spread them uniformly. Achieving quality fertilization involves adjusting the flow of fertilizer through valves and controlling the force of fertilizer dispersion, making it challenging for beginners. However, modern versions have added electronic control functions for flow adjustment, enabling fertilization even without advanced skills.

Types of Fertilizer Spreader

Fertilizer spreaders are primarily classified into “towed” types, which use the power generated when the tractor is running, and “mounted” types, which are attached to the tractor to utilize its power. While these are the main categories, further divisions are made based on the shape and purpose of the materials to be spread.

1. Manure Spreader

The manure spreader is mainly used for spreading compost. It has a container-type fertilizer tank with a conveyor belt at the bottom. During spreading, the conveyor belt moves, dispersing the compost to the rear. The rotating blades scatter the approaching compost to the surroundings.

They come in various sizes, ranging from small ones with a capacity of less than 1 ton to large ones with a capacity of 5 tons, providing a wide range of sizes. When used in paddy fields, it is essential to consider the need for significant towing force and the possibility of getting stuck with wheels. However, in dry fields, it efficiently allows the spreading of a large amount of compost at once.

Manure spreaders come in both self-propelled versions with an independent power source and crawlers attached, making them suitable for use in paddy fields. The advantage of crawlers is that they can be used even on soft fields. However, specialized transport vehicles such as trailers are required for movement.

2. Broadcaster

The broadcaster has a cylindrical fertilizer tank, and a pendulum-like device swings left and right to spread the fertilizer. In addition to pendulum types, there are also types with rotating discs that scatter the fertilizer by rotating. One or two discs can be attached.

In larger sizes, some exceed 1 ton, requiring large tractors or the installation of counterweights.

3. Lime Sower

The lime sower, commonly attached to the rear of a tractor, also has a type that can be attached to the front. It is mainly used when spreading powdered fertilizers. Due to its ability to spread in a linear pattern close to the ground, it is advantageous for certain applications.

However, compared to the previous two types, its fertilization range is narrower, resulting in relatively lower efficiency.

4. Slurry Spreader

The slurry spreader is used primarily for spreading liquid manure from livestock. It can suck up from a manure reservoir into a tank and directly spread on the field.

The slurry spreader is like a machine with a vacuum truck mechanism, allowing it to spread liquid or semi-solid manure easily.

カテゴリー
category_usa

Grafting Knife

What Is a Grafting Knife?

A grafting knife is a tool used for grafting.

It is also referred to as a budding knife, cutting-out knife, grafting blade, or grafting knife. Grafting is a plant propagation method where a branch or bud from a plant you want to propagate is cut and joined to another plant, creating a new individual through a propagation technique. The part to be transplanted (the grafted branch or bud) is called the scion, and the plant on which grafting is done is called the stock.

The grafting process involves first shaping the stock, which serves as the foundation, using a grafting knife, and making an incision to insert the scion. The shaped scion, with its tip trimmed for easy insertion, is placed into the incision. By securing it with grafting tape for a specific period, the stock and scion become established, growing together into a single plant.

Grafting knives are used in creating the insertion points for the scion and stock. Grafting is a delicate process, and the sharpness of the knife is crucial.

Uses of Grafting Knife

The grafting knife is utilized during the grafting of plants. Grafting methods include whip-and-tongue graft, cleft graft, side-veneer graft, approach graft, and bud graft, among others. For whip-and-tongue grafting, a grafting knife and grafting tape are typically prepared. Grafting tape, similar to a bandage for humans, is tightly wound around the joined part of the stock and scion, facilitating their bonding and hastening the union of the plants.

Firstly, a healthy branch with one or more buds from the plant you want to use as a scion is selected. This branch is cut a few centimeters below the bud. Using a grafting knife, the cut branch is shaved at an angle of several centimeters.

Next, a healthy and straight plant that you want as the stock is selected, and the stem is cut horizontally. From this cut, a vertical incision of several centimeters is made to expose the green part called the cambium layer. The cut end of the scion, prepared earlier, is inserted into this incision. Since the cambium layer must adhere for successful grafting, a firm connection is ensured. Finally, the junction of the scion and stock is wrapped with grafting tape to complete the process.

Features of Grafting Knife

Advantages

The advantages of a grafting knife lie in its ability to facilitate successful grafting, efficiently increasing the number of plants. Grafting requires familiarity, experience, and skilled techniques—it is not a skill acquired overnight. The grafting knife is used for the selection and preparation of scions and stocks.

While grafting can be done with knives other than grafting knives or with garden shears, the inability to make precise cuts may crush plant fibers, hindering successful union.

Grafting knives are lightweight, easy to handle, and possess sharp blades that cut cleanly without requiring excessive force. This results in clean cuts, reducing the risk of plant damage—a notable advantage.

Disadvantages

One disadvantage of grafting knives is the need for regular maintenance, such as sharpening with a whetstone and cleaning after use, to keep the blade sharp. Additionally, grafting knives generally have thin blades, making them unsuitable for cutting robust plants with thick stems.

Types of Grafting Knives

There are mainly the following types of grafting knives:

1. Pistol-Grip Grafting Knife

This grafting knife has a handle that gently curves like a pistol grip. Its distinctive feature is that it fits well in the hand, providing easy handling. With a thin and sharp blade, it cleanly cuts through tissues where the cambium layer is actively creating new cells.

2. Sheath-Encased Grafting Knife

This knife is encased in a wooden sheath. Storing the blade in the sheath makes it safe to carry in a bag. The wooden sheath covering the handle provides a non-slip grip and stability. This knife is recommended for those buying a grafting knife for the first time.

3. Folding Grafting Knife

This type of grafting knife folds, making it compact and easy to carry in a pocket. It is versatile and suitable for various applications, including DIY and school projects.

How to Choose a Grafting Knife

When choosing a grafting knife, it is crucial to consider the type of grafting and the intended use of the knife. There are many types of grafting, and the grafting knife should be selected based on the characteristics of the stock (such as stem thickness and wood hardness) for which it will work. Also, check factors such as the size of the grafting knife and its portability.

Two key points to check when purchasing a grafting knife are:

1. Specifications

Check the size of the grafting knife, the shape of the handle, and the material. A handle that provides a comfortable grip and fits well in the hand is recommended. Handles can be made of metal alone or covered with materials such as wood, bamboo, or plastic.

Wooden handles are generally beautiful and durable. The size of the grafting knife depends on whether the entire knife fits into a sheath or if the blade tip is foldable.

2. Blade Features

Grafting knives come in two main types based on the shape of the blade: straight-edge blades and slightly curved blades called curved-edge blades. Straight-edge knives are suitable for all types of grafting.

Curved-edge blades are less likely to slip and escape from branches due to their curvature, making them suitable not only for grafting but also for cutting plants for ikebana or flower arrangements. Additionally, there are variations for left-handed users and knives with dual edges.
カテゴリー
category_usa

Excavator

What Is an Excavator?

Excavator

An excavator is a machine used for digging soil or creating holes in the ground.

There is a wide variety of excavators, ranging from those suitable for single-person operations to large-scale facilities.

Uses of Excavator

Excavators are employed for digging up soil and creating holes. In agriculture, they are often used for small-scale purposes such as driving stakes or erecting support posts in fields.

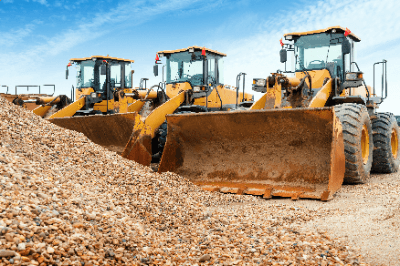
Additionally, shovel loaders and bulldozers fall under the category of excavators and can move large quantities of soil and rocks.

Features of Excavator

Advantages

Excavators excel in tasks such as moving large quantities of soil, which is not feasible with human hands, and drilling holes in hard soil. While manual work may suffice for small-scale agricultural operations, as the size of the field or the variety of crops increases, the overall workload also increases.

In such cases, the use of an excavator can significantly lighten the labor involved.

Disadvantages

One drawback of excavators is the associated cost. Excavators come in various types, but particularly electric or engine-powered ones tend to have high initial costs.

Moreover, since excavators can only be utilized for specific processes when considering their use in small-scale home gardens or fields, a balance between cost and workload needs to be evaluated.

Types of Excavators

There are primarily three types of excavators:

1. Manual Excavators

Manual excavators involve thrusting the tip into the ground and rotating the handle to dig a hole. Since they operate manually, they have limitations on the amount of soil that can be excavated and the size of the holes.

However, for those involved in small-scale gardening or home gardening, where the frequency of excavator use may be low, or for tasks requiring the digging of small holes, manual excavators can be advantageous depending on the method and situation.

2. Electric Excavators

Electric excavators operate by charging a battery before use. Compared to manual excavators, they offer ease of excavation through electric power. Additionally, being electric-powered results in lower noise levels during operation, making them suitable for use in farmland near residential areas.

However, due to the high electricity consumption during excavation, the continuous usage time is limited. Moreover, if the battery malfunctions, the cost of repair or replacement is likely to be higher than the main unit.

3. Engine-Powered Excavators

Engine-powered excavators operate using fuel. They have significant horsepower compared to electric ones, enabling longer operating times. For relatively larger home gardens or fields, engine-powered excavators with sufficient horsepower and extended operating times are recommended.

However, caution is needed when using them in locations near residences, as the noise generated during operation can be substantial. Additionally, the higher horsepower increases the burden on the operator.

How to Choose an Excavator

When selecting an excavator, it is essential to consider factors such as hole size and operating methods.

1. Hole Size

When using an excavator in fields or home gardens, it is crucial to determine the desired hole size. Each excavator has a maximum drilling capacity, so understanding the required capacity is essential.

2. Operating Method

As mentioned earlier, excavators come in various types, including manual, electric, and engine-powered. Since each type has different merits and drawbacks, thorough comparisons should be made before making a choice.

For instance, in fields near residential areas where noise or exhaust gas issues may lead to complaints, manual or electric excavators may be more suitable.

カテゴリー
category_usa

Incubator

What Is an Incubator?

Incubator

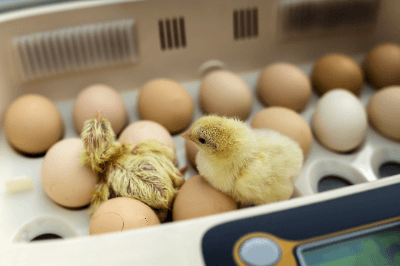
An Incubator is a device designed for the artificial incubation of eggs.

It is also referred to as a hatching machine or an incubator. Each living organism has an optimal incubation temperature, and by maintaining that temperature consistently, artificial conditions for egg incubation can be created.

Uses of Incubator

Incubators are primarily used for the artificial incubation of eggs. By maintaining a constant temperature and humidity, they facilitate the incubation process. Some models can automatically manage temperature and humidity and calculate the expected hatching date.

They are commonly employed in the production of chicks for pets like parrots and livestock animals such as chickens.

Features of Incubator

Advantages

One of the key advantages of incubators is their ability to provide the necessary environmental conditions, such as temperature and humidity, required for egg incubation. Temperature management is especially crucial for eggs, as even a slight deviation from the optimal incubation temperature can significantly impact the hatching rate.

Some incubators can automatically turn the eggs, a process aimed at preventing the embryo from sticking to the inner shell. While manual egg turning can be time-consuming, automating this process significantly improves efficiency.

Moreover, some incubators calculate the expected hatching date based on egg management. This feature facilitates easier planning of production schedules and shipping dates.

Disadvantages

One drawback of incubators is the potential inability of some devices to effectively manage temperature and humidity. While these parameters are generally set and managed by the incubator, variations between the set and actual temperature or humidity may occur due to external factors or device characteristics.

As mentioned earlier, temperature and humidity have a significant impact on hatching rates. Therefore, it is essential to monitor how far the internal temperature and humidity of the incubator deviate from the set values.

Types of Incubators

There are two types of incubators: three-dimensional incubators and flat-panel incubators, each with distinct characteristics.

1. Three-Dimensional Incubator

Three-dimensional incubators are suitable for hatching a large number of eggs. The storage space for eggs is divided into multiple tiers, and the incubator is equipped with fans to maintain a consistent temperature. Additionally, they have a heating function to keep the temperature constant.

2. Flat-Panel Incubator

Flat-panel incubators are suitable for hatching a smaller number of eggs. However, many of them lack fans to stir the air, leading to temperature variations within the incubator.

Moreover, compared to three-dimensional incubators, flat-panel incubators have limited space inside, resulting in more significant temperature and humidity fluctuations when opening and closing the door. Given that temperature and humidity changes significantly impact incubation conditions, extra caution is necessary when using flat-panel incubators.

How to Choose an Incubator

When choosing an incubator, considering functionality and the target animal is crucial.

1. Functionality

Since the functionality of incubators varies, it is essential to check if the desired features are incorporated. Common features include heating, humidifying, and egg-turning functions.

Bird eggs have varying incubation periods depending on storage conditions, so having features that help create optimal incubation conditions is indispensable. For instance, the ideal storage temperature varies by bird species but is generally around 37.5℃.

It is crucial to maintain humidity close to the conditions found in the bird’s nest, especially adjusting humidity based on conditions before and after the expected hatching date.

The egg-turning function is essential to prevent the contents of the egg from sticking to the shell, potentially leading to a decrease in hatching rates or adverse effects on chicks.

2. Target Animal

Different bird species require different incubation conditions, so choosing an incubator that meets the conditions for the eggs you want to incubate is necessary.

Some incubators are designed with specific settings for each animal species, making it advisable to purchase a dedicated incubator whenever possible.

How to Use an Incubator

Modern incubators are user-friendly, allowing for straightforward usage. You can place the eggs and set the temperature and humidity, and some models even have buttons for different animal species, ensuring that the appropriate temperature and humidity are automatically set.

However, it takes time for the incubator’s interior to reach the proper temperature and humidity. Therefore, it is advisable to confirm that the set values have been reached before placing the eggs.